Tag Archives: sugar free

No Bake Pumpkin Pie

No Bake Pumpkin Pie - paleo, vegan, nut free - Amanda Naturally

I love pumpkin pie. Like love love love it. It’s one of my favourite parts of Thanksgiving – that and the amazing quality time with family of course! Unfortunately inherent to a traditional pumpkin pie recipe is wheat and dairy, so it’s non-negotiable for me. It’s been years since I’ve had a bite of that sweet and spicy goodness and oh how I missed it! This year it all changed. But first, let me preface this post with an important fact:

I am NOT a baker.

I can do muffins and cookies, but if they are too complicated I’ll even mess those up!

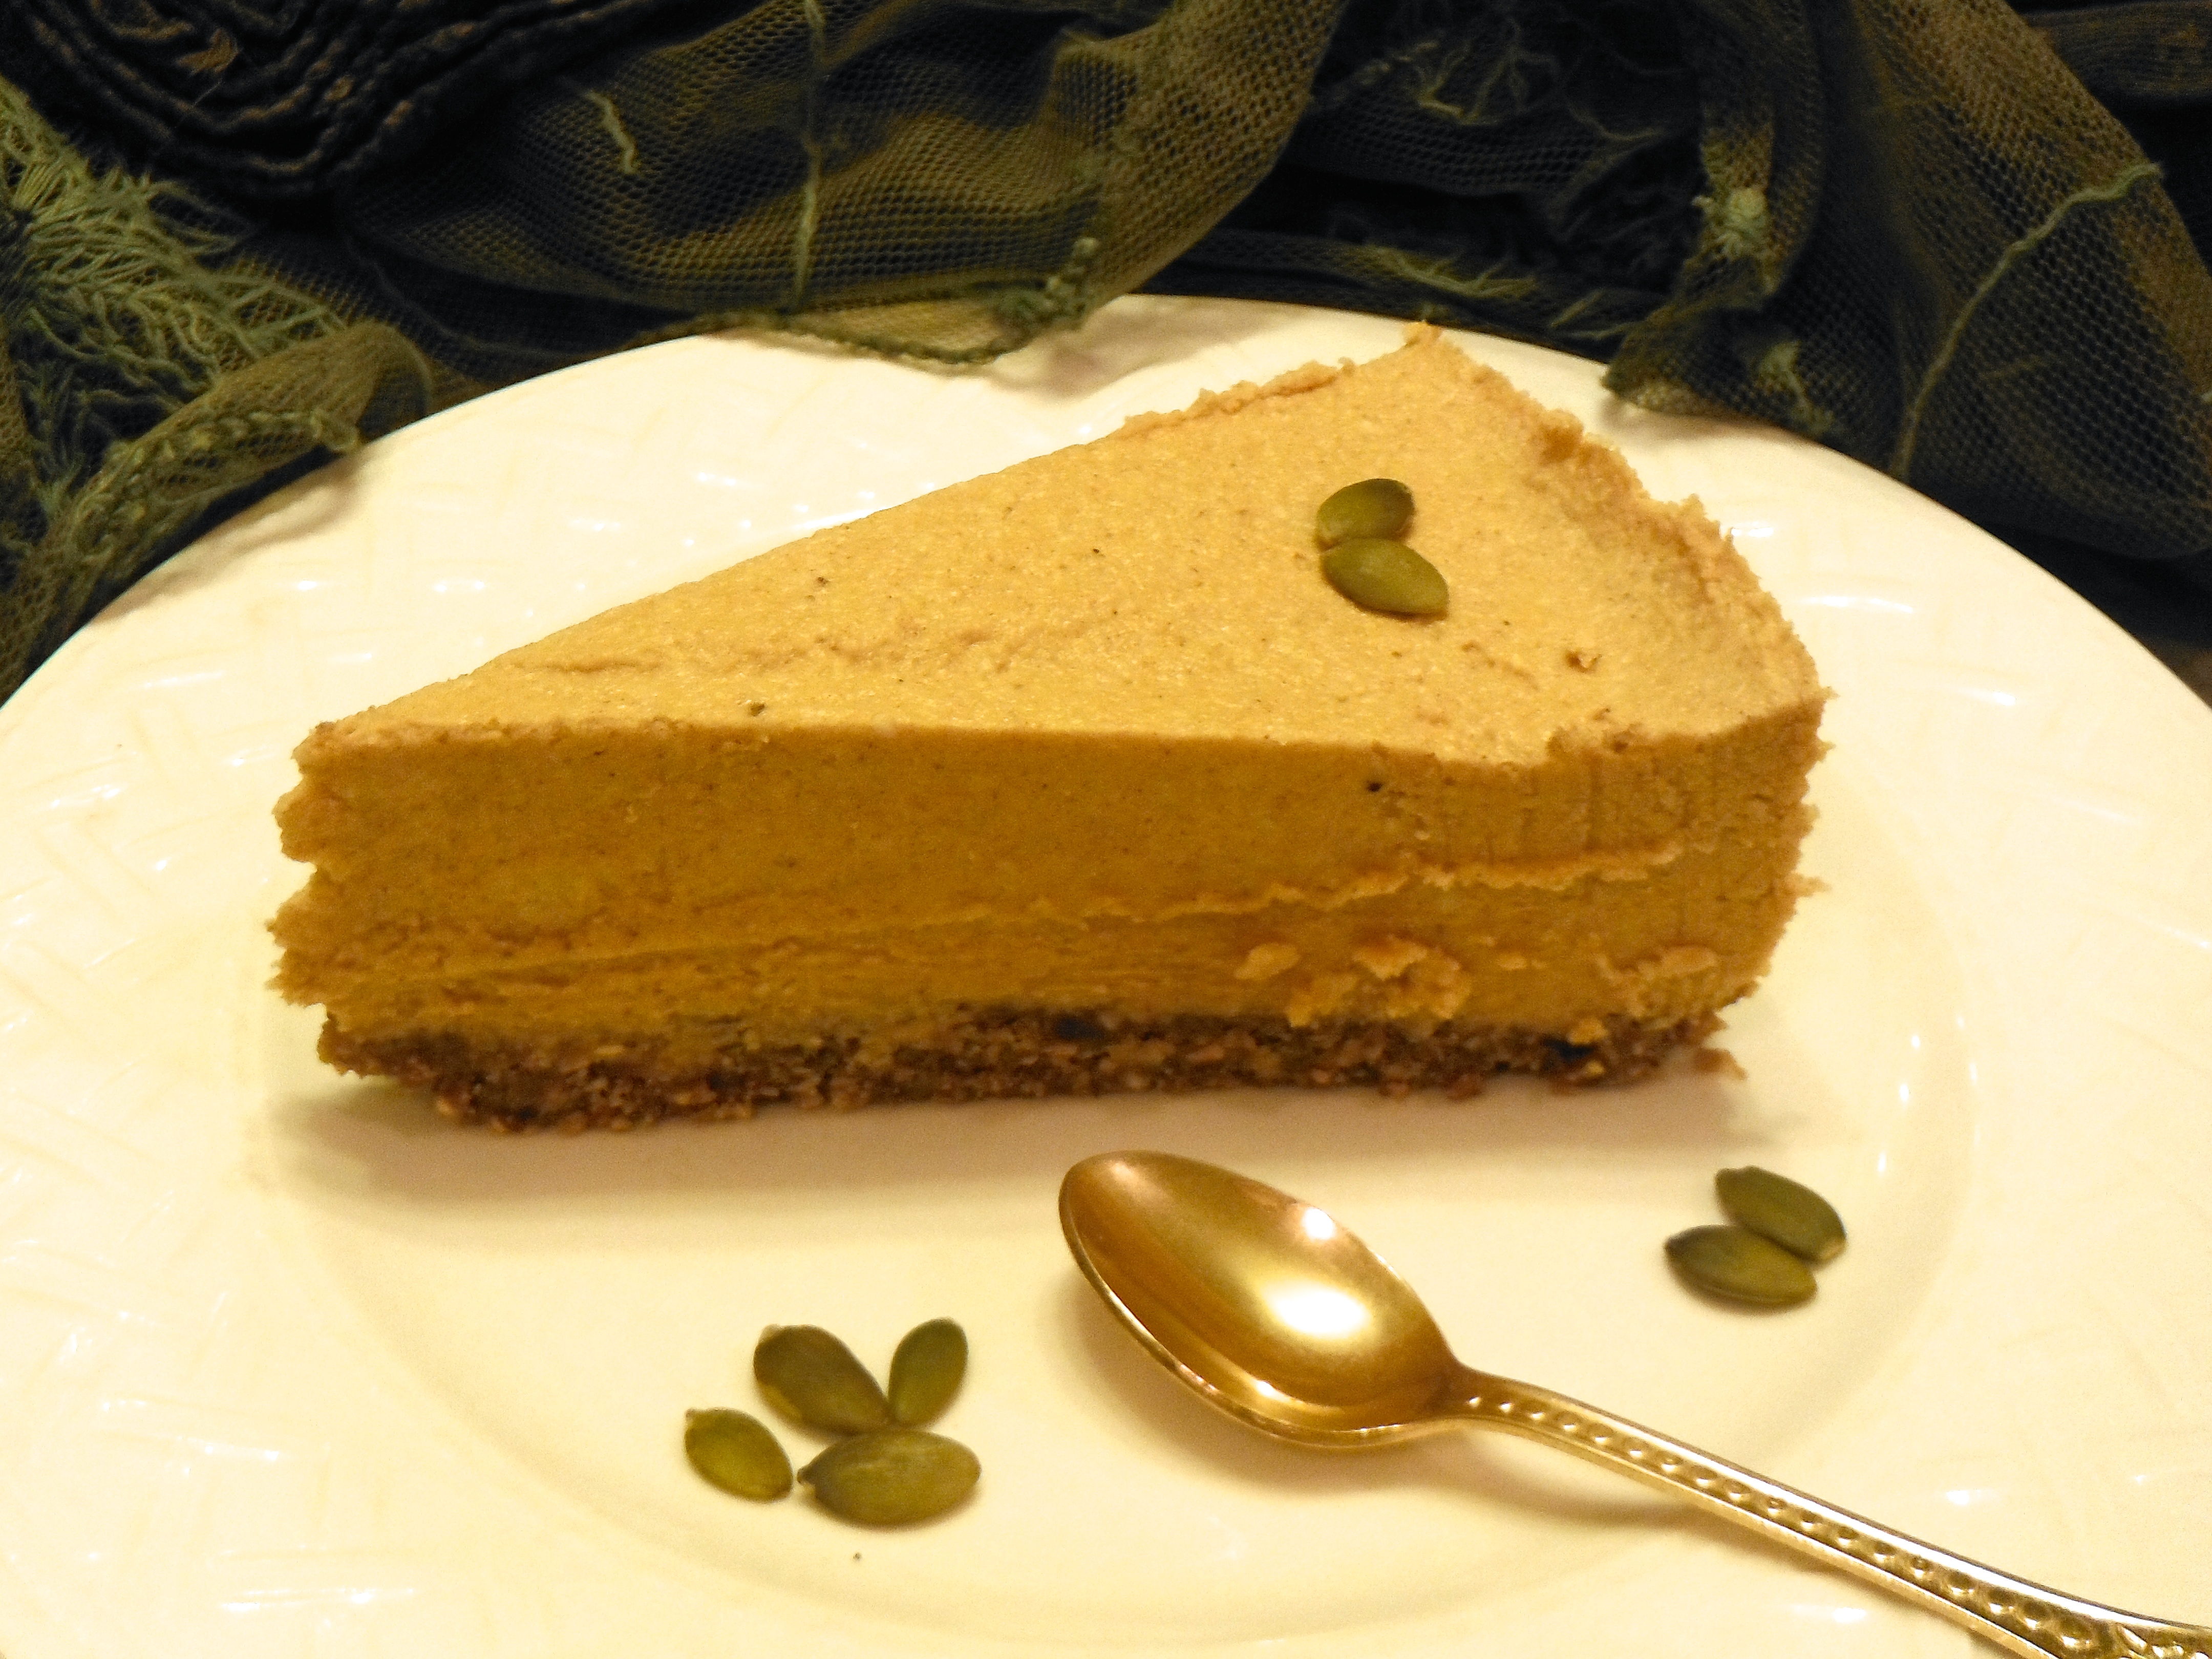
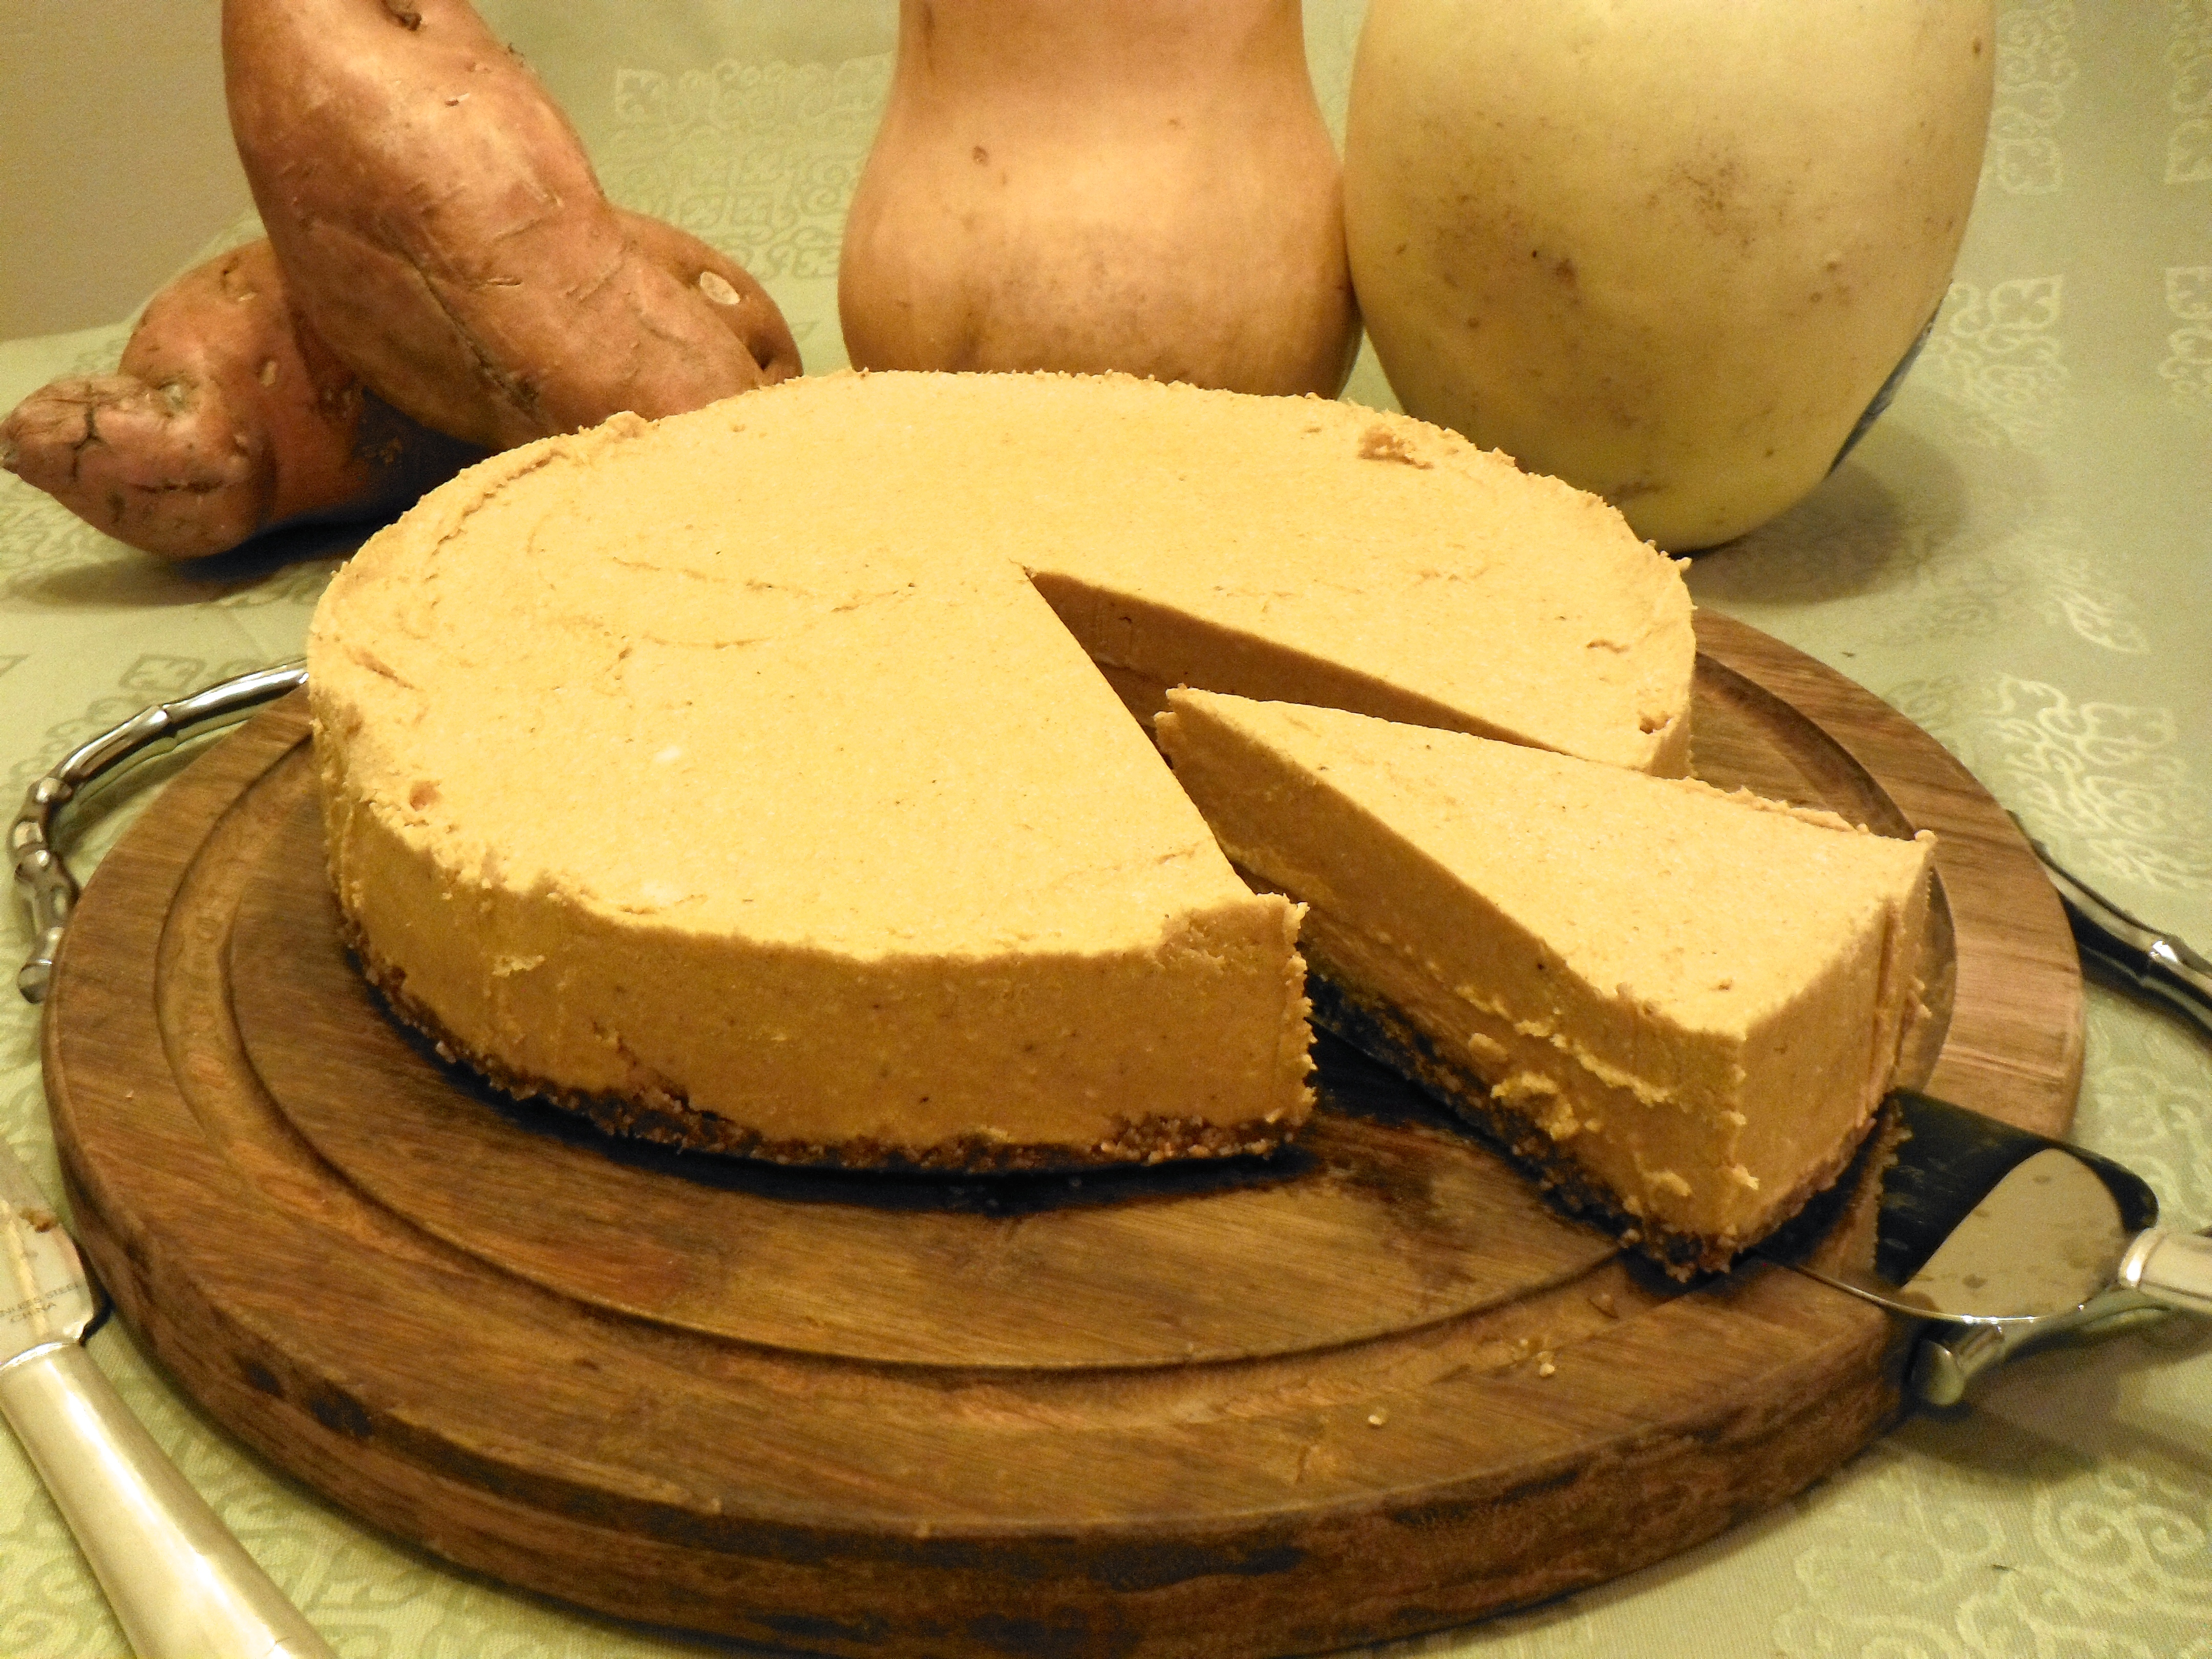
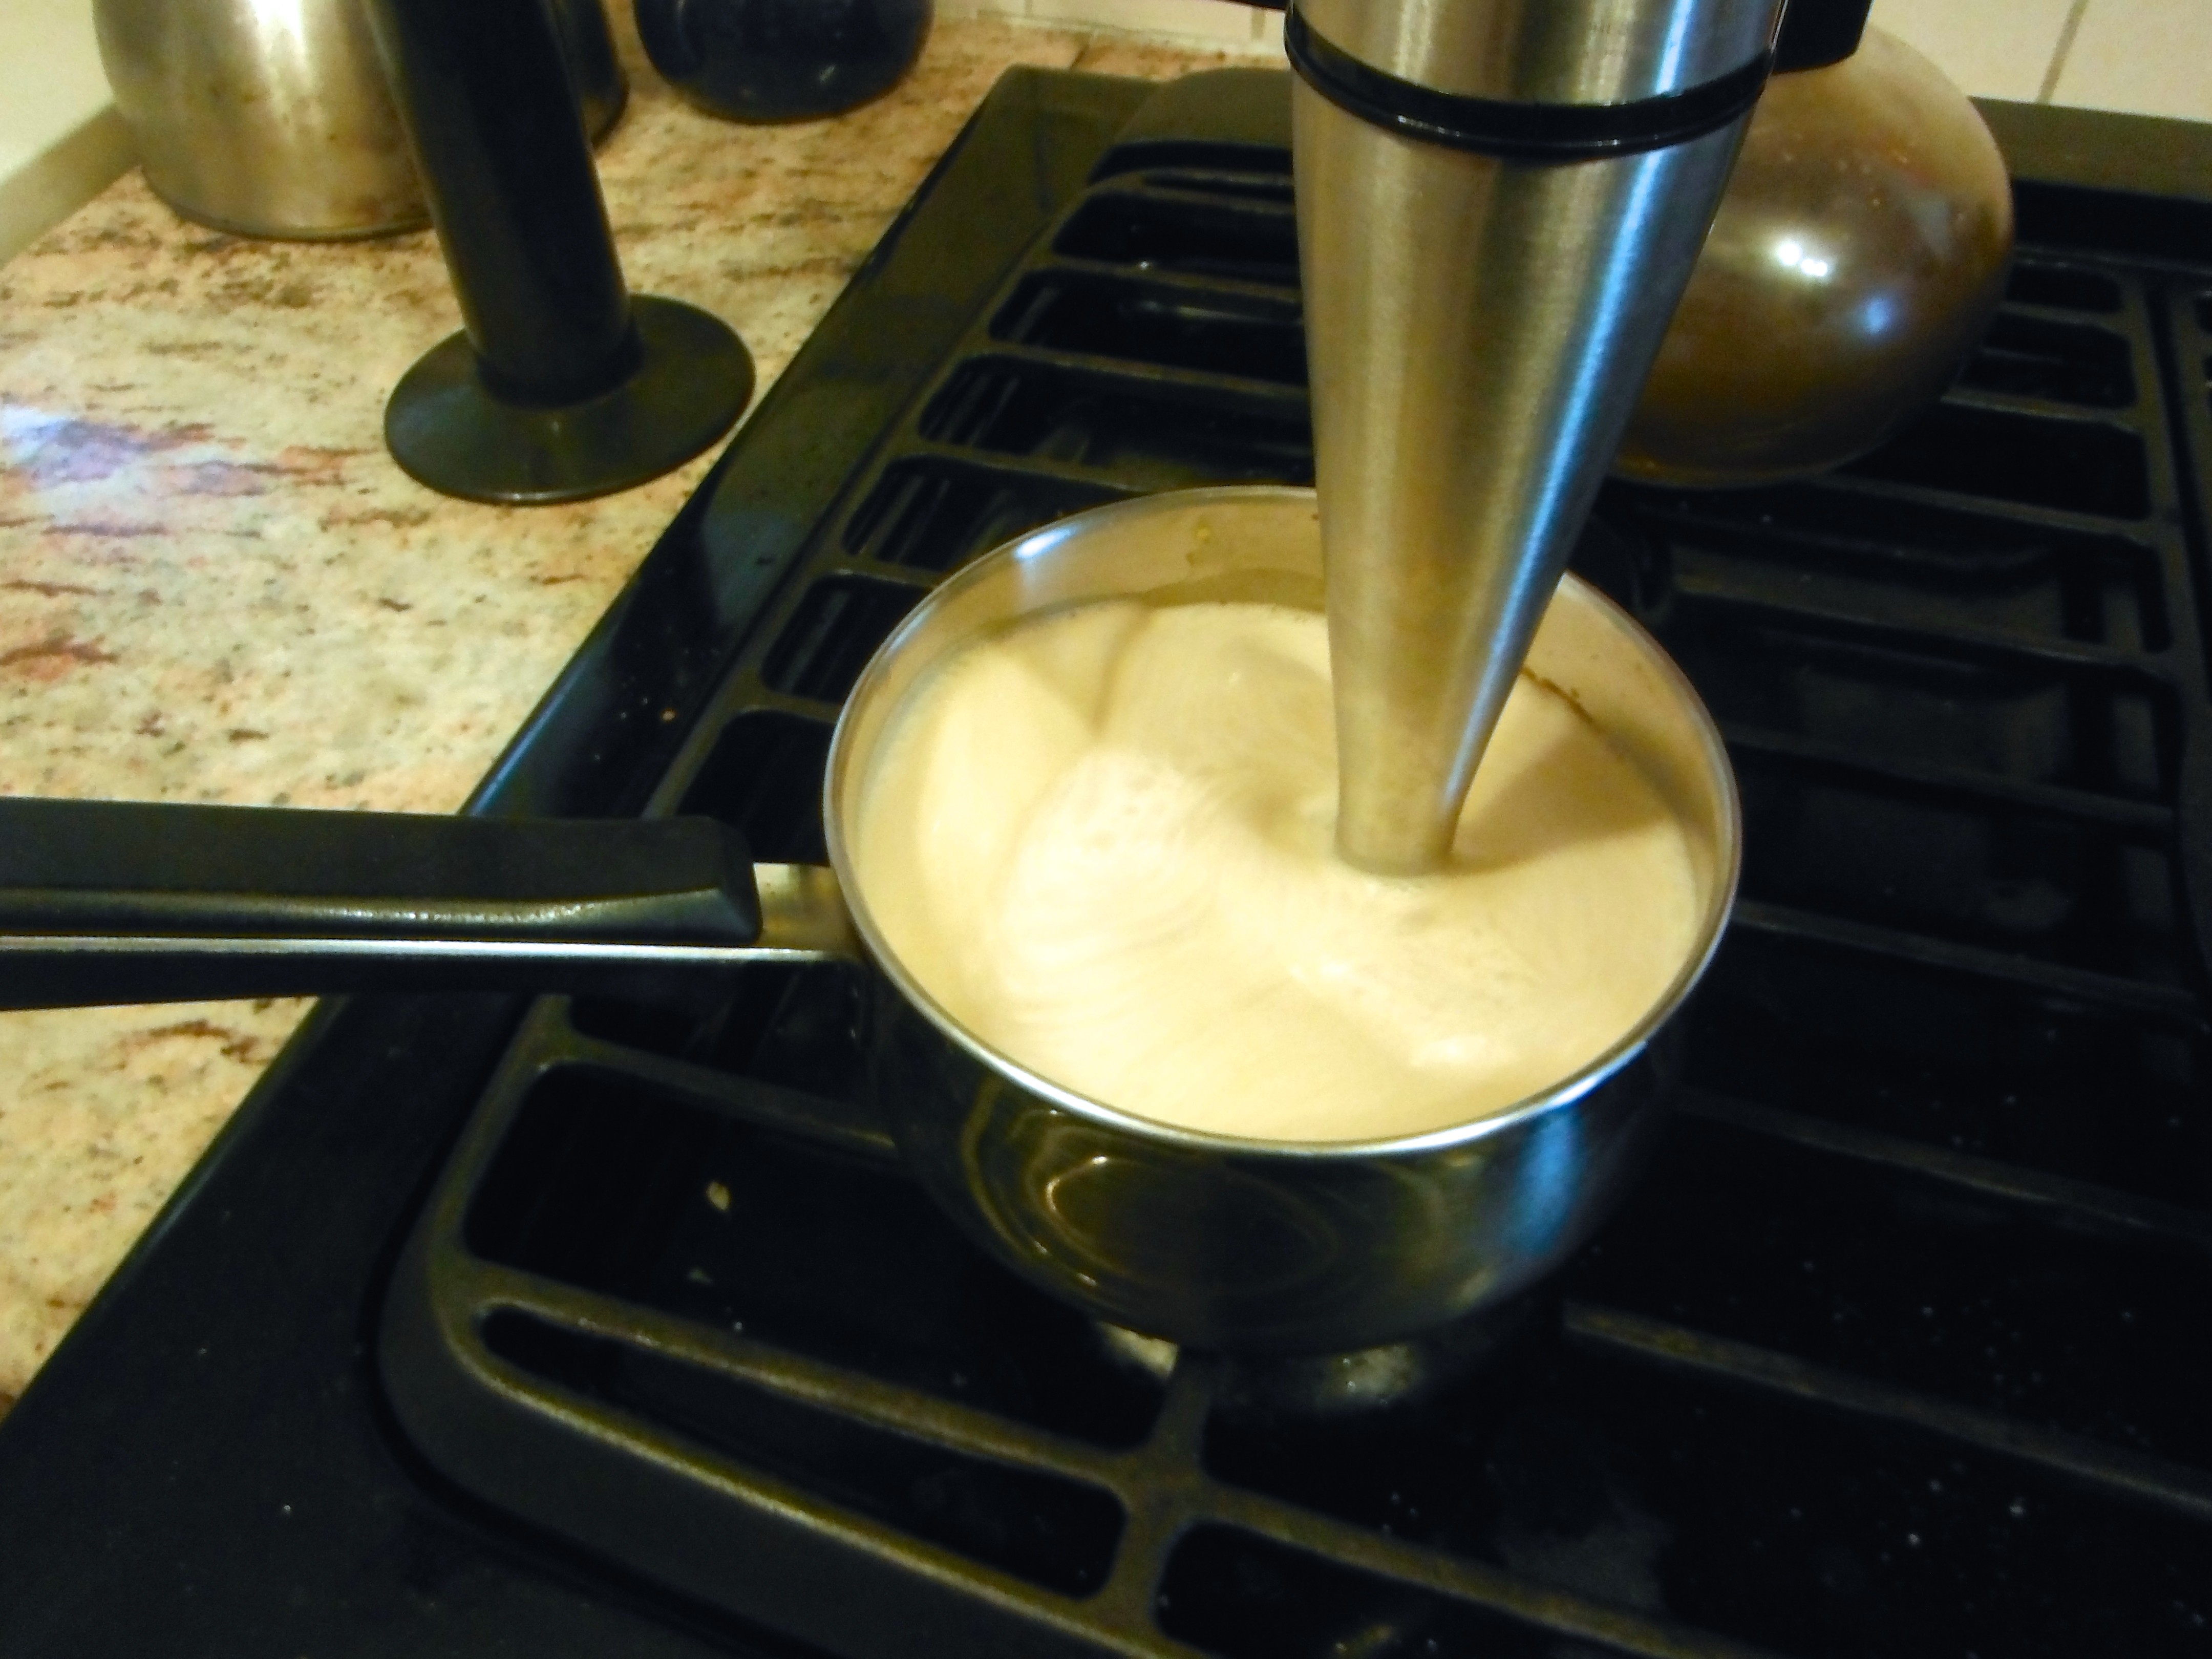
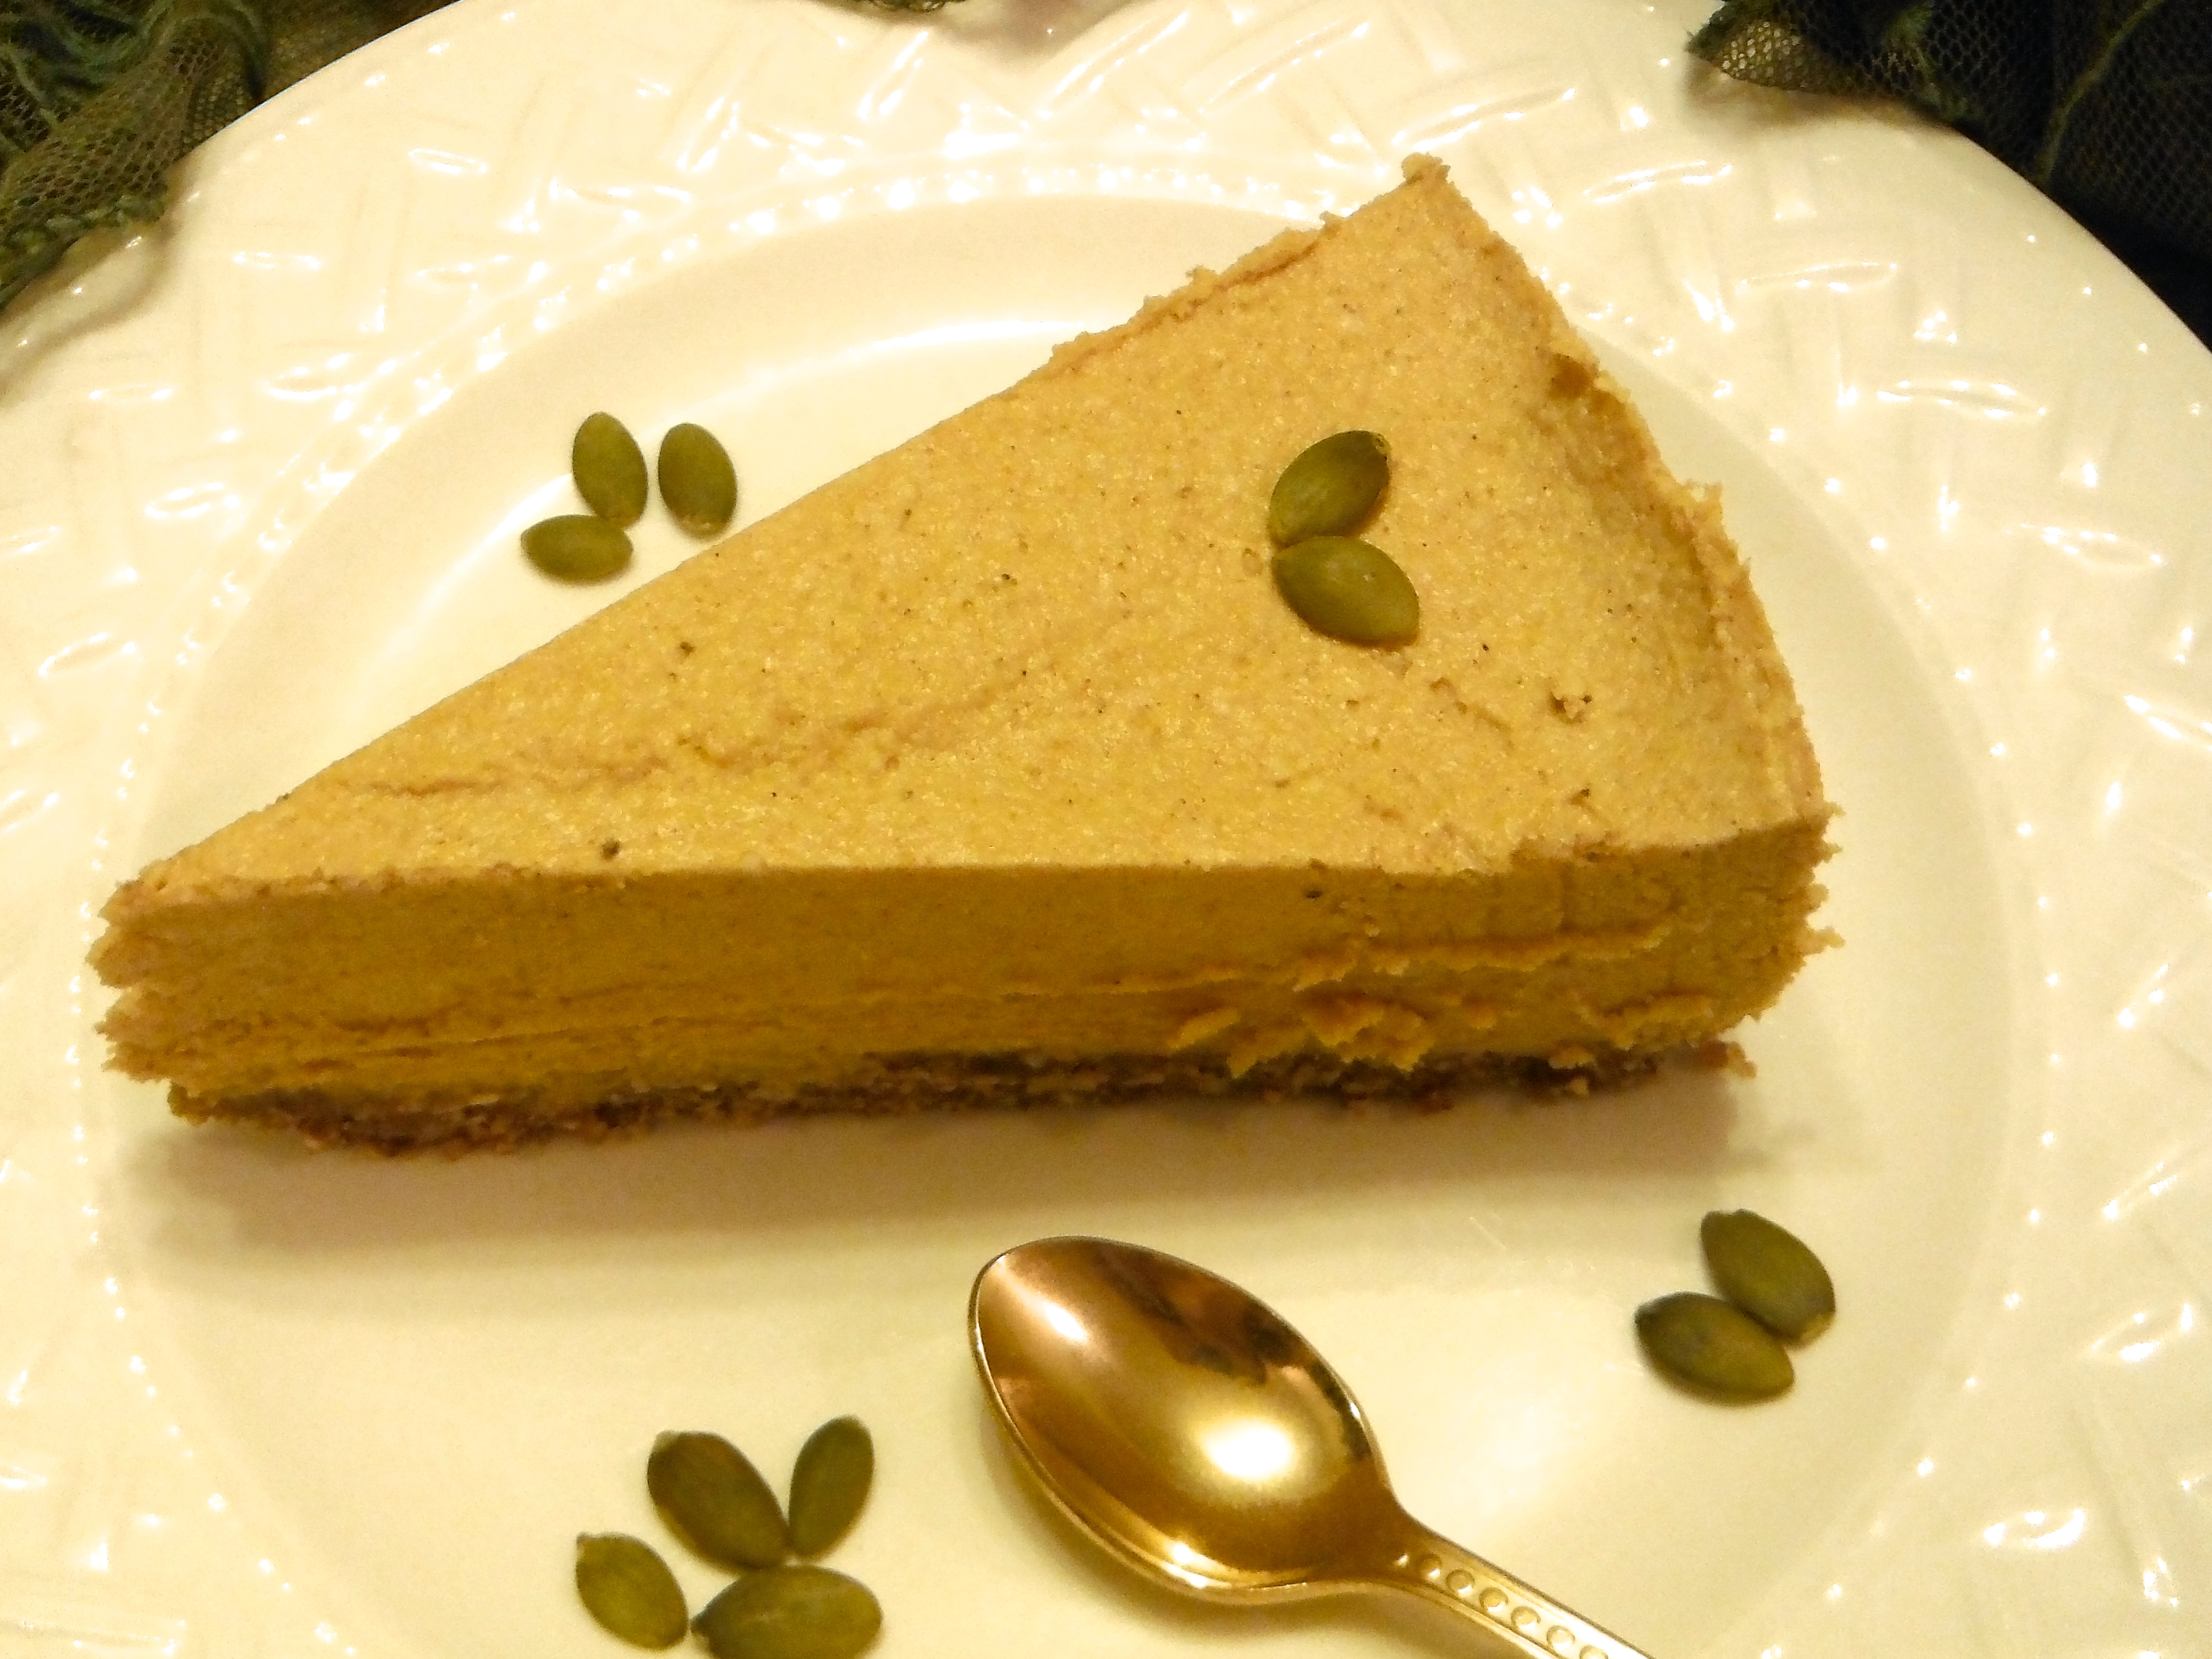
In complete defiance of my lack of baking and general desert-making skills, I decided to take on the challenge. I took a look at a pumpkin pie and realized that the filling is pretty darn simple. All I needed was pureed pumpkin, pumpkin pie spice, something to sweeten it with (maple syrup, obv) and something to help it thicken and keep its consistency. I wanted it to be egg-free (that gets complicated and involves baking or making peaks somehow) and vegan (no gelatin)…coconut oil would melt too quickly after you pulled it out of the fridge…hmmm…and then it hit me, coconut butter! My favourite snack ever! What would happen if I mixed pumpkin and coconut butter together…well it was a match made in heaven!

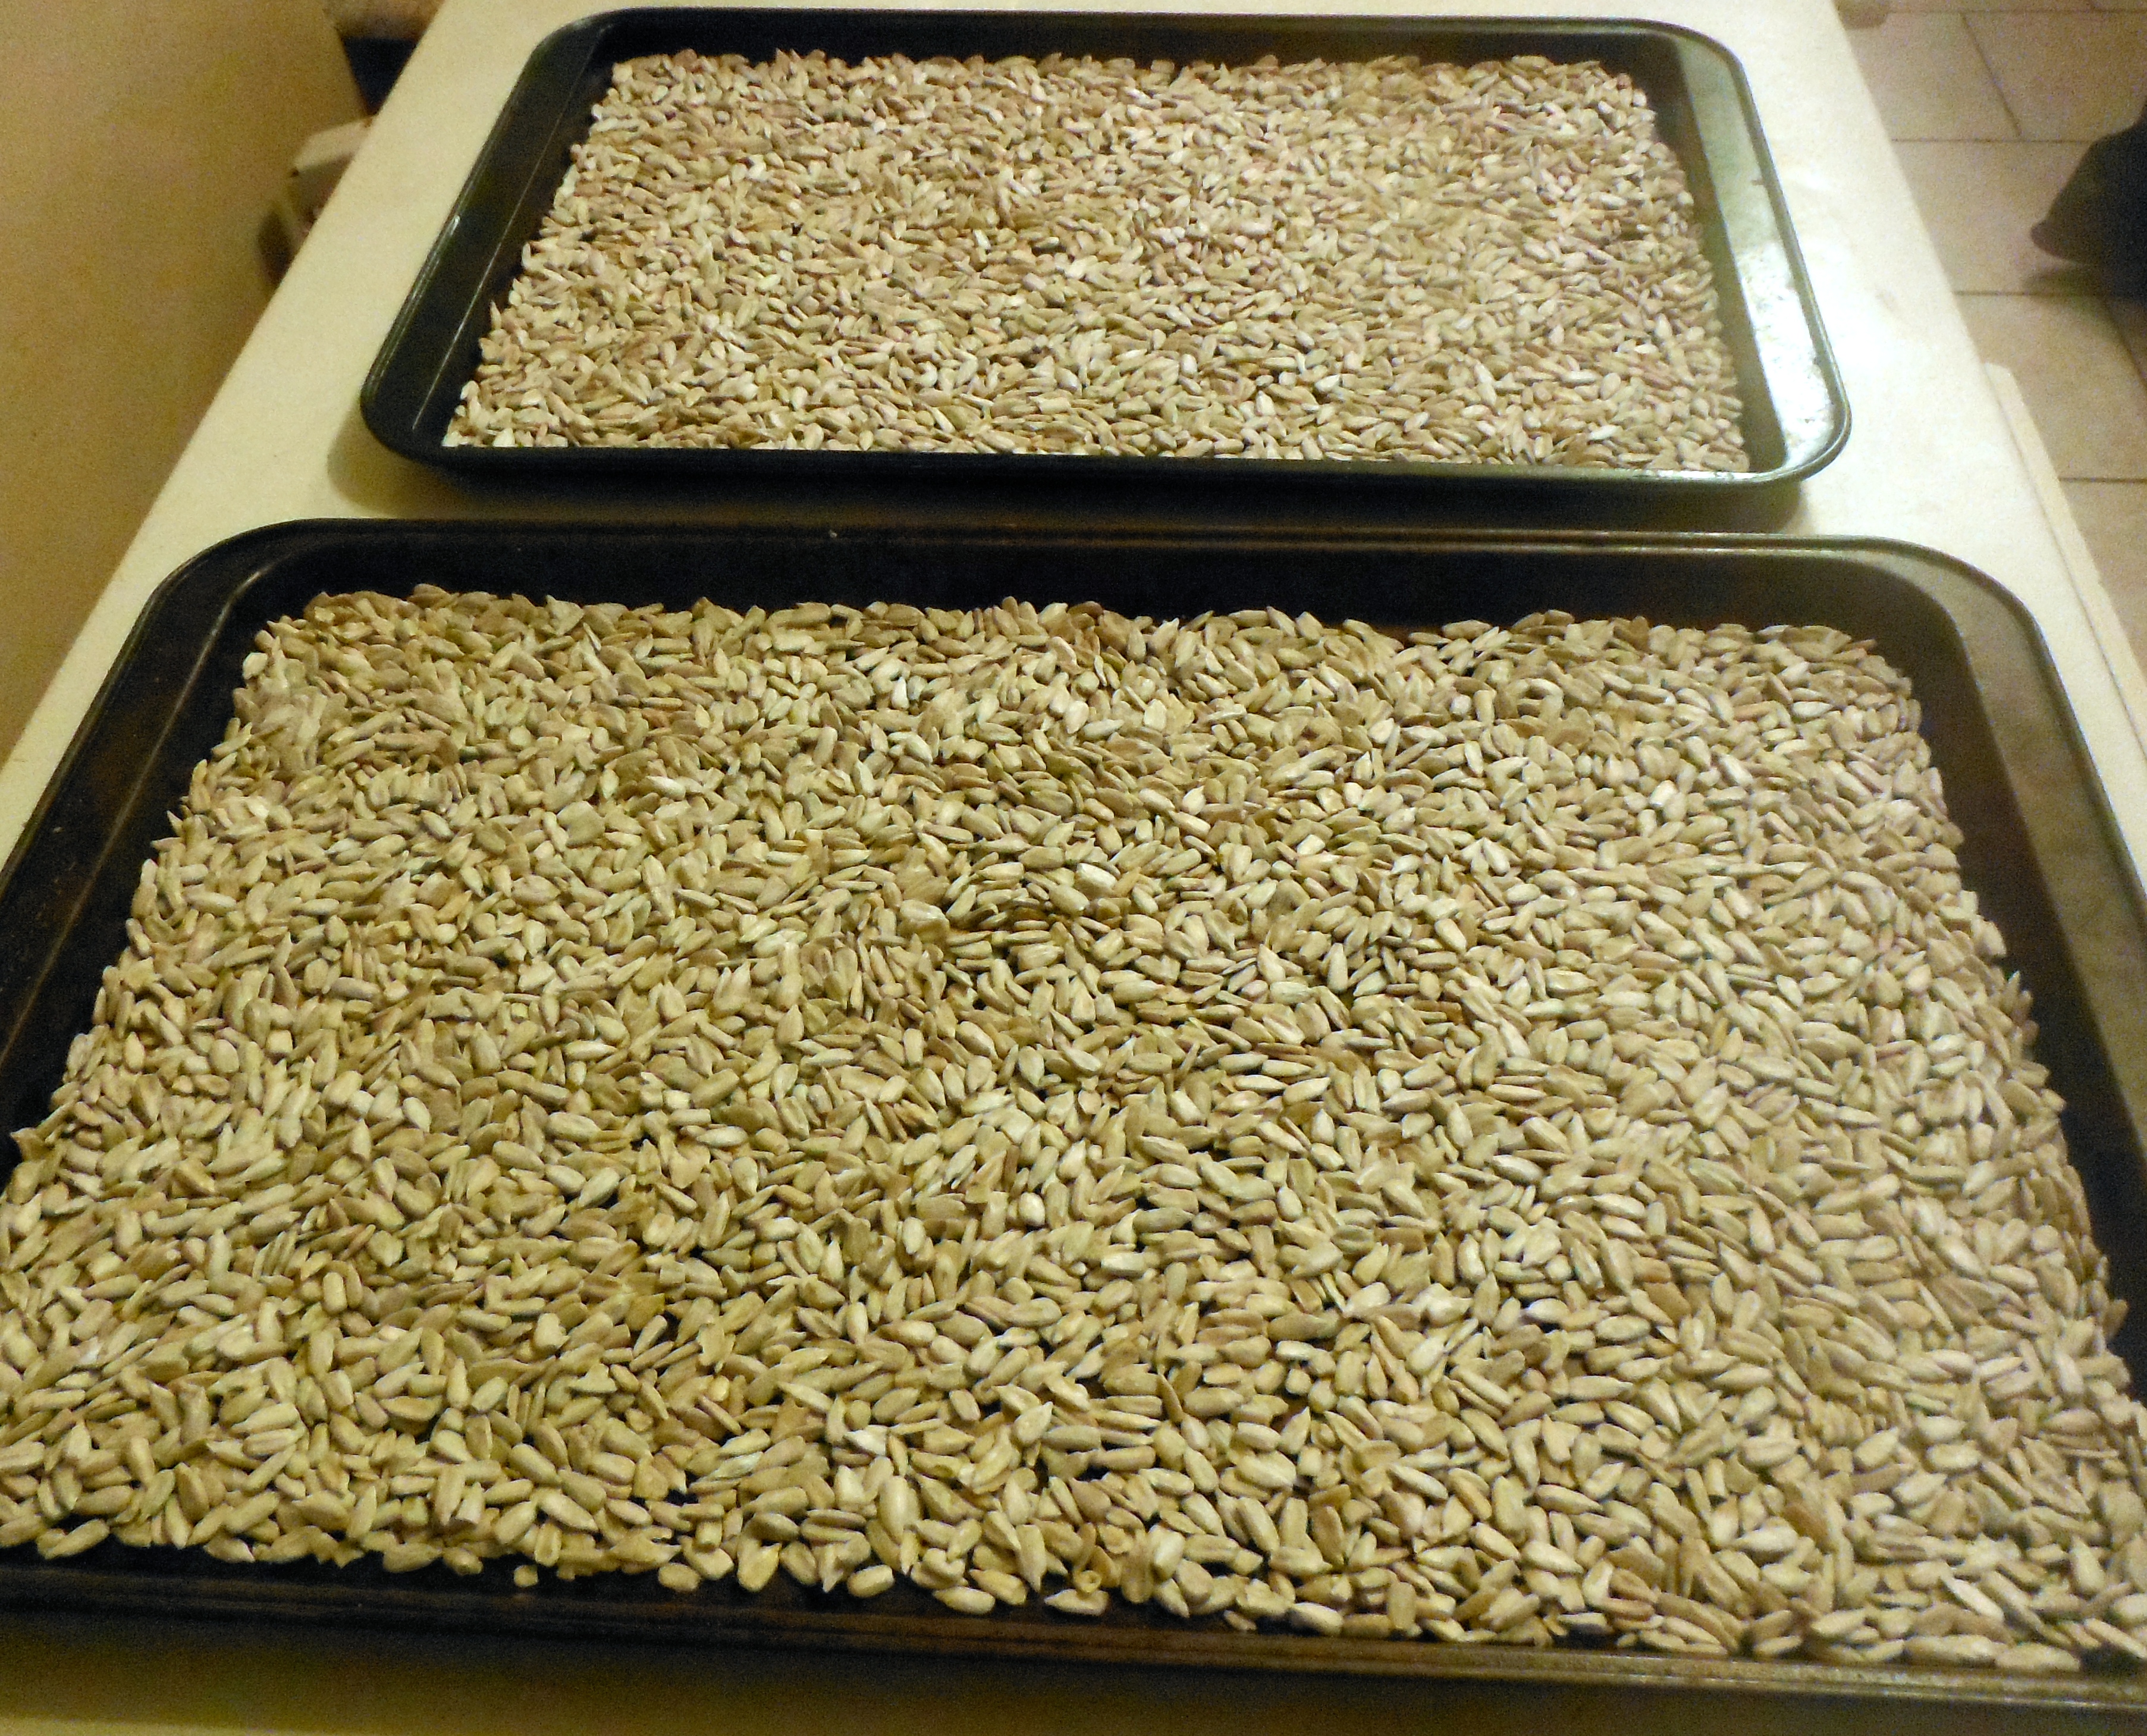
As for the crust, well I’ve never been one for pastry, so I considered omitting it altogether, but realized it would be a little challenging to serve up. So I figured a typical nut/date no-bake crust would go well. Except I decided to try a nut-free version using pumpkin seeds so it would be safe for schools, and it worked amazingly! Not to mention, toasted pumpkin seeds totally go with the vibe of the season! 

No Bake Pumpkin Pie - paleo, vegan, nut free - Amanda Naturally

The resulting no bake pumpkin pie was a HUGE hit. I tried it out on my husband immediately, and my colleagues at work the next day, and I think it’s safe to say that I will absolutely be bringing this to my family Thanksgiving dinner on Sunday. (FYI I’m in Canada!) Not only is this delicious and pretty darn healthy, it is also:

No bake.

Sugar-free.

Nut-free.

Dairy-free.

Gluten-free.

Grain-free.

Paleo.

Vegan.

Yeah, you read that right! It pretty much fits every single dietary requirement I ever get asked for! Heck, I feel like you could even make it autoimmune compliant by substituting shredded coconut for the seeds in the crust and cutting back on some maple syrup. I haven’t tried that though, so if you do, please let me know in the comments below!

No Bake Pumpkin Pie - vegan, paleo nut-free - Amanda Naturally

Bonus: you can make it ahead and it keeps really well in the fridge!
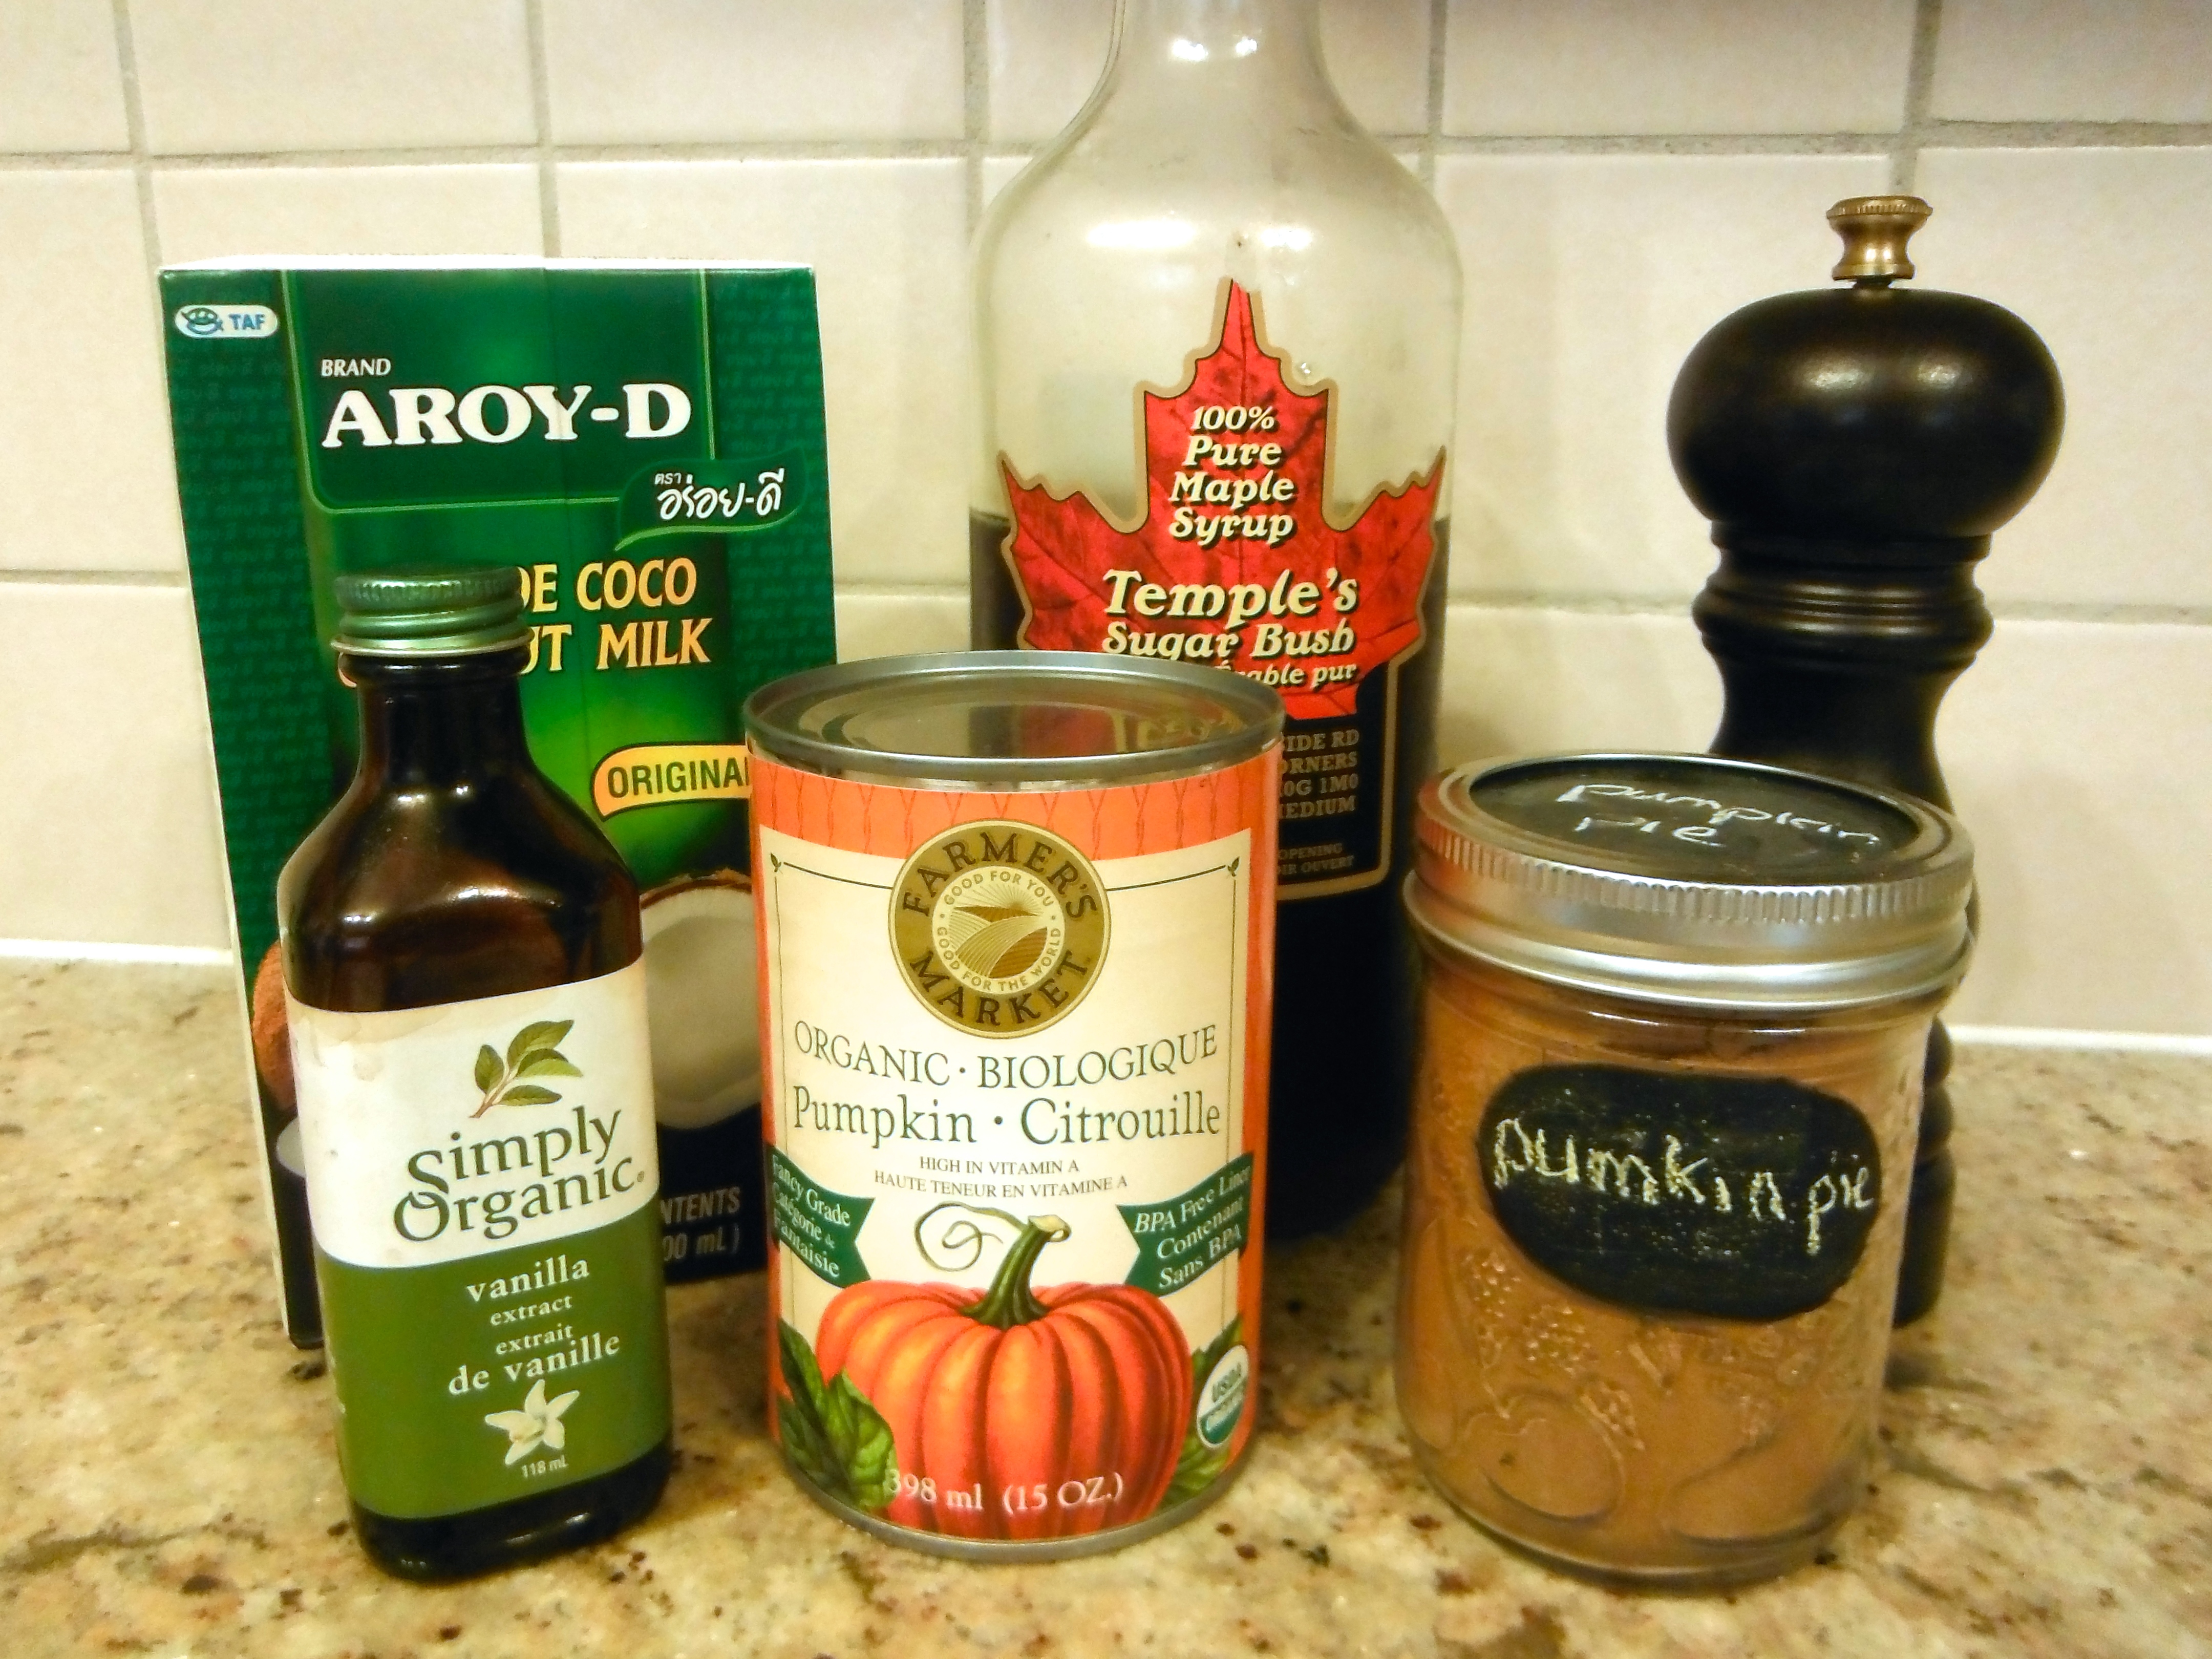
No Bake Pumpkin Pie
An simple yet yummy take on the traditional pumpkin pie. Nut-free, dairy-free, gluten-free, grain-free, dairy-free and sugar-free. Vegan and paleo!
Write a review
Print
Prep Time
25 min
Total Time
25 min
Prep Time
25 min
Total Time
25 min
Crust
  1. 3 cups dates
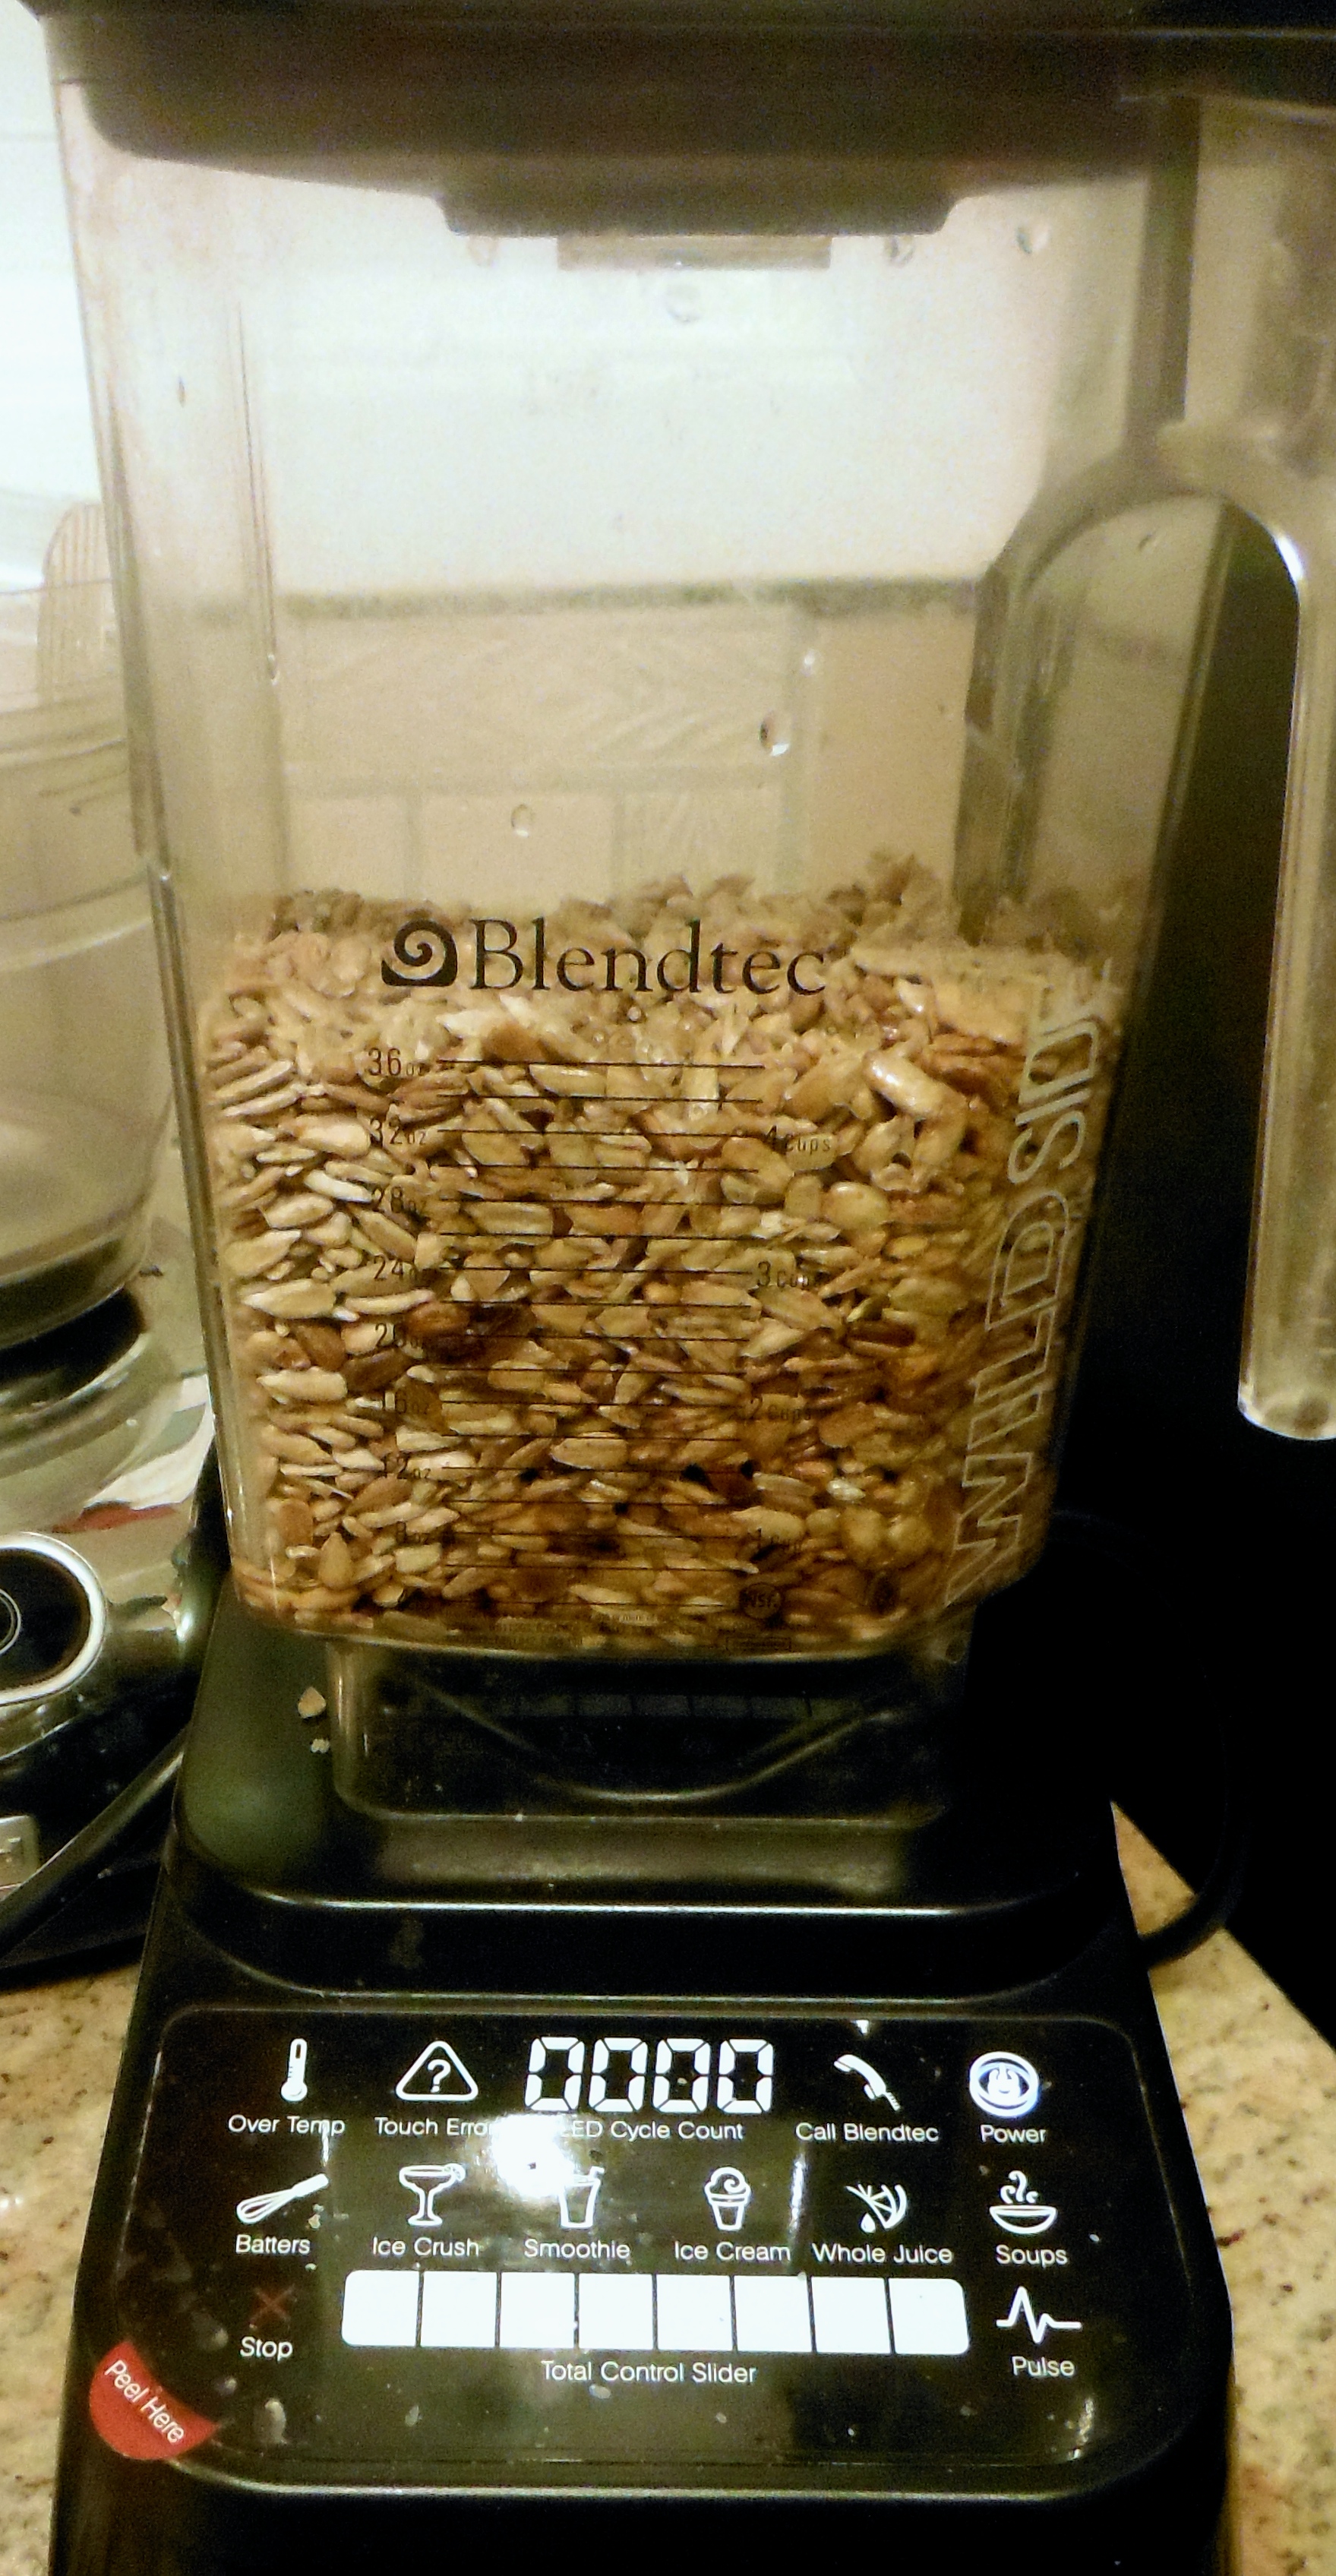
  2. 1½ cups pumpkin seeds, toasted
  3. 2 tbsp coconut oil
  4. pinch of sea salt
Filling
  1. 1¾ cups coconut butter (homemade or store bought)
  2. 3 cups pumpkin puree (homemade or canned)
  3. ½ cup pure maple syrup
  4. ½ tsp sea salt
  5. 2½ tbsp pumpkin pie spice
  6. ¼ cup coconut oil
  7. 2 tsp vanilla extract
Instructions
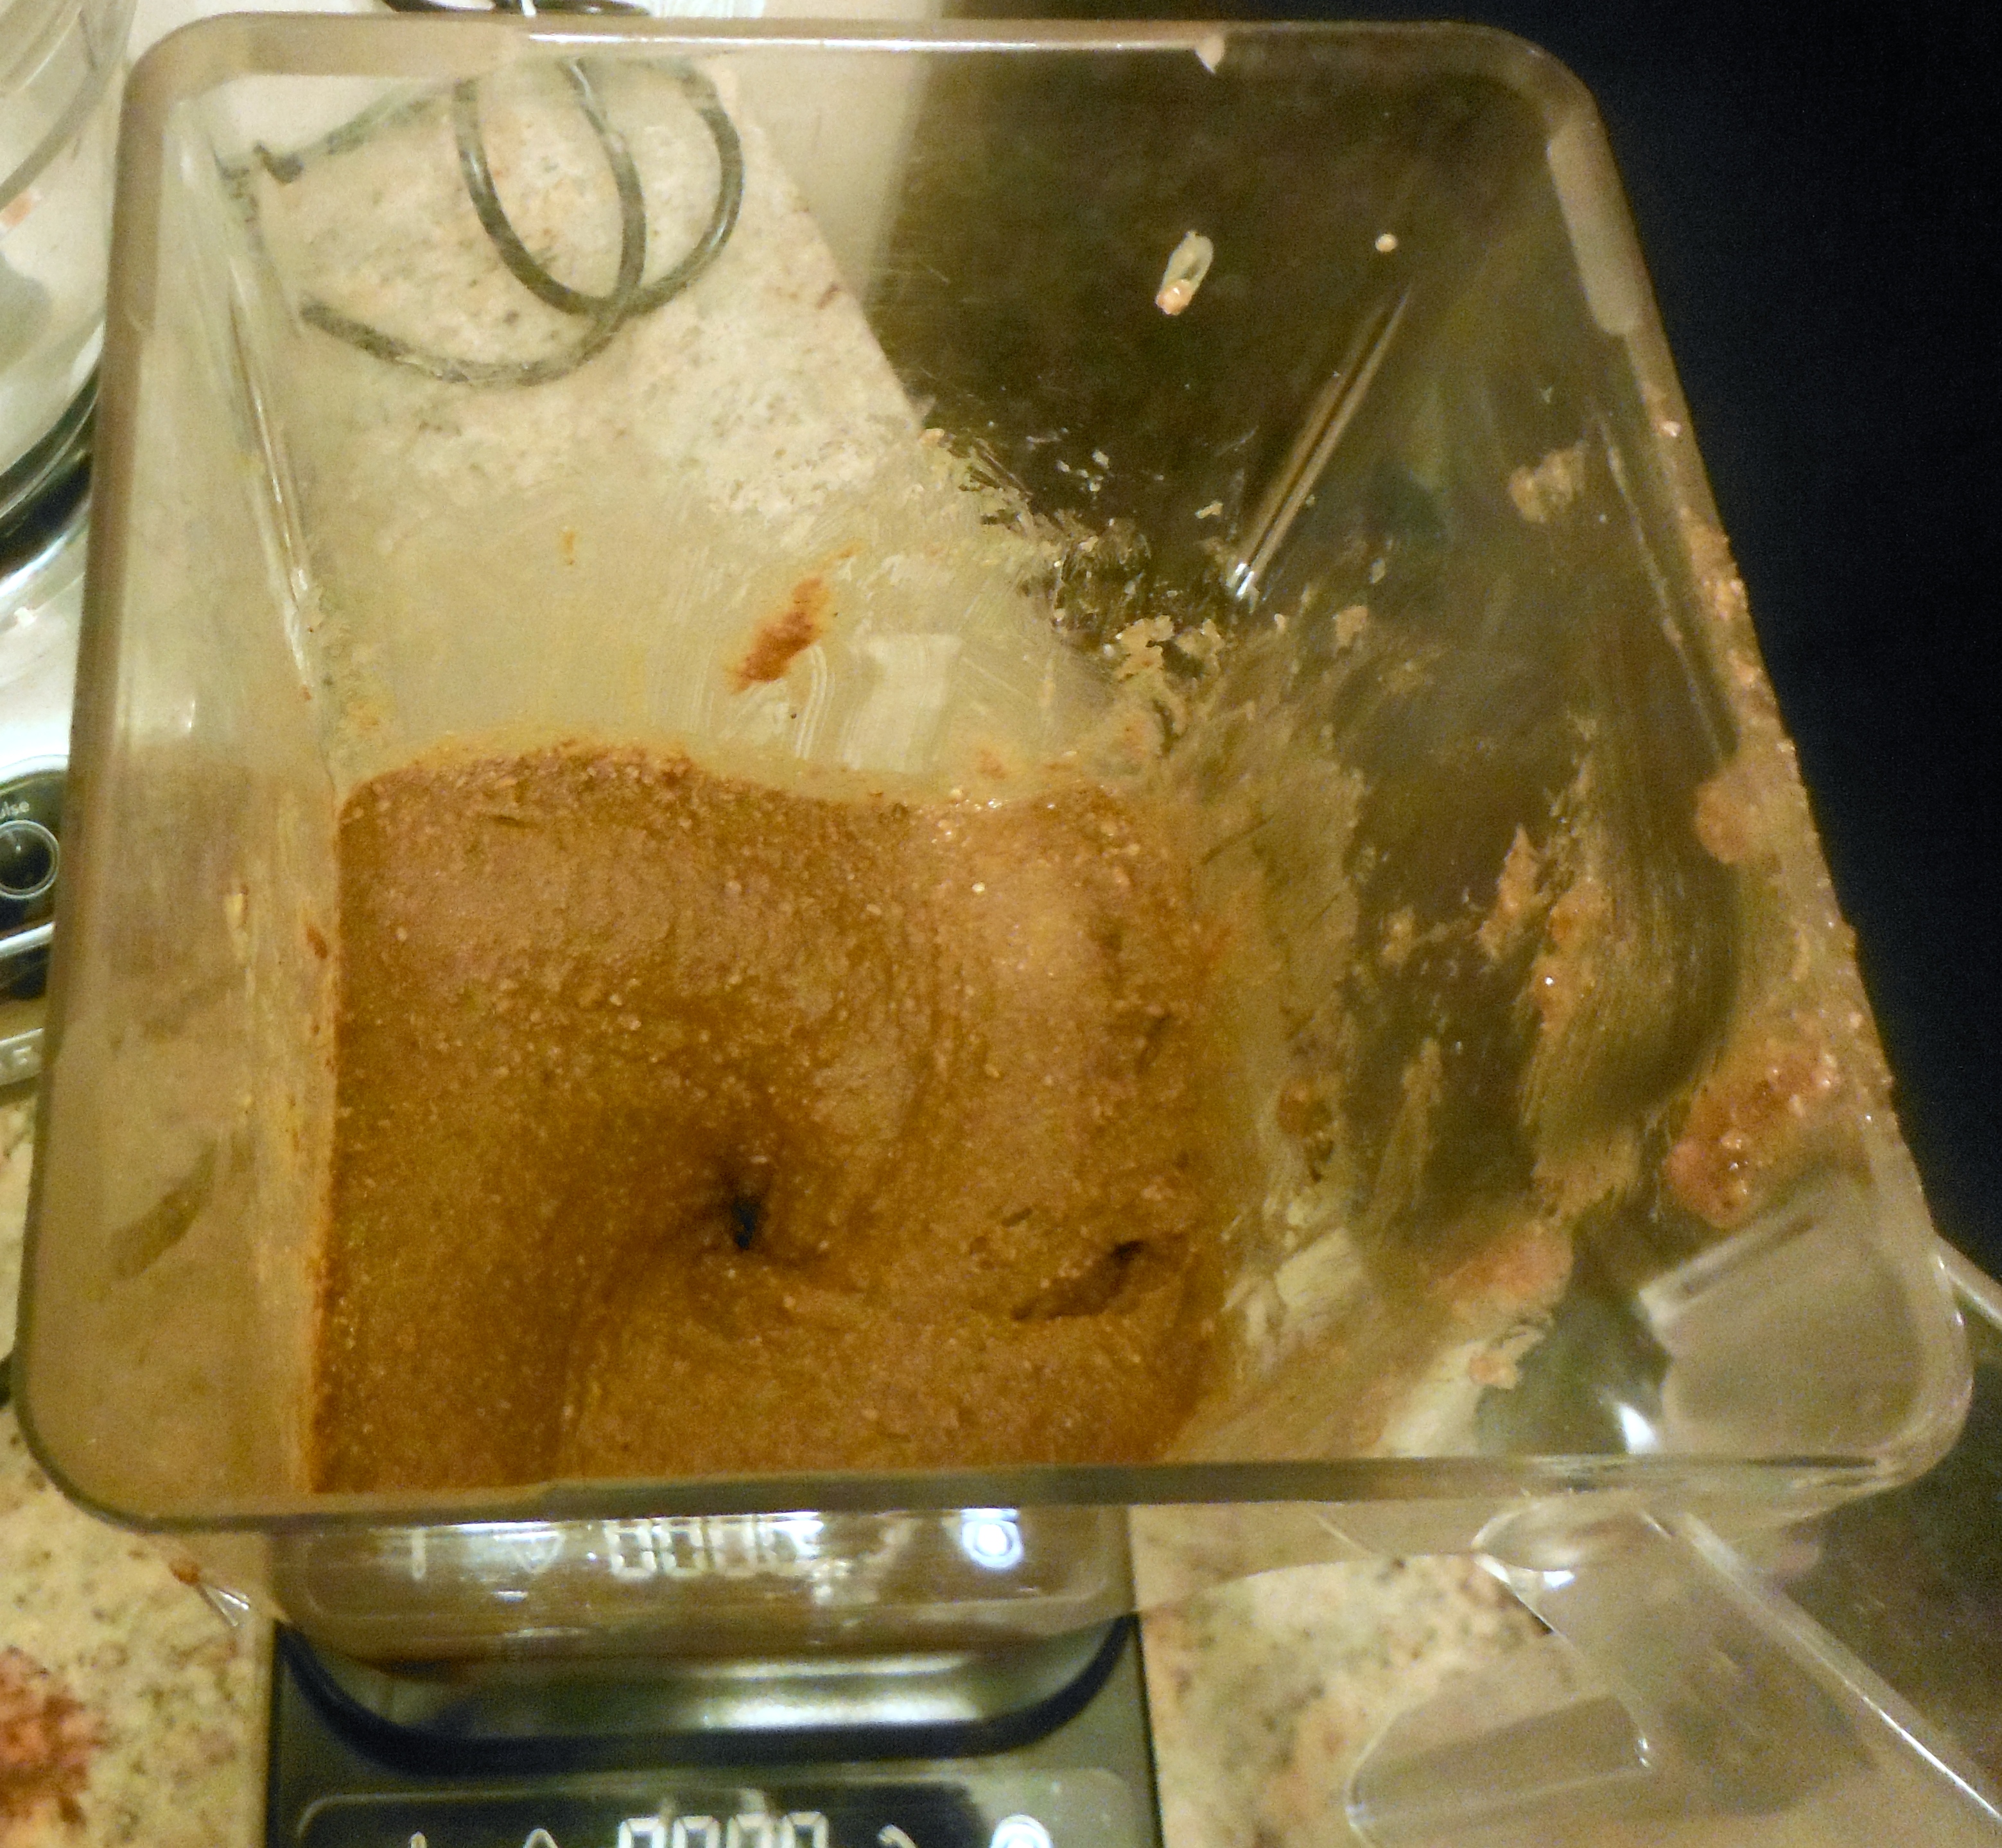
  1. In a food processor, combine all the crust ingredients. Blend until it starts to stick together and to the sides. You may need to scrape the sides down once or twice with a spatula. This step takes about 2 minutes of processing.
  2. Line a springform pan with parchment paper.
  3. Pour the crust into the pan. Pack it down tightly using your fingers.
  4. Rinse the food processor.
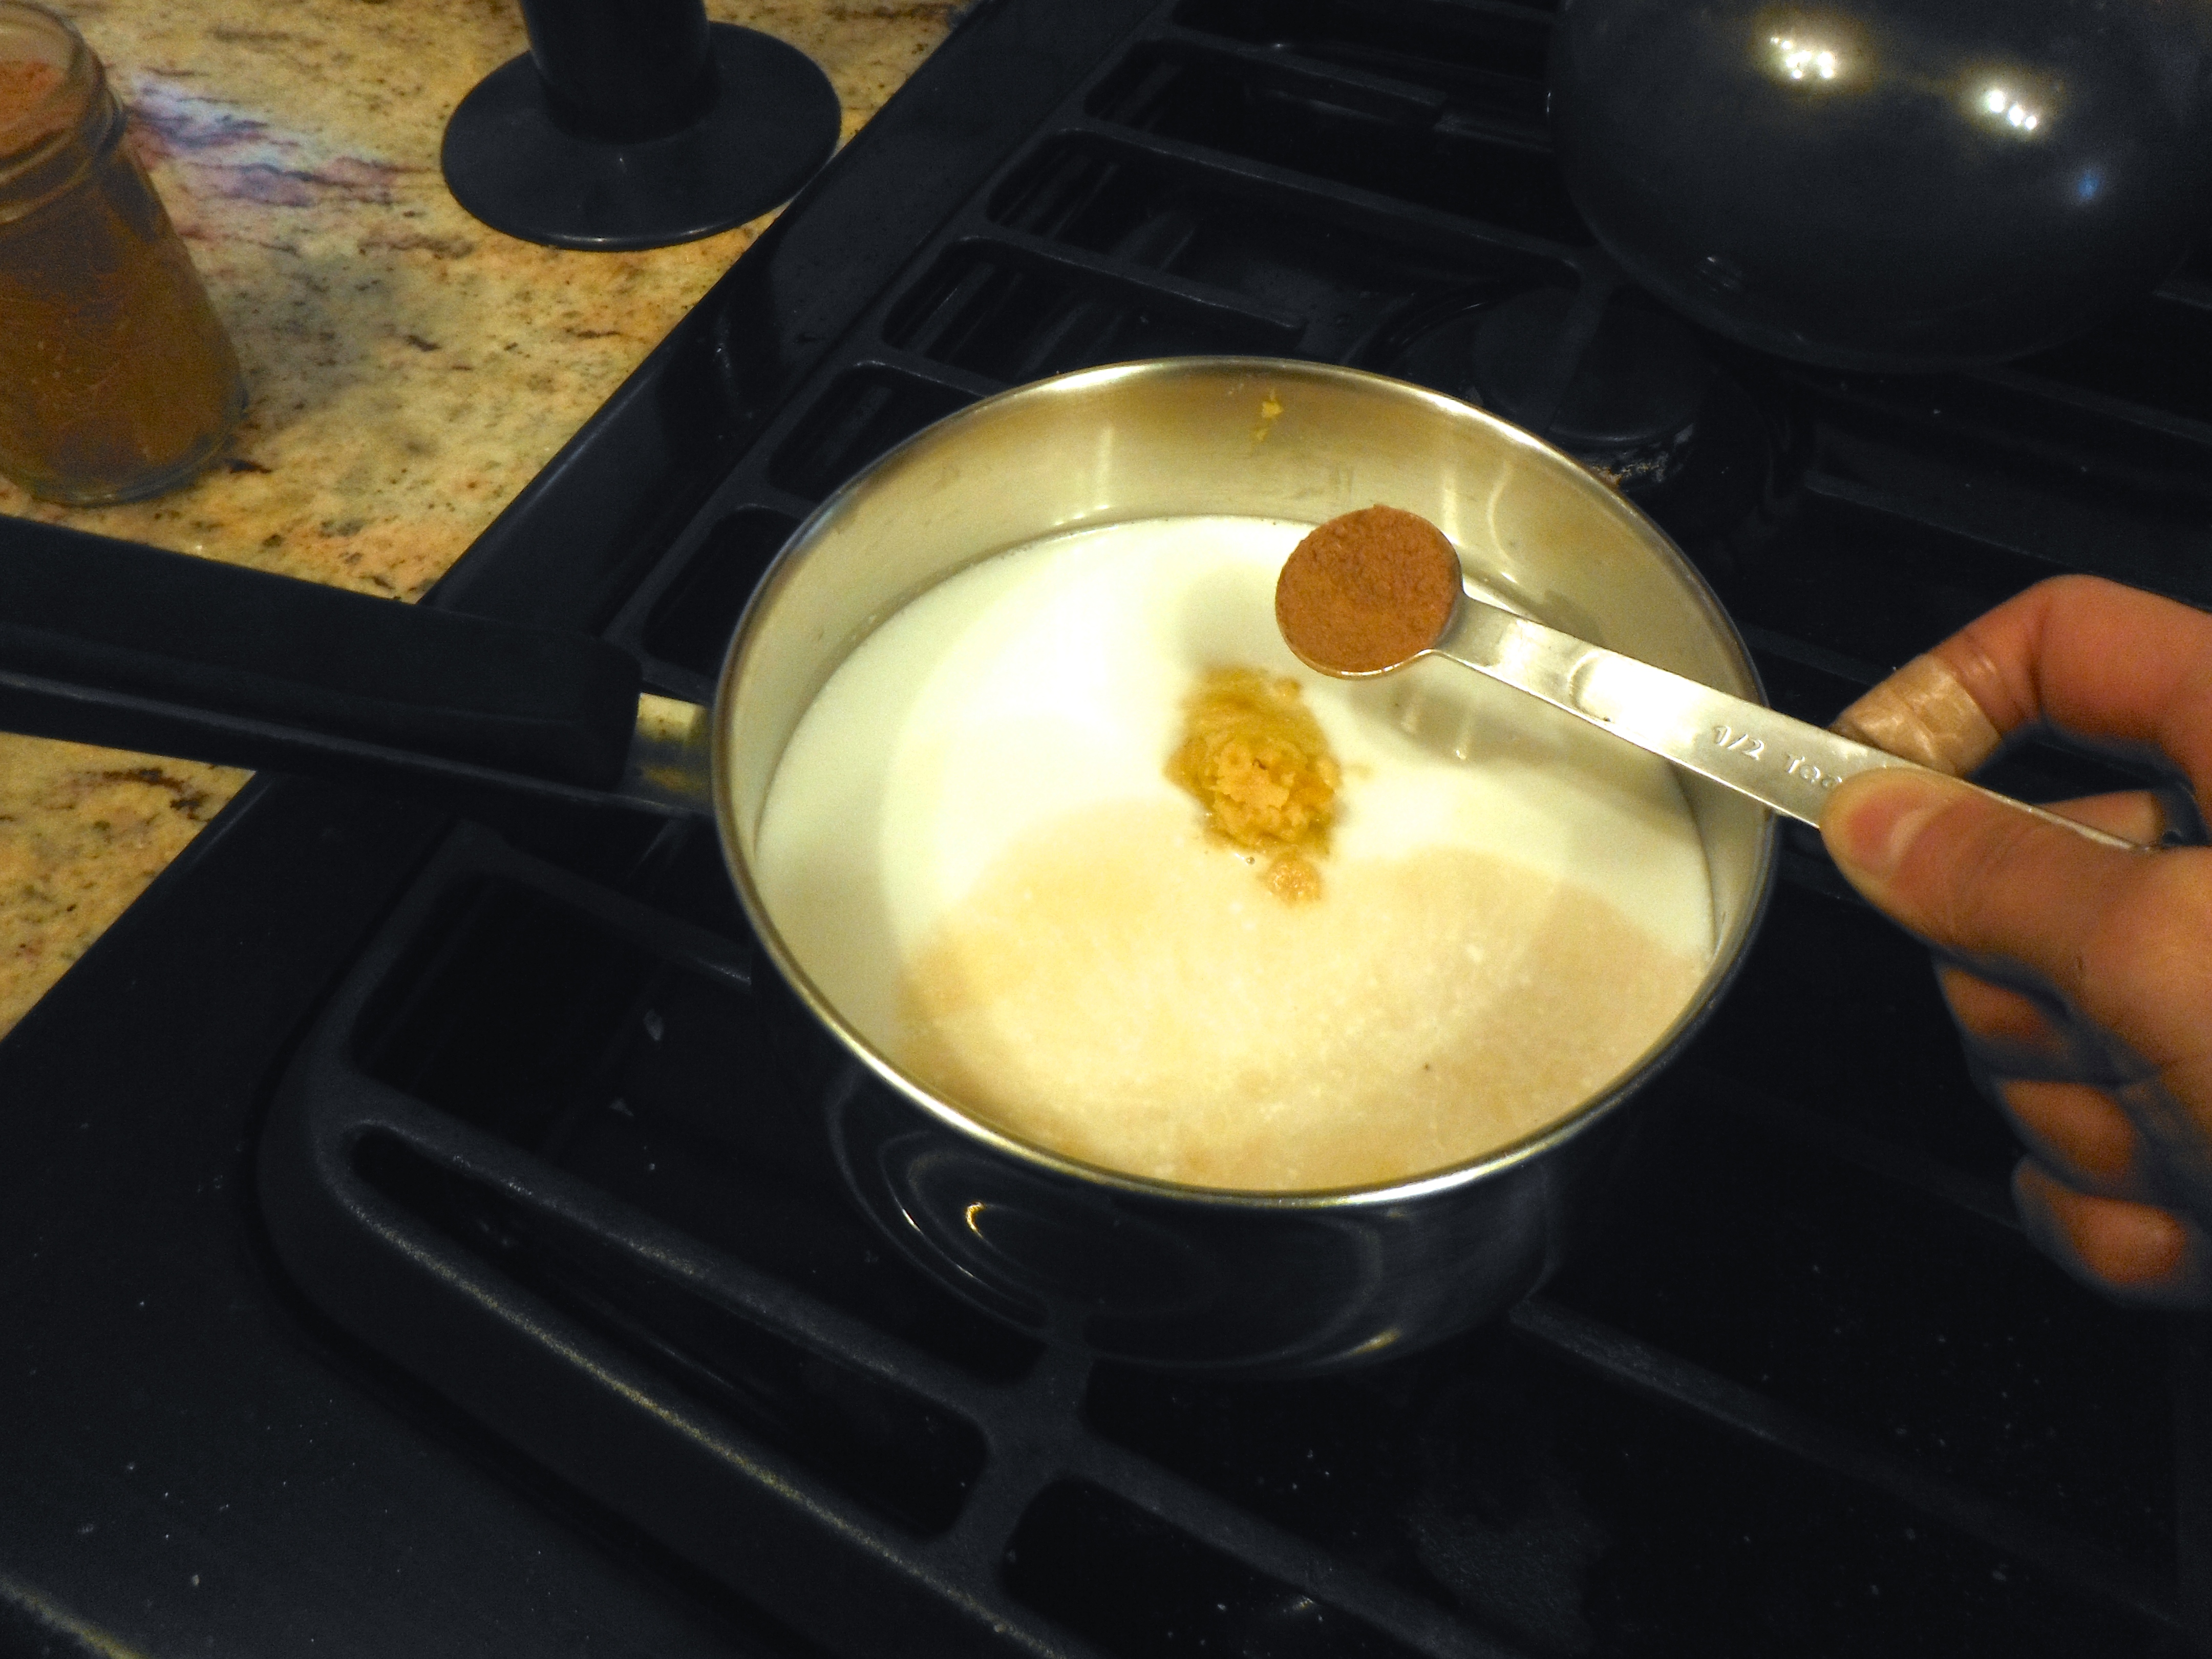
  5. Gently warm your coconut butter either in the microwave, the oven or in a water bath.
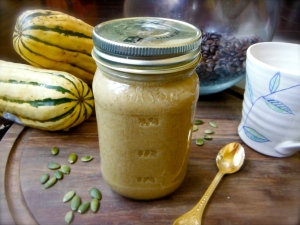
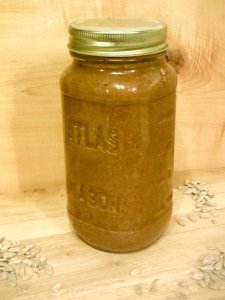
  6. Combine all filling ingredients in the food processor. Blend until smooth.
  7. Pour onto the crust and smooth down with a spatula.
  8. Chill in the fridge for a minimum of 1 hour.
  9. Run a knife along the sides and remove from the pan.
  10. Enjoy with some coconut milk ice cream, or homemade whipped cream!
Notes
  1. This pie is really dense and large. I made it to feed 16 people!
  2. You can absolutely make a smaller size.
  3. It also works well as bars / squares.
Amanda Naturally http://www.amandanaturally.com/
 No Bake Pumpkin Pie - paleo, vegan, nut free - Amanda Naturally

Wishing all my Canadians a Happy Thanksgiving weekend with lots of love, light and laughter. Here’s to having so much to be thankful for! xo

Pumpkin Spice Creamer

Now that it is officially fall, I can finally post a pumpkin recipe! It’s been a busy week in my household, so I’m going to keep this post short. It’s also been an exciting week, because I was quoted in an article for in the Toronto Sun, as well as local Sun Media papers in a dozen or so other Canadian cities such as Calgary, Ottawa, Edmonton and Winnipeg. Check out my thoughts on sugary vs. salty snacks here!

Pumpkin Spice Creamer - Amanda Naturally

Okay, back to more important things, our beloved pumpkin – the celebrated fall flavour that is exploding all over the blogosphere and Pinterest right now! You can pretty much type “pumpkin” before any food and find a recipe…pumpkin fudge, pumpkin muffins, pumpkin pie, pumpkin chill and of course, the fan-favourite:

Pumpkin Spice Latte!

I’ve been making my own pumpkin spice latte for a few years now, because:

  1. I didn’t trust the barristers to not cross contaminate my soy latte with milk
  2. I don’t love soy milk, especially the heavily sweetened one they use at Starbucks 
  3. They’re damn expensive
  4. I didn’t trust the ingredients

I knew the ingredients had to be shifty, but I hadn’t actually looked into it, so I couldn’t speak to it. Well that all changed a few weeks ago when Vani over at The Food Babe did an expose about what’s in your PSL! If you haven’t seen it on your Facebook feed, go check it out now. It’s worth the read! Turns out all of my reasons for avoiding the Starbucks PSL were legit: the pumpkin syrup is sweetened with condensed milk, so even a soy version has dairy in it, and there are some other sketchy ingredients!

Last year I was in the habit of routinely making PSLs from scratch every morning – and while they were delicious, it was a little time consuming. So this year, I created a PSL creamer that you can just add directly to your coffee! Not a coffee lover? Add some extra milk to enjoy a warm mug of pumpkin spice deliciousness, similar to a hot chocolate!

A few notes:
– pumpkin spice does not have to contain pumpkin, but I like to add it because it makes the flavour richer and pumpkin is good for you!
– I don’t like my coffee sweet, so if you’re expecting a Starbucks style PSL, you’re going to want to add more maple syrup!
– the creamer works best if you pour it in first, and add coffee to it, or if you blend it with an immersion blender, but a vigorous whisk with a fork will do just fine!

Step 1: gather ingredients – coconut milk, pumpkin puree, pumpkin pie spice, maple syrup, vanilla extract, sea salt 

Pumpkin Spice Creamer - Amanda Naturally

Step 2: combine ingredients in a small saucepan over medium heat. Blend with an immersion blender, or transfer to a stand up blender.

Pumpkin Spice Creamer - Amanda Naturally Pumpkin Spice Creamer - Amanda Naturally

Step 3: store in a jar in the fridge for 5-7 days.

Pumpkin Spice Creamer - Amanda Naturally

Pumpkin Spice Creamer
Write a review
Print
Prep Time
2 min
Cook Time
1 min
Total Time
3 min
Prep Time
2 min
Cook Time
1 min
Total Time
3 min
Ingredients
  1. 2 cups full-fat coconut milk (preferred brand: Aroy D)
  2. ⅓ cup pumpkin puree (organic canned or homemade)
  3. 1½ tsp pumpkin pie spice
  4. 2 tbsp maple syrup
  5. 1 tsp vanilla extract
  6. pinch of sea salt
Instructions
  1. Combine all ingredients in a small pot and heat over medium.
  2. Blend with an immersion blender, or transfer to a blender.
  3. Store in a jar in the fridge.
Notes
  1. Use within 5-7 days.
  2. Shake well before using (there are no emulsifiers added, so separation might occur!)
Amanda Naturally http://www.amandanaturally.com/

Homemade Sunflower Seed Butter

Homemade Sunflower Seed Butter - Amanda NaturallyNut and seed butters are a key pantry staple for quick grab and go snacks. While I absolutely love peanut butter, I’m careful with how much I eat because I have a sensitivity to legumes and recently I’ve noticed that it kind of makes my mouth tingle. That’s clearly not ideal!

When I first started eating a real food diet and throughout my initial candida cleanse, almond butter was my lifeline. Any time I had a craving for something sugary I’d dunk a spoon into a jar of almond butter and enjoy it straight. Don’t judge – I know you’ve done it, or at least thought about it!

For a while I made sure I always had a jar in my cupboard, but when I started crunching the numbers I realized I was spending way too much money on this jar of deliciousness that would barely last a week. To save money, I switched to a store-bought sunflower seed butter which was half the price. It was ok, but I didn’t really love it because it always tasted a bit off. And then my life changed…

My incredibly awesome parents gave us a Blendtec for our wedding!

They had thought about a getting my soon-to-be husband a watch, and me a nice pair of earrings or a necklace…but when they really thought about the kind of people we are, and what we would actually enjoy (and use!) they went with their gut and bought us our FAVOURITE present ever. The Blendtec. A luxurious kitchen gadget that was worth every penny! We use it every day, at least once!

As much as we love the Blendtec for its incredible smoothies, it’s honestly not worth it if that’s the only thing you’re going to use it it for. It’s all of the other incredible tasks it can handle that really make this a cook’s dream! So far I’ve used my Blendtec for:

  • pancake batter
  • muffin batter
  • ice cream
  • fruit sorbet
  • pesto and other sauces
  • grinding my own meat
  • homemade jello
  • coconut butter
    AND
  • sunflower seed butter!

Making your own sunflower seed butter is SO much better than buying it. When seeds are roasted and ground, the oils become less stable, and over time will oxidize (go rancid). I’m sure that’s why the sunflower seed butter I was buying tasted off. By roasting and grinding your own seeds, you are guaranteed the freshest butter, with a much richer flavour, and at a fraction of the cost. Not to mention, sunflower seeds are allowed in most schools because they’re not nuts! Here are a few ways to use sunflower seed butter for you or your kids:

  • on a sliced banana topped with shredded coconut
  • on a sliced apple topped with pumpkin seeds
  • stuffed in pitted dates (my husbands favourite)
  • on gluten-free crackers
  • as a fruit and/or veggie dip

Or as I’ve been known to do…eat it straight out of the jar with a spoon!

If you don’t have a fancy pants blender like this one, you can achieve a similar consistency with a good quality food processor, but it doesn’t get quite a smooth!

Homemade Sunflower Seed Butter
An inexpensive, delicious and nut-free alternative to peanut and almond butter!
Write a review
Print
Prep Time
30 min
Cook Time
10 min
Total Time
40 min
Prep Time
30 min
Cook Time
10 min
Total Time
40 min
Ingredients
  1. 2 cups raw, hulled sunflower seeds
  2. ¼ cup + 1 tbsp avocado oil
  3. ½ tsp sea salt
Instructions
  1. Preheat oven to 400F.
  2. Spread sunflower seeds thinly on a baking sheet.
  3. Roast for 7-10 minutes. Keep an eye on them so they don't burn! If necessary, stir once.
  4. Once seeds develop a golden brown colour and you can start to smell them, remove from oven and let cool.
  5. Pour ¼ cup avocado oil in to your Blendtec. Add sunflower seeds and sea salt.
  6. Blend on medium low, using a spatula to scrape down the sides. Be patient, it takes a few minutes!
  7. Add more avocado oil if you need to to achieve the desired consistency.
Notes
  1. Store in the fridge to maintain freshness and reduce oxidation of the oils.
Amanda Naturally http://www.amandanaturally.com/

Spread sunflower seeds in a single layer on a baking sheet. It’s better to use multiple sheets than to pile the seeds high on one. You risk burning the seeds on the edges and having raw seeds in the middle! If you only have 1 sheet, either make a smaller batch or stir seeds frequently.

Homemade Sunflower Seed Butter - Amanda Naturally

Toast until golden brown. Don’t burn!

Homemade Sunflower Seed Butter - Amanda Naturally   Homemade Sunflower Seed Butter - Amanda Naturally

Let seeds cool. Add avocado oil, sea salt and cooled sunflower seeds to to Blendtec or food processor. Blend on medium low, scraping down the sides.

Homemade Sunflower Seed Butter - Amanda Naturally   Homemade Sunflower Seed Butter - Amanda Naturally

Be patient! Eventually it will turn into a beautiful, creamy butter!

Homemade Sunflower Seed Butter - Amanda Naturally

Jar and store in the fridge.

Homemade Sunflower Seed Butter - Amanda Naturally


So tell me, what’s your favourite nut / seed butter and your favourite way to eat it?

Copyright 2014 Amanda Naturally | Design by The Nectar Collective