Tag Archives: vegetarian

Homemade Sunflower Seed Butter

Homemade Sunflower Seed Butter - Amanda NaturallyNut and seed butters are a key pantry staple for quick grab and go snacks. While I absolutely love peanut butter, I’m careful with how much I eat because I have a sensitivity to legumes and recently I’ve noticed that it kind of makes my mouth tingle. That’s clearly not ideal!

When I first started eating a real food diet and throughout my initial candida cleanse, almond butter was my lifeline. Any time I had a craving for something sugary I’d dunk a spoon into a jar of almond butter and enjoy it straight. Don’t judge – I know you’ve done it, or at least thought about it!

For a while I made sure I always had a jar in my cupboard, but when I started crunching the numbers I realized I was spending way too much money on this jar of deliciousness that would barely last a week. To save money, I switched to a store-bought sunflower seed butter which was half the price. It was ok, but I didn’t really love it because it always tasted a bit off. And then my life changed…

My incredibly awesome parents gave us a Blendtec for our wedding!

They had thought about a getting my soon-to-be husband a watch, and me a nice pair of earrings or a necklace…but when they really thought about the kind of people we are, and what we would actually enjoy (and use!) they went with their gut and bought us our FAVOURITE present ever. The Blendtec. A luxurious kitchen gadget that was worth every penny! We use it every day, at least once!

As much as we love the Blendtec for its incredible smoothies, it’s honestly not worth it if that’s the only thing you’re going to use it it for. It’s all of the other incredible tasks it can handle that really make this a cook’s dream! So far I’ve used my Blendtec for:

  • pancake batter
  • muffin batter
  • ice cream
  • fruit sorbet
  • pesto and other sauces
  • grinding my own meat
  • homemade jello
  • coconut butter
    AND
  • sunflower seed butter!

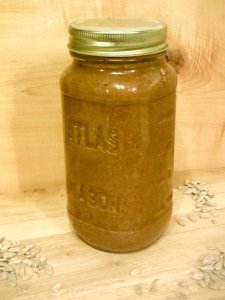
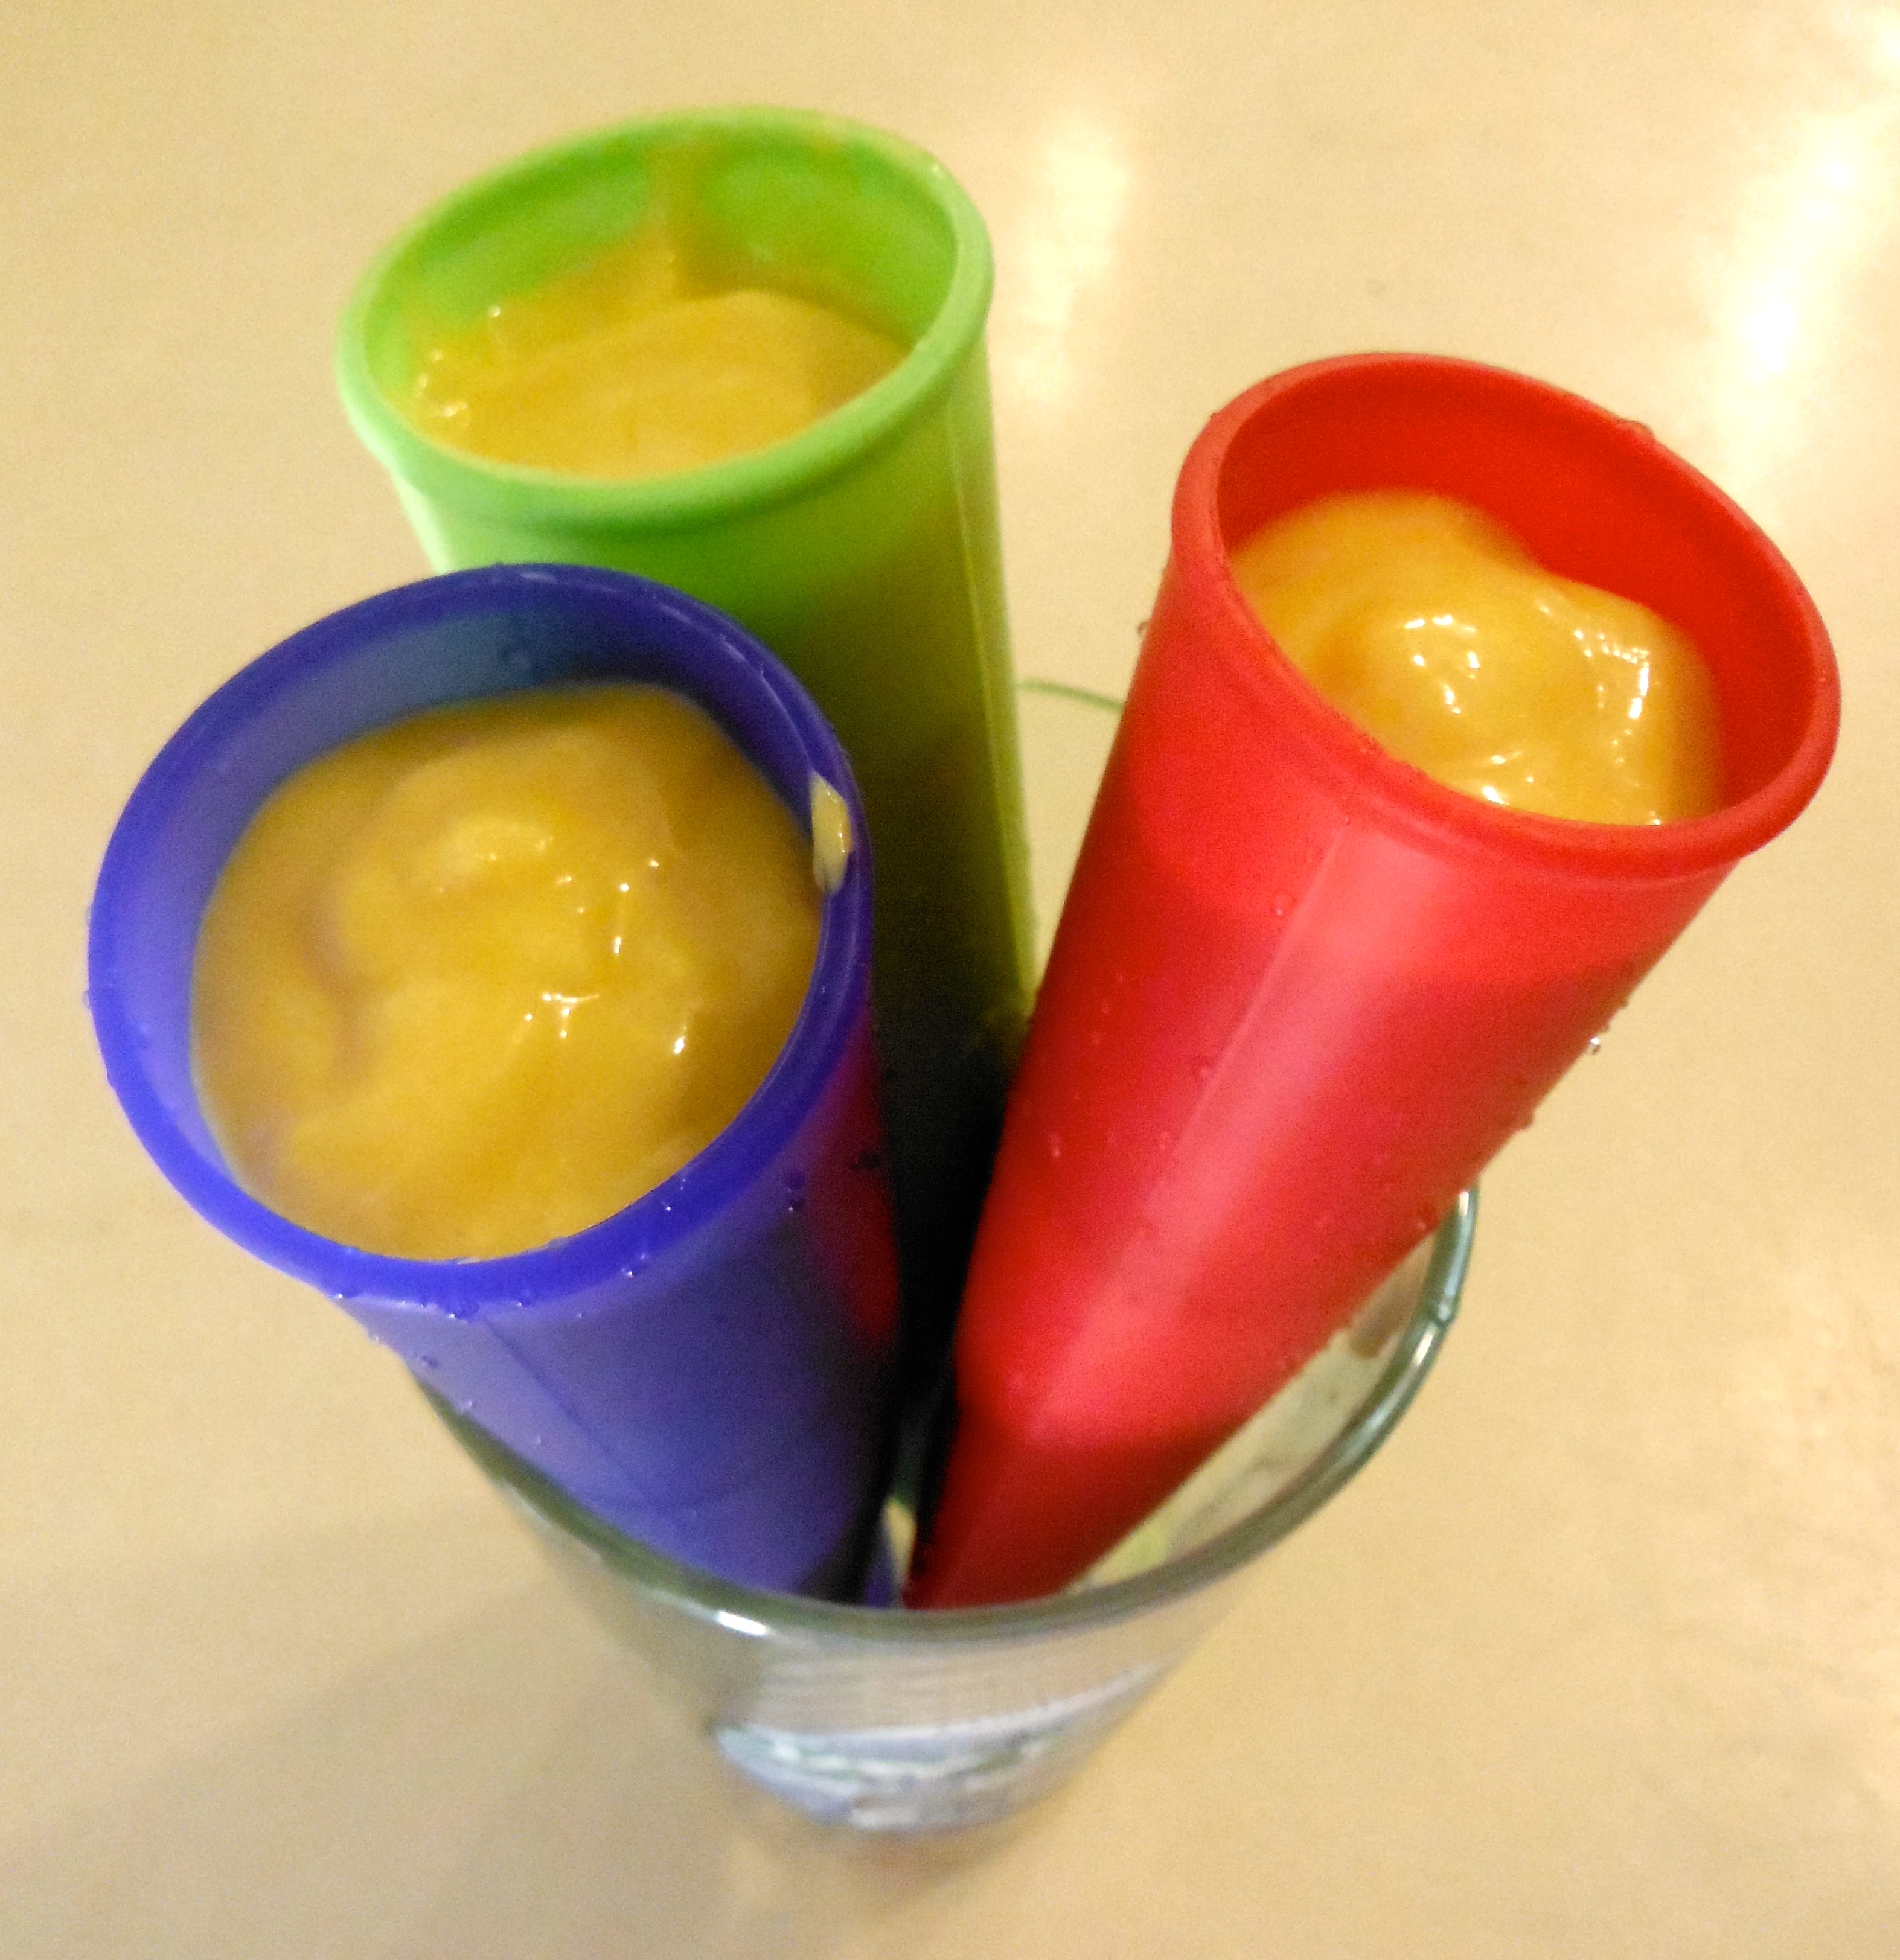
Making your own sunflower seed butter is SO much better than buying it. When seeds are roasted and ground, the oils become less stable, and over time will oxidize (go rancid). I’m sure that’s why the sunflower seed butter I was buying tasted off. By roasting and grinding your own seeds, you are guaranteed the freshest butter, with a much richer flavour, and at a fraction of the cost. Not to mention, sunflower seeds are allowed in most schools because they’re not nuts! Here are a few ways to use sunflower seed butter for you or your kids:

  • on a sliced banana topped with shredded coconut
  • on a sliced apple topped with pumpkin seeds
  • stuffed in pitted dates (my husbands favourite)
  • on gluten-free crackers
  • as a fruit and/or veggie dip

Or as I’ve been known to do…eat it straight out of the jar with a spoon!

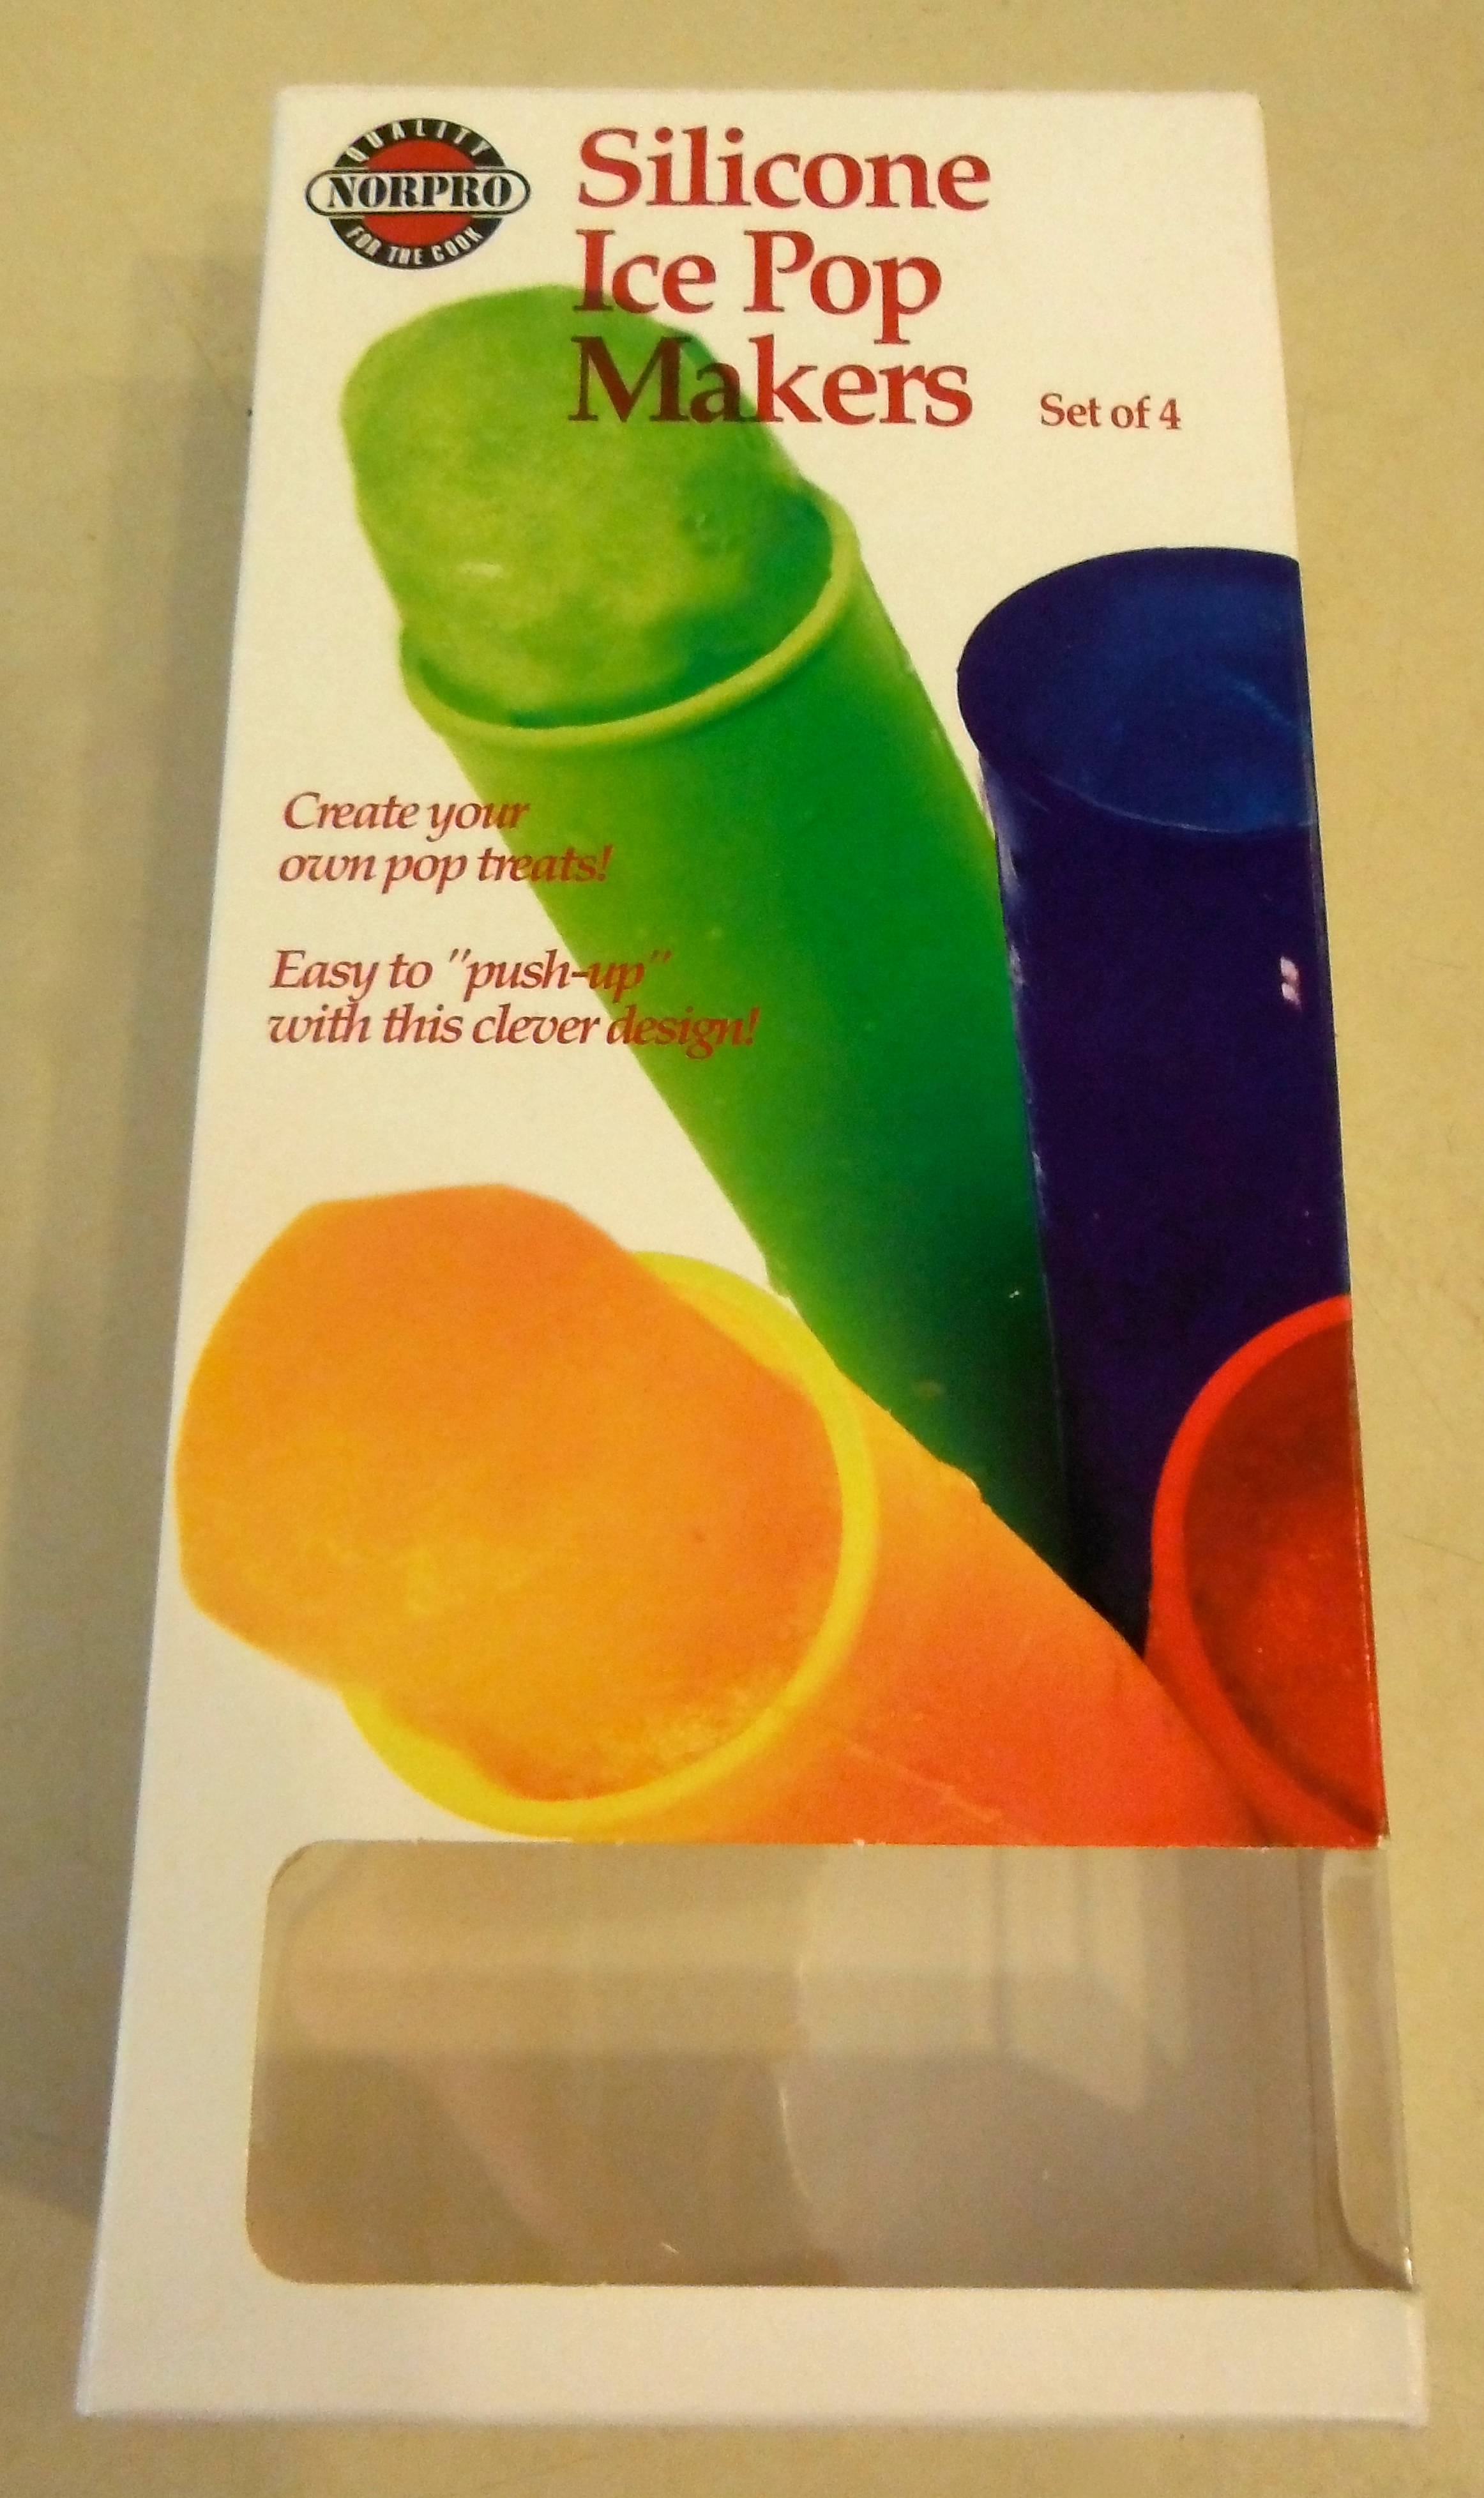
If you don’t have a fancy pants blender like this one, you can achieve a similar consistency with a good quality food processor, but it doesn’t get quite a smooth!

Homemade Sunflower Seed Butter
An inexpensive, delicious and nut-free alternative to peanut and almond butter!
Write a review
Print
Prep Time
30 min
Cook Time
10 min
Total Time
40 min
Prep Time
30 min
Cook Time
10 min
Total Time
40 min
Ingredients
  1. 2 cups raw, hulled sunflower seeds
  2. ¼ cup + 1 tbsp avocado oil
  3. ½ tsp sea salt
Instructions
  1. Preheat oven to 400F.
  2. Spread sunflower seeds thinly on a baking sheet.
  3. Roast for 7-10 minutes. Keep an eye on them so they don't burn! If necessary, stir once.
  4. Once seeds develop a golden brown colour and you can start to smell them, remove from oven and let cool.
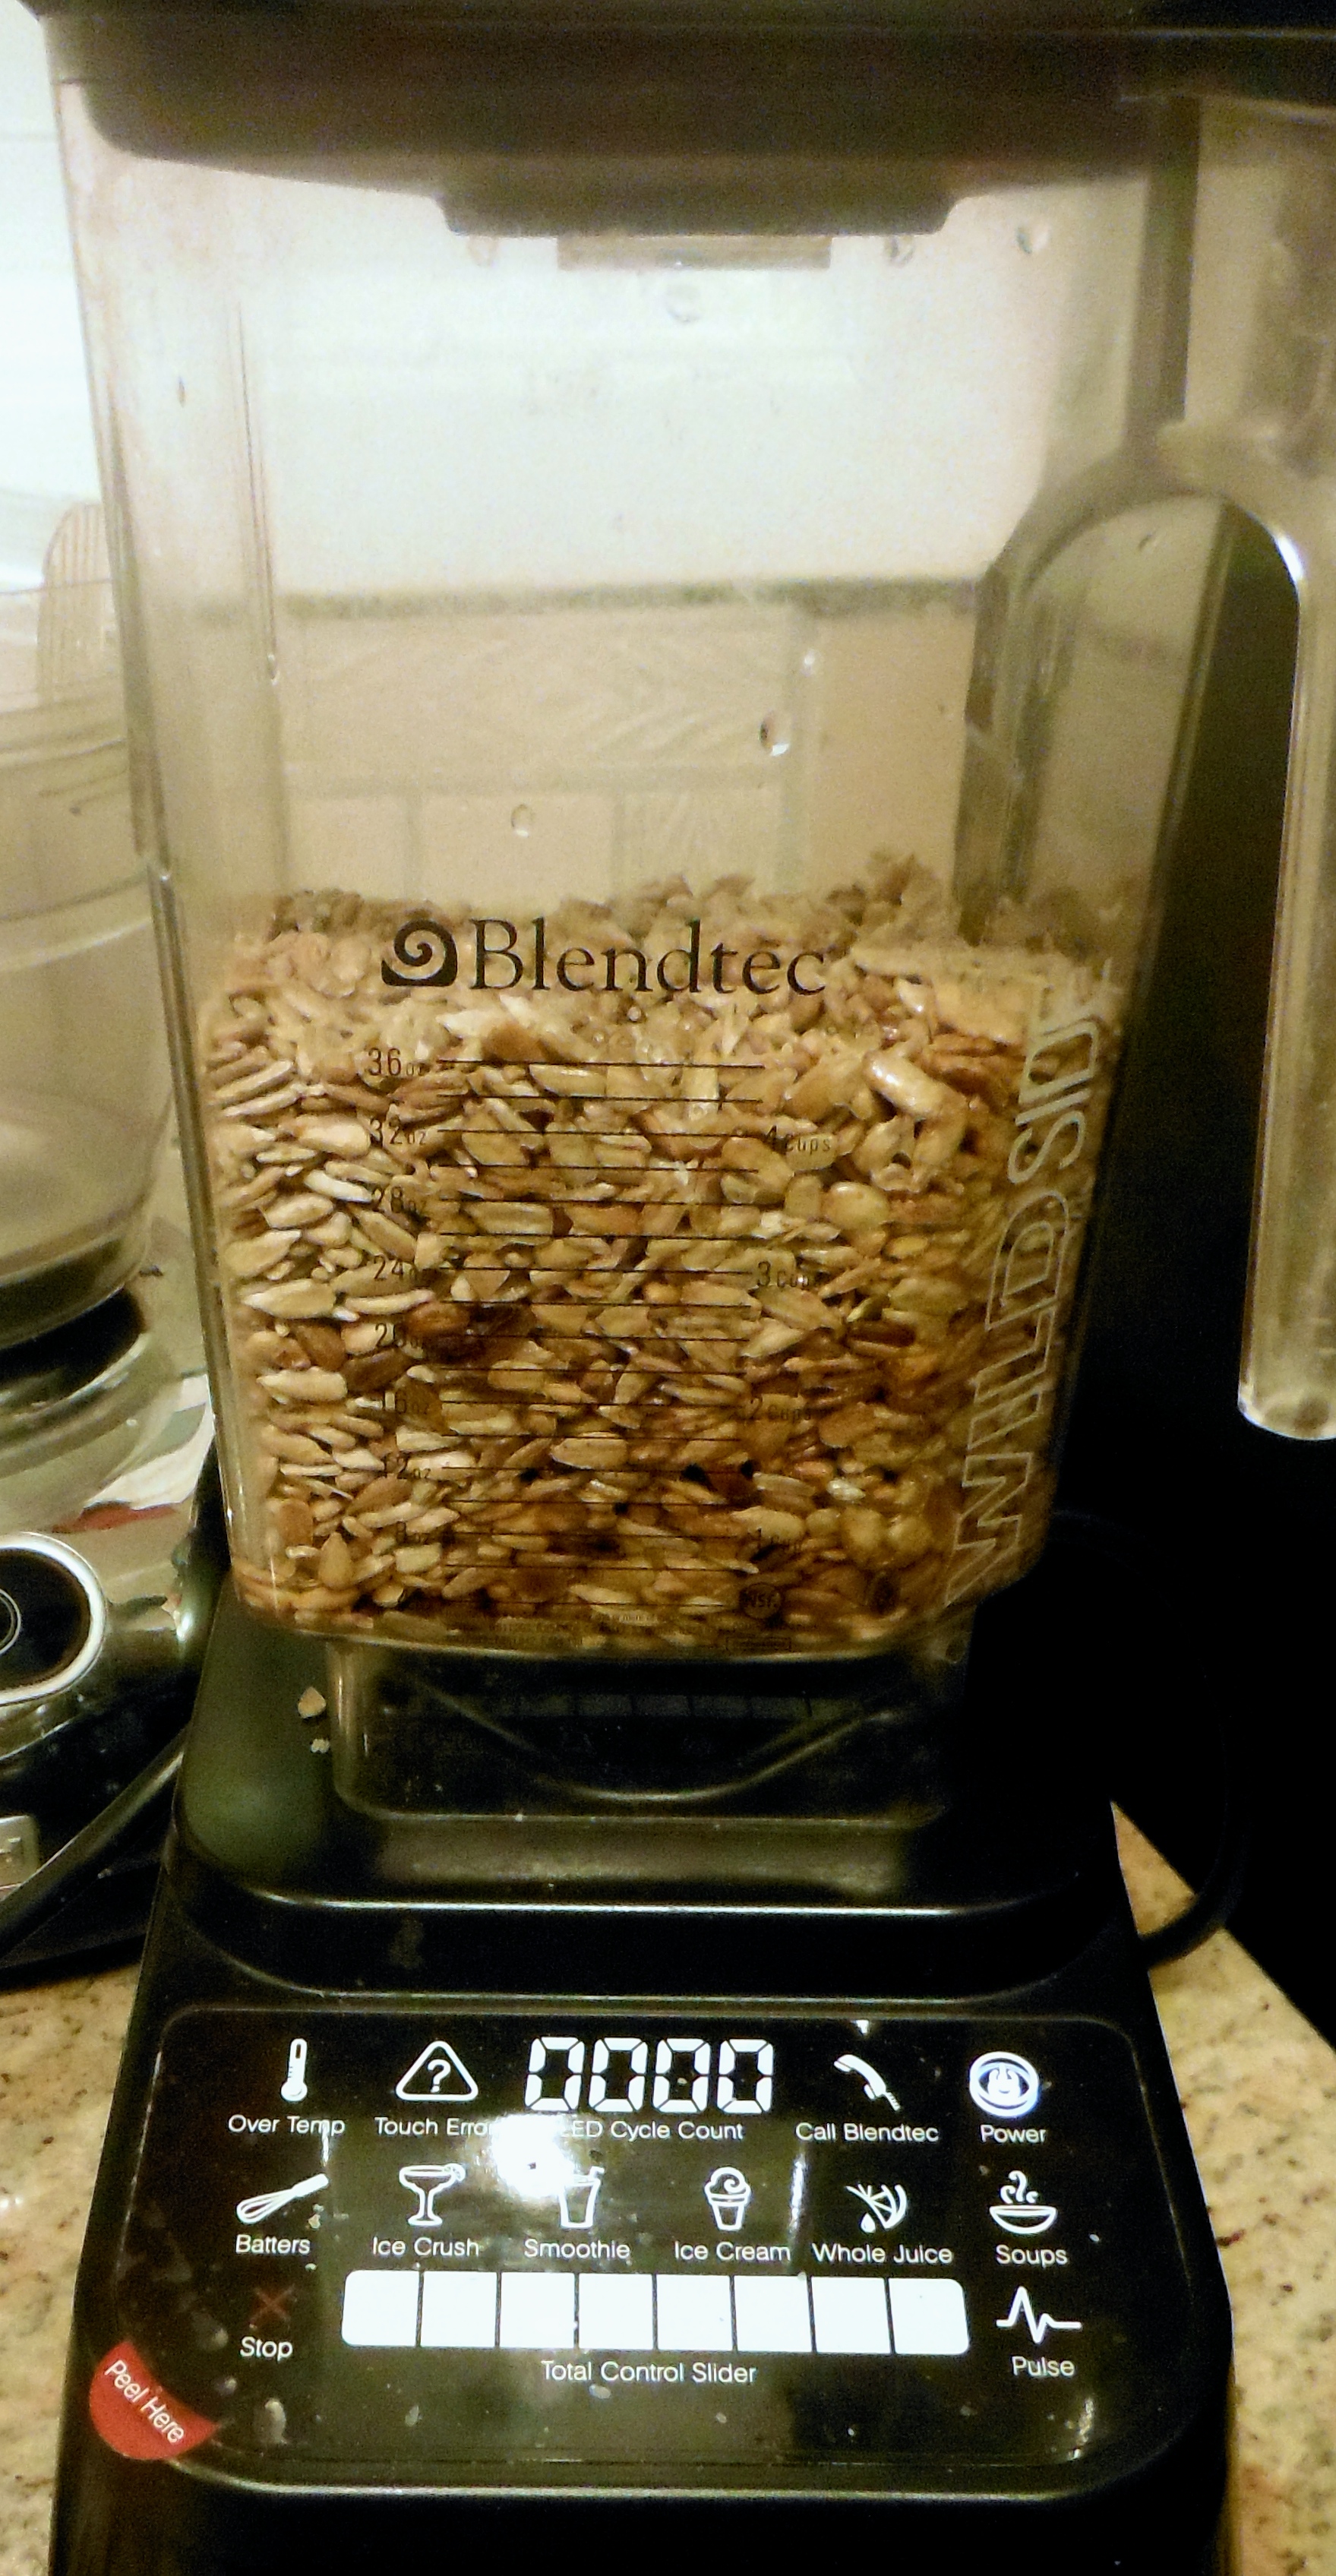
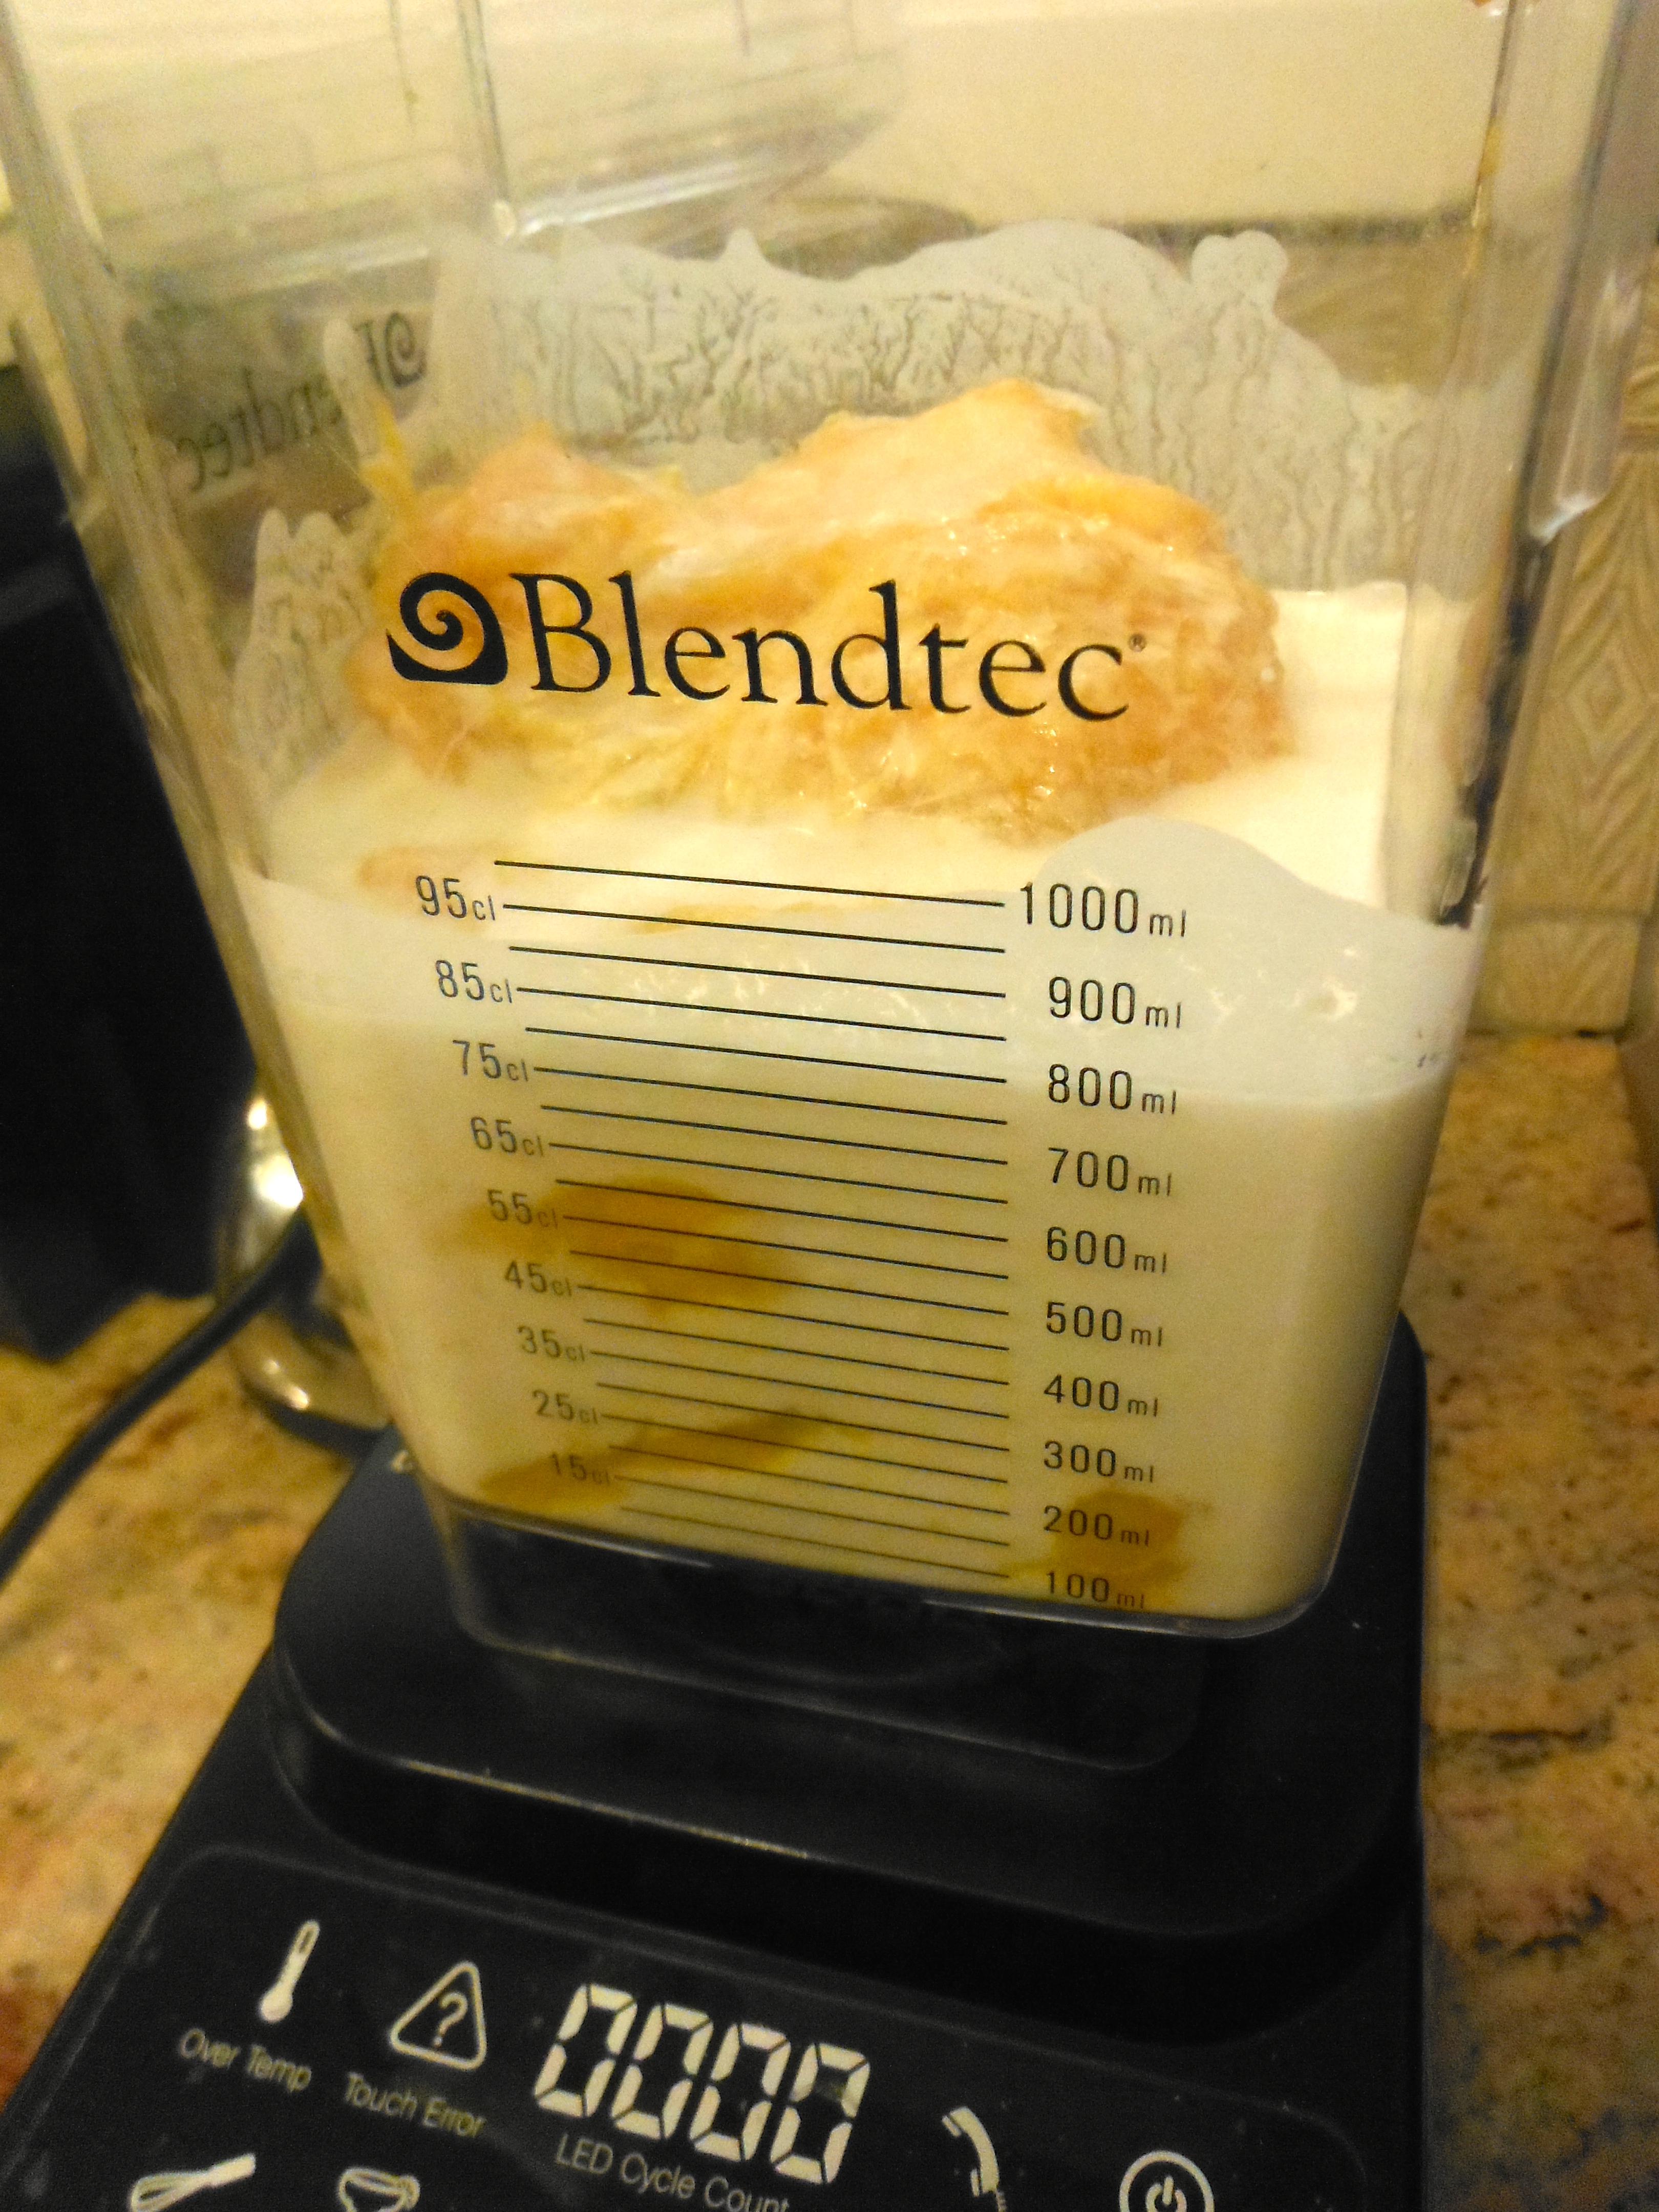
  5. Pour ¼ cup avocado oil in to your Blendtec. Add sunflower seeds and sea salt.
  6. Blend on medium low, using a spatula to scrape down the sides. Be patient, it takes a few minutes!
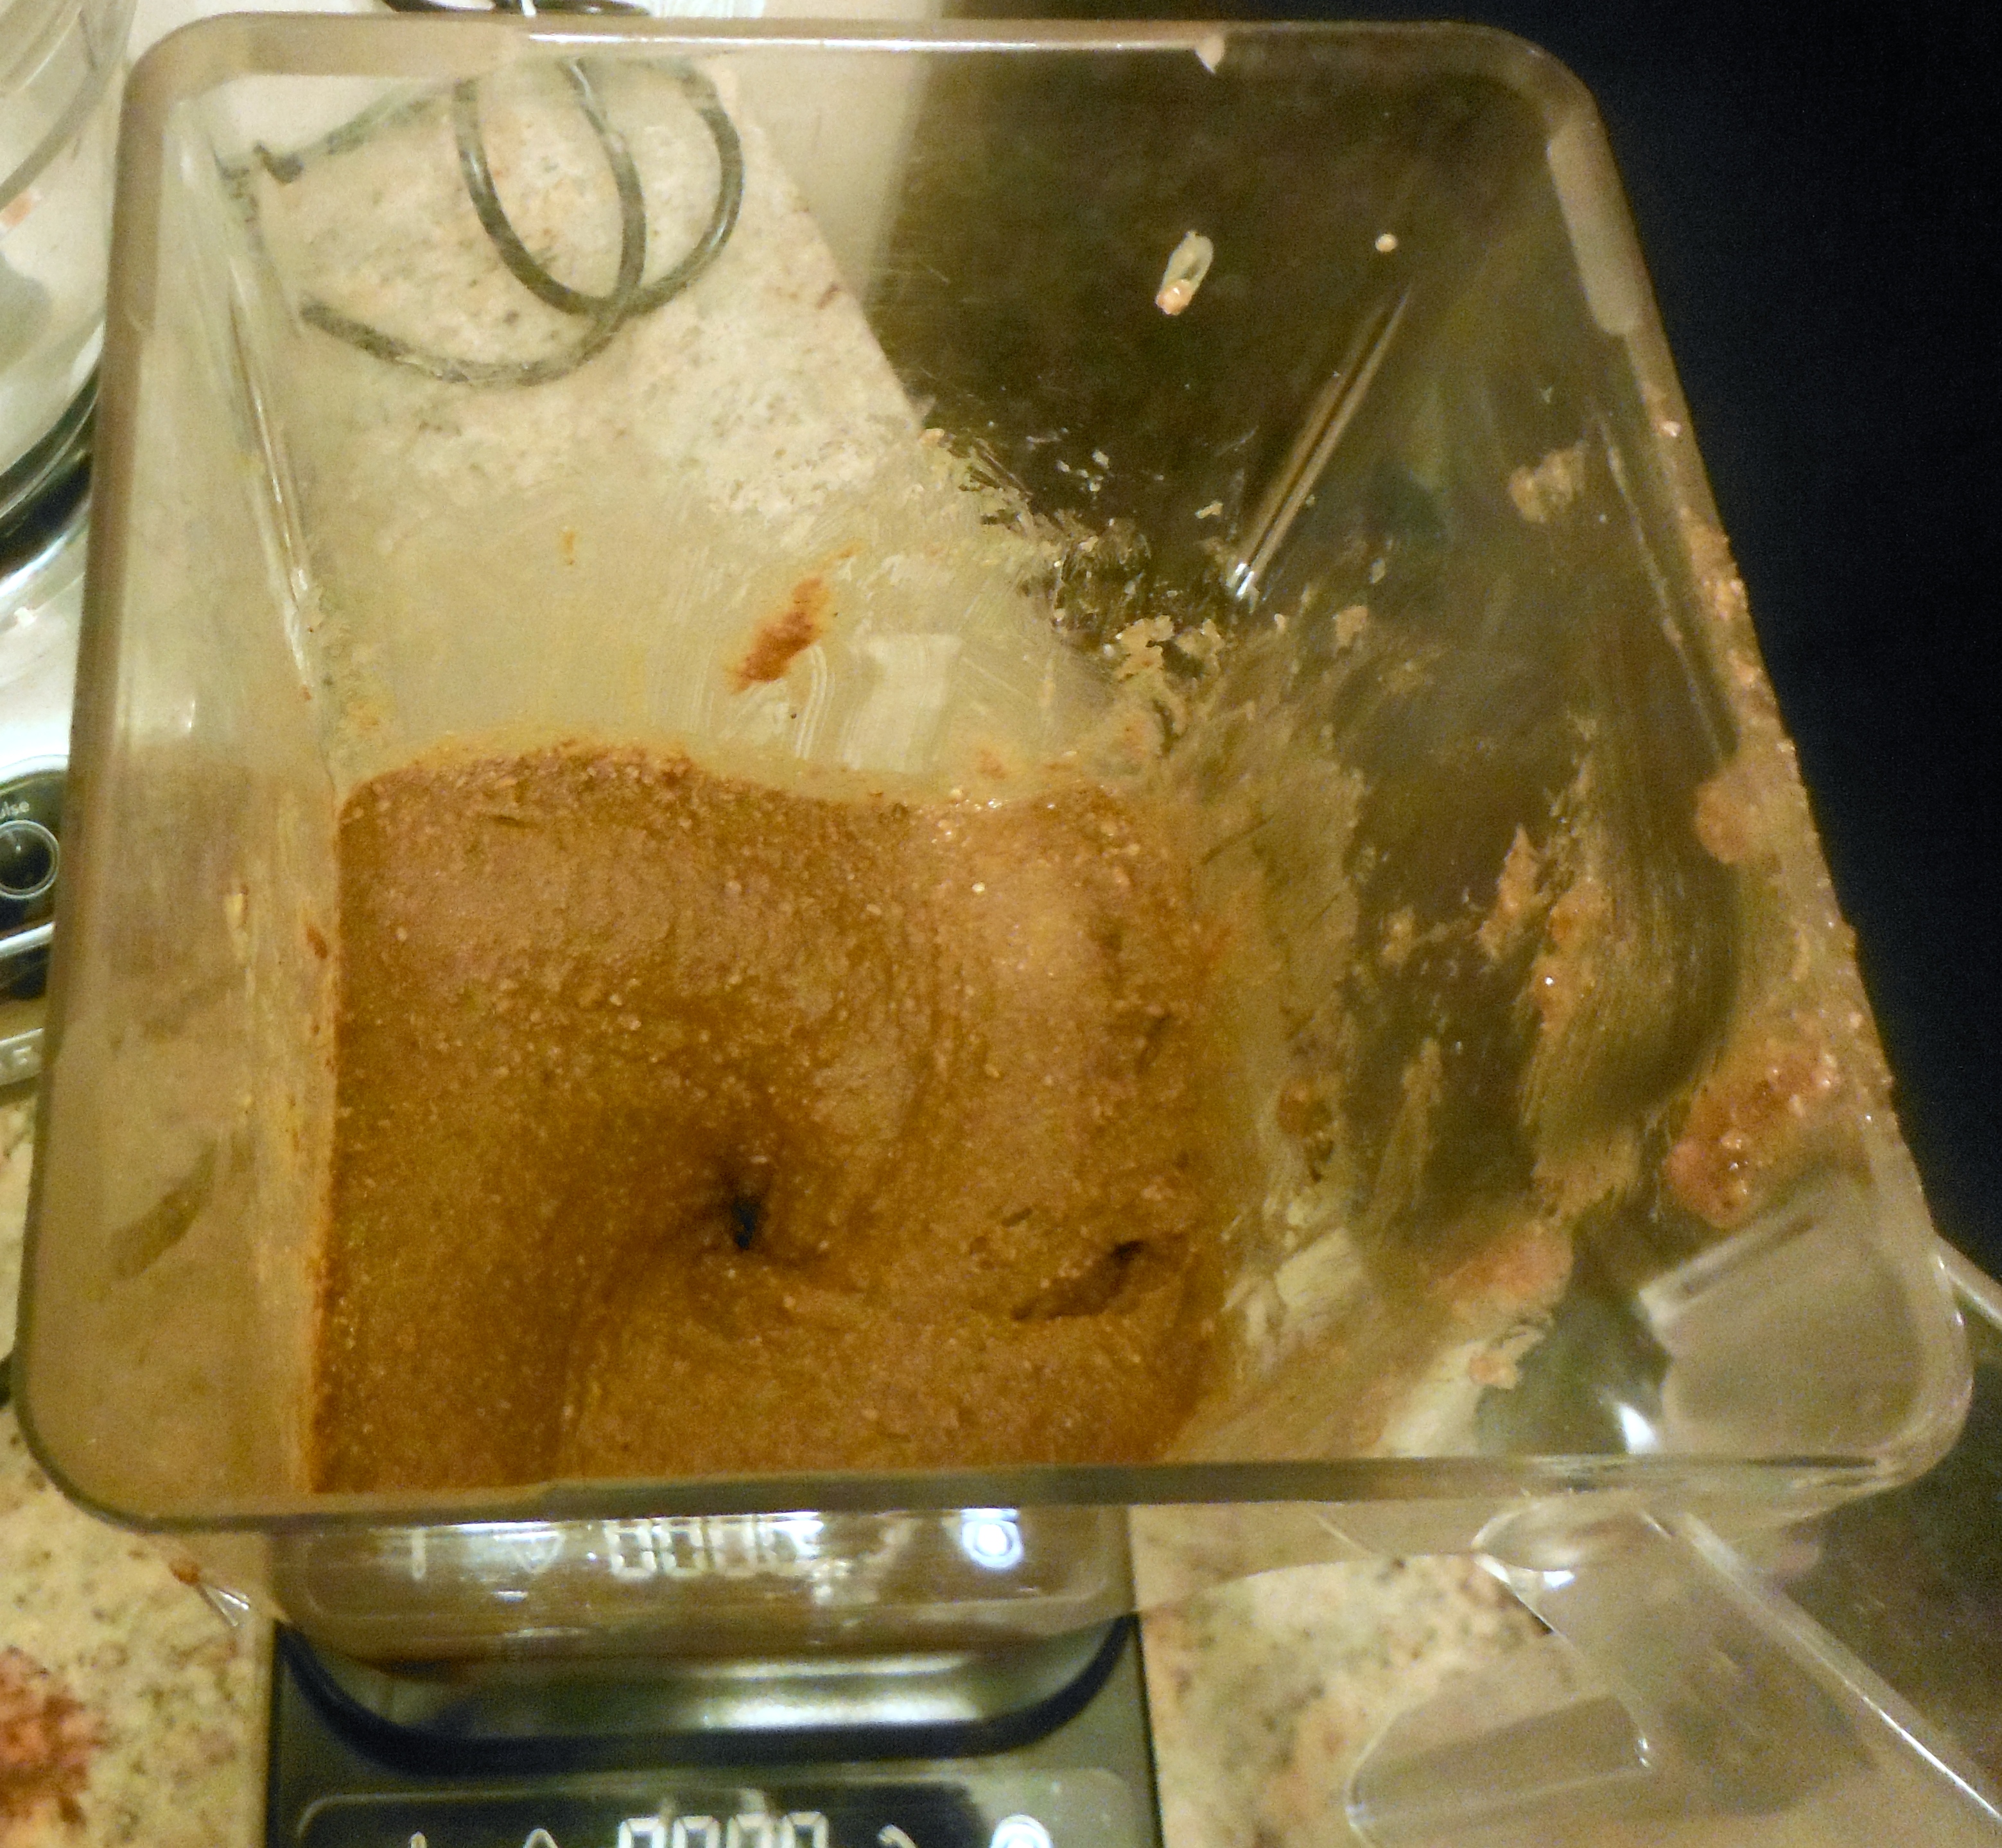
  7. Add more avocado oil if you need to to achieve the desired consistency.
Notes
  1. Store in the fridge to maintain freshness and reduce oxidation of the oils.
Amanda Naturally http://www.amandanaturally.com/

Spread sunflower seeds in a single layer on a baking sheet. It’s better to use multiple sheets than to pile the seeds high on one. You risk burning the seeds on the edges and having raw seeds in the middle! If you only have 1 sheet, either make a smaller batch or stir seeds frequently.

Homemade Sunflower Seed Butter - Amanda Naturally

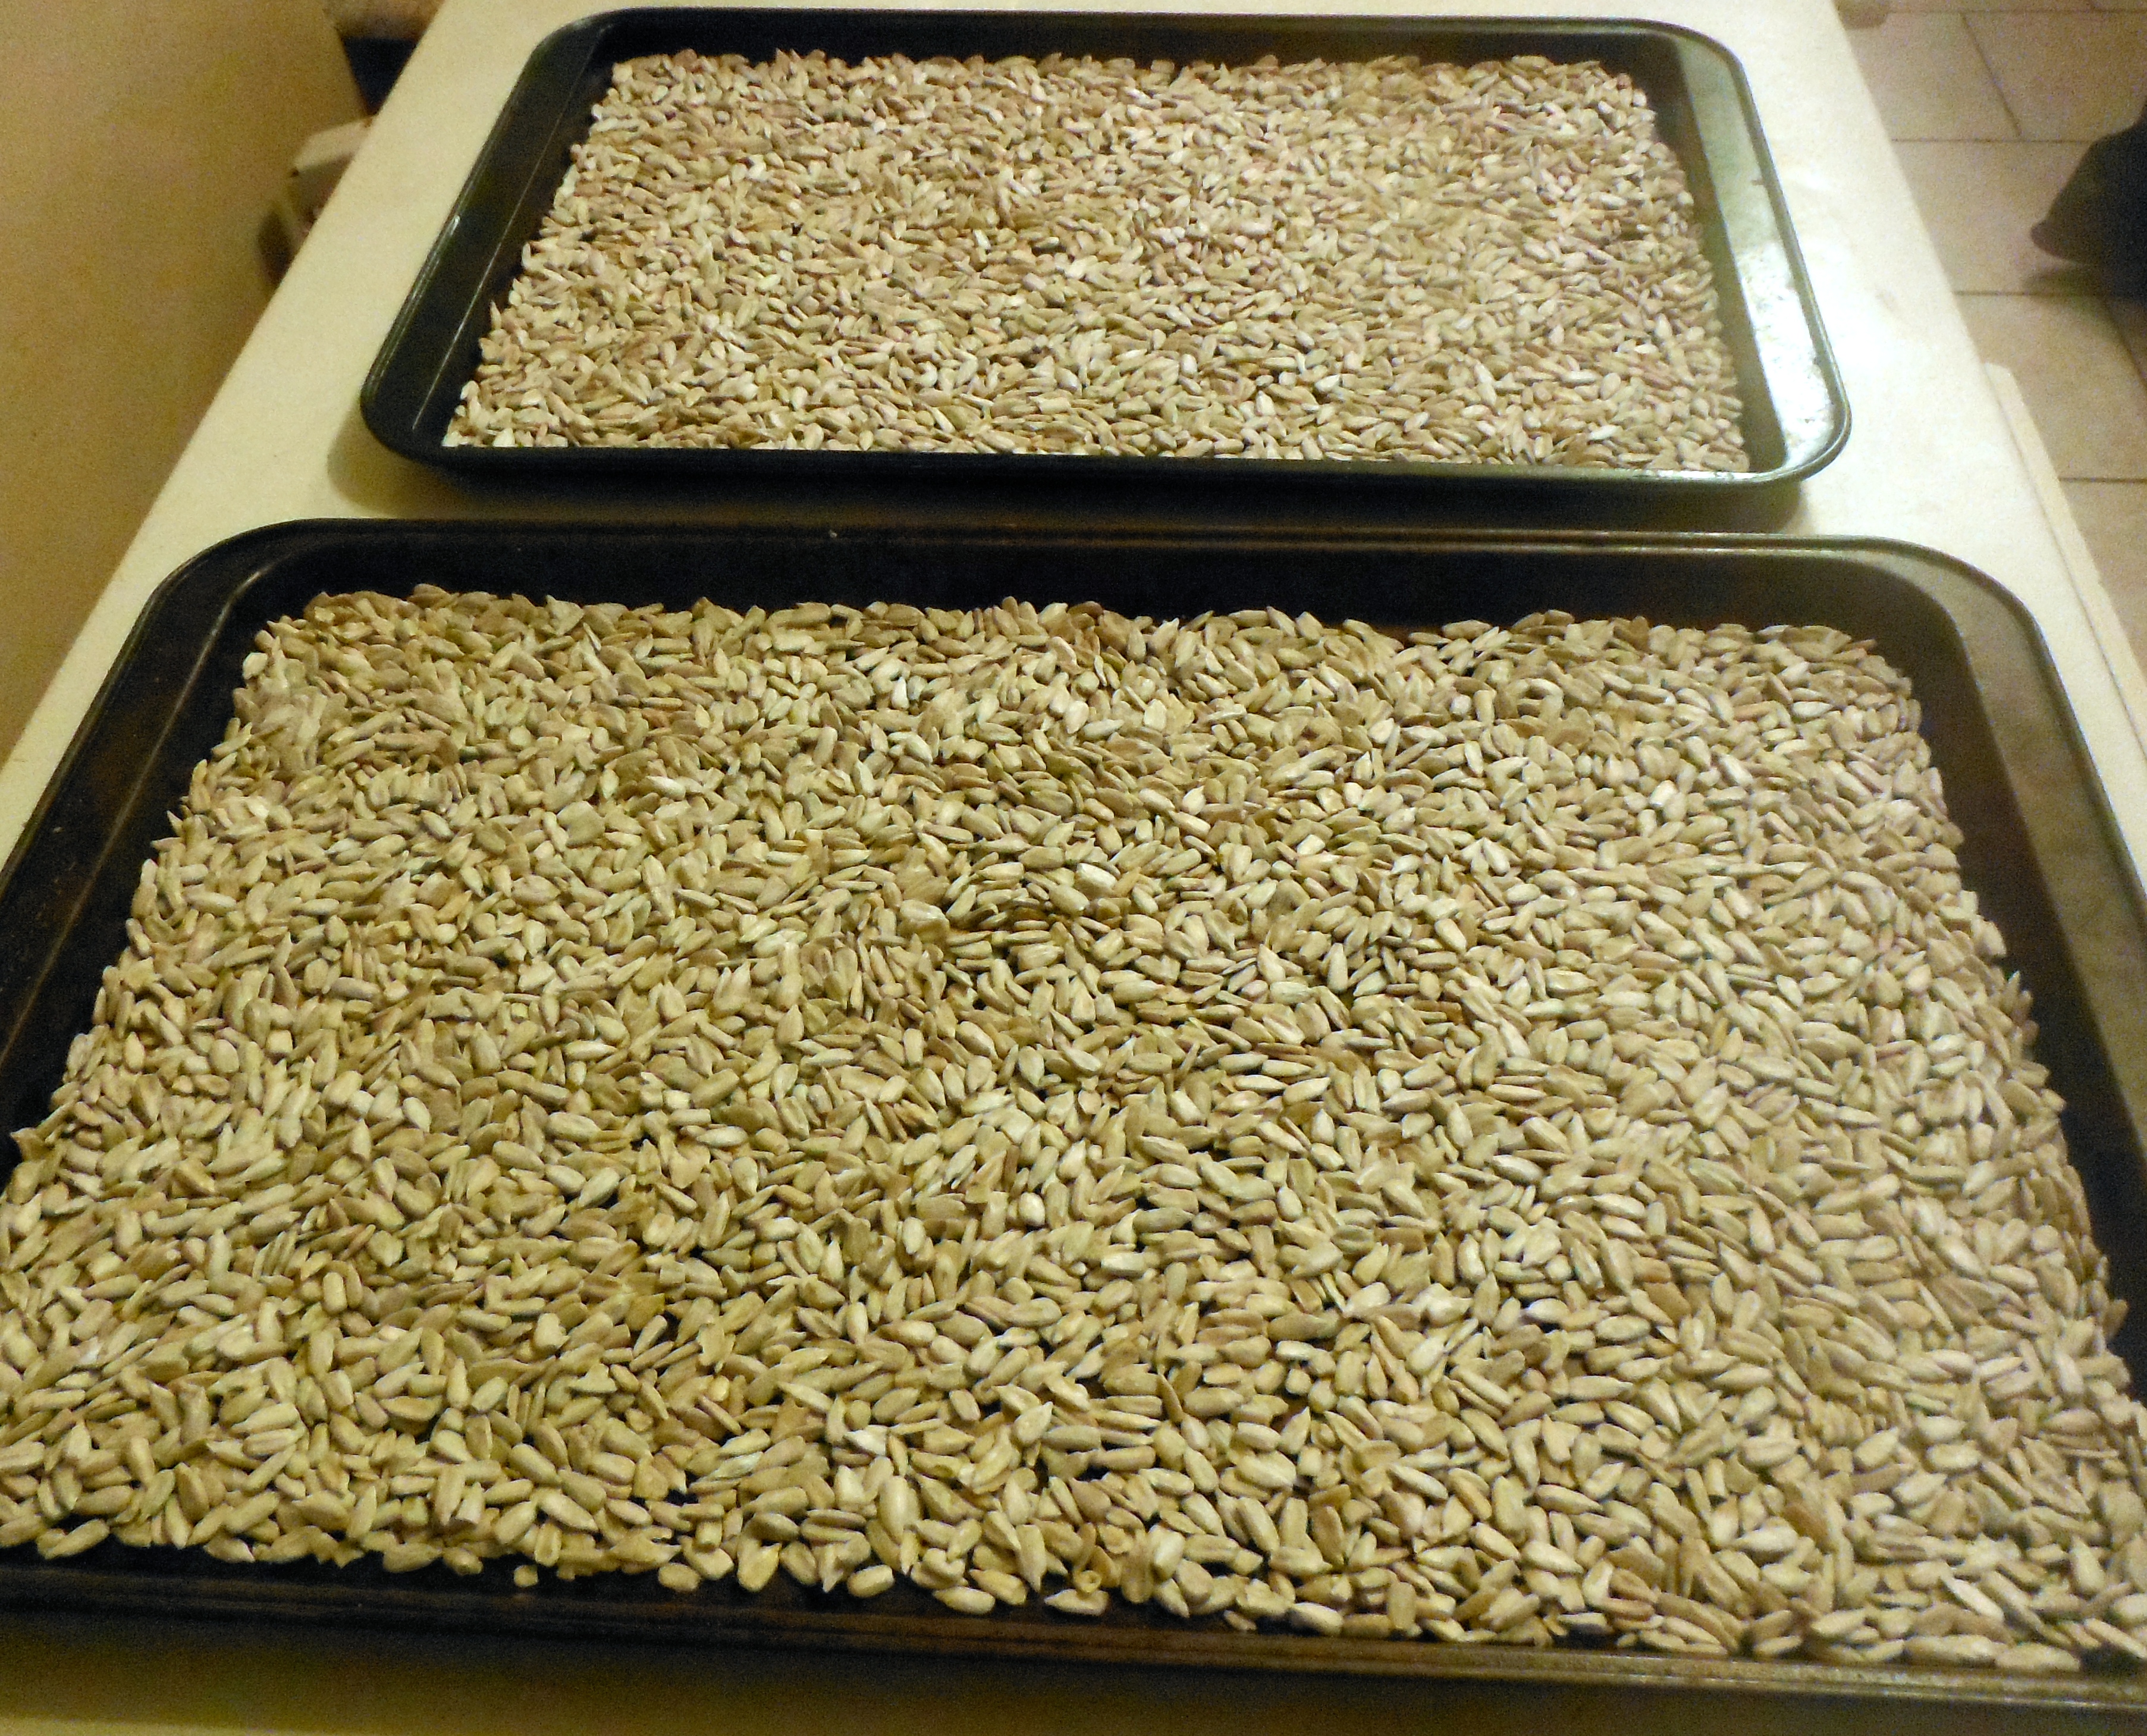
Toast until golden brown. Don’t burn!

Homemade Sunflower Seed Butter - Amanda Naturally   Homemade Sunflower Seed Butter - Amanda Naturally

Let seeds cool. Add avocado oil, sea salt and cooled sunflower seeds to to Blendtec or food processor. Blend on medium low, scraping down the sides.

Homemade Sunflower Seed Butter - Amanda Naturally   Homemade Sunflower Seed Butter - Amanda Naturally

Be patient! Eventually it will turn into a beautiful, creamy butter!

Homemade Sunflower Seed Butter - Amanda Naturally

Jar and store in the fridge.

Homemade Sunflower Seed Butter - Amanda Naturally


So tell me, what’s your favourite nut / seed butter and your favourite way to eat it?

Coconut Milk Parfait

Coconut Milk Parfait - Amanda NaturallyRemoving dairy from my diet was absolutely crucial in gaining my health back. As a child I always had stomach issues and in hindsight, dairy was likely the culprit. Not only was constant consumption (seriously, I was obsessed!) causing chronic low-grade inflammation in my body and setting the stage for recurrent ear infections and strep throat, it took a serious toll on my digestion. Let’s just say it slowed everything down to a crawl. I had to eat 3-4 hours before any exercise, otherwise I’d lose my meal! Knowing what I know now about exercise and nutrition – this is not ideal. Cutting dairy vastly improved my digestion (I can now eat half an hour before working out if I need to), helped my body heal from the chronic inflammation, reduced length and duration of illnesses that (rarely) get me and really opened my eyes to the dramatic healing that can occur by identifying food sensitivities. I haven’t looked back since and to be honest, I very rarely miss it!

The only thing I tend to miss is yogurt! Growing up in the 90’s and 00’s during the low-fat greek yogurt phase, I was fully addicted. Yogurt parfait’s were a regular occurance and oh how I loved them! Now there are cultured coconut and almond “yogurts” available at grocery and health food stores, but they tend to have questionable ingredients, so I avoid them. I was okay with just not having it – after 4 years of being truly dairy free you kind of forget what all those dairy-filled foods taste like! But suddenly this summer, I had a serious craving for yogurt out of nowhere. It was a hot morning, I was over my traditional egg breakfast and I just needed something fresh and cool. Enter the Coconut Milk Parfait!

I already professed my love for coconut milk in this post and this one. So I won’t go on and on about it. Just know this:

  • coconut milk is high in medium chain triglycerides (specifically lauric acid), a fat the body LOVES burning as fuel. Lauric acid is absorbed in the upper part of the small intestine, without any assistance from bile (i.e. it is very easy to digest, absorb and utilize). It is interesting to note that lauric acid is prominent in human milk – likely because it does not require a fully functioning digestive tract to be utilized!
  • most of its fat is saturated in chemical nature, so it oxidizes (goes bad) very slowly. This is one of the main reasons saturated fat is so healthy for you – stability!
  • it is naturally antimicrobial, so it fights fungi, bacteria and viruses in the body
  • it is full of satisfying fats that keep you full longer
  • it is delicious!!

Ok, so I ended up going went on and on after all. That’s how it goes with me – coconut is up on a well-deserved pedestal! 

Coconut Milk Parfait - Amanda Naturally

Coconut Milk Parfait
Serves 1
A delicious paleo, vegan, high-fat alternative to your standard yogurt and berries. It's allergen free too!
Write a review
Print
Prep Time
2 min
Cook Time
10 min
Total Time
12 min
Prep Time
2 min
Cook Time
10 min
Total Time
12 min
Ingredients
  1. ½ cup full-fat coconut milk (Aroy D is my favourite brand)
  2. 2 tbsp chia seeds
  3. ¼ tsp vanilla extract
  4. pinch of sea salt
  5. ½ cup blueberries (fresh or frozen)
  6. ½ banana, sliced
Instructions
  1. Combine coconut milk, chia seeds, vanilla and sea salt in a small bowl. Mix well.
  2. Place in the fridge and let sit for 10 minutes (or overnight).
  3. Top with desired fruit.
  4. Enjoy!
Notes
  1. If your coconut milk is particularly thin, you may need more chia seeds to thicken it up.
  2. Add nuts for a crunchy texture.
  3. Make in bulk on Sunday and have breakfasts prepared for the entire week!
  4. If you don't like the consistency of chia/coconut milk, blend the milk mixture after it has soaked for a while to achieve a smoother consistency.
Amanda Naturally http://www.amandanaturally.com/

Combine all ingredients in a small bowl. Mix well. 

Coconut Milk Parfait - Amanda Naturally
Let sit for a minimum of 10 minutes (while you’re getting yourself or the kids ready in the morning!) or overnight.

Coconut Milk Parfait - Amanda Naturally
Top with your favourite fruit, nuts or seeds. Or enjoy plain!

Coconut Milk Parfait - Amanda Naturally

What flavour combination are you going to try? Share in the comments below!

Mango Creamsicles [vegan, paleo]

Mango Creamsicles - Amanda NaturallyWhen the dog days of summer roll in, I really start craving ice cream. 

Who am I kidding…I always crave ice cream!! 

That’s all fine and dandy, except for the small issue of a severe dairy allergy, which makes enjoying ice cream a little more challenging for me than for most people. Added to that allergy is a fierce aversion to any ingredients that fall into the fake, chemical, artificial, risky, highly processed or questionable categories. So needless to say, most commercial ice creams are simply not options for me. Yes that includes dairy-free ice creams too! Here’s why:


Case #1 – Rice Dream Vanilla Frozen Dessert

Ingredients: filtered water, organic brown rice syrup, organic agave syrup, organic rice dextrin, organic expeller pressed sunflower oil and/or safflower oil and/or canola oil, natural vanilla flavour with other natural flavours, organic tapioca starch, soy lecithin, sea salt, organic guar gum, carrageenan


Case #2 – So Delicious Chocolate Coconut Milk Non-Dairy Frozen Dessert

Ingredients: Organic coconut milk, organic agave syrup, chicory root extract, cocoa, carob bean gum, guar gum, natural flavour


Does that list strike anyone else as odd? Shouldn’t ice cream be made from mostly cream, sugar and vanilla? What the heck are those other ingredients in there for? Let’s break it down:

  1. Brown rice syrup & agave syrup: sugar alternatives
  2. Rice dextrin: a dextrin is a starch (in this case rice starch), which has been treated with either an enzyme, an acid or an alkali to create a string of glucose molecules. It is used as a thickener.
  3. Organic expeller pressed sunflower/safflower/canola oil: an industrial seed oil, touted as heart-healthy by the powers that be, which were originally meant for paint and machinery (heaven forbid there is any real fat or cholesterol because that stuff will kill you!)
  4. Tapioca starch: a thickener
  5. Soy lecithin: an emulsifier, made from non-organic (therefore GMO and pesticide-laden) soy. Emulsifiers allow fat to dissolve into water.
  6. Guar gum: a powder derived from guar bean, a legume. It is used in food production as a thickener, an emulsifier and a stabilizer. It prevents the product from separating.
  7. Carrageenan: a polysaccharide extracted from seaweed, often used in lieu of gelatin to thicken food products. It also acts as an emulsifier and stabilizer. There is controversy around the safety of heavily processed carrageenan, with some research showing an association with intestinal ulcers and neoplasms. In my own experience, I find it very irritating to the digestive tract and choose to avoid it.
  8. Chicory root extract: made from the root of the flowering chicory plant. The root is most commonly used as a coffee substitute. It also contains inulin, which is an insoluble fibre, known for its prebiotic activity. It is used as a thickener and mild sweetener.
  9. Carob bean gum: a powder derived from the carob bean, a legume. It is also known as locust bean gum. It is used as a thickener and an alternative to cocoa.

So why are all of these ingredients necessary? Well first of all they’re not, but that’s besides the point. What’s going on here is an attempt to mimic the chemical composition of cow milk. Milk is what is known in the science world as a colloid – a bunch of tiny fat droplets suspended in water. Now in order to mimic this using water and an industrial crop oil such as canola, all sorts of emulsifiers must be added to the mixture to force it to become a colloid. The right mix of emulsifiers, thickeners and stabilizers can turn water and oil into an ice cream evil clone. It sort of feels the same, but deep down you know it’s not right! 

The coconut version is definitely a better option, because it embraces the naturally high-fat composition of coconut milk, eliminating the need for adding a crop oil to water and forcing them to mix. However it still contains chicory root, guar gum and carob bean gum. Since guar gum and carob bean gum are legumes, and I don’t particularly enjoy migraines (trigger), the lesser of 2 evils is still evil to me!

Now that your favourite non-dairy ice cream is starting to look a little questionable (sorry!) how about a delicious and easy alternative that will totally satisfy kids of all ages? Made with only 2 ingredients, my Mango Creamsicles are a guaranteed winner! As always, I will be using my favourite brand of coconut milk – Aroy D

While you can use any popsicle mould, try to find a plastic-free version if possible. I was super thrilled to find these silicon popsicle moulds on Amazon and promptly bought 2 packs!

Mango Creamsicles - Amanda Naturally

While I have never made this recipe in an ice cream maker (I don’t own one – yet – hint hint oh hubby dearest!), I have a feeling it may turn out pretty well. If I end up the owner of an ice cream maker, I will give it a shot and report back, but until then they will stay in popsicle form for me. Enjoy!

Mango Creamsicles [vegan, paleo]
Serves 8
Homemade mango creamsicles made with 2 ingredients. Easy, healthy, delicious and kid-friendly!
Write a review
Print
Prep Time
10 min
Total Time
10 min
Prep Time
10 min
Total Time
10 min
Ingredients
  1. 1 cup Aroy D coconut milk
  2. 2 ripe ataulfo mangos
  3. pinch of sea salt
Instructions
  1. 1. Combine all ingredients in a food processor or blender.
  2. 2. Blend on high until a very smooth consistency is achieved.
  3. 3. Pour into popsicle moulds and freeze.
Notes
  1. Run under hot water for 10 seconds to help the popsicle release from the mould.
  2. I am sure you can use any type of mango (or fruit for that matter) but the ratio of fruit to milk might change. Green mangos tend to be a lot larger than ataulfo's, so you likely will only need 1!
Amanda Naturally http://www.amandanaturally.com/

Combine all ingredients and blend. Check out this amazing trick for preparing mangos! 

Mango Creamsicles - Amanda Naturally

Pour into popsicle moulds and freeze. Mine don’t stand up on their own so I put them in a pint glass. 

Mango Creamsicles - Amanda Naturally

Run under hot water and enjoy! 

Mango Creamsicles - Amanda Naturally

This recipe is flexible and adaptable to any ingredients that you have on hand. Get creative! What other flavours are you going to try? Share in the comments below!


Copyright 2014 Amanda Naturally | Design by The Nectar Collective