Tag Archives: newborn

Newborn Baby Equipment

Favourite Equipment = No Equipment

Before my baby shower, a lot of people were surprised that I didn’t register for some typical baby items like a Bumbo, an Exersaucer, a Jolly Jumper, Swings, Activity Mats etc. So I thought I would share a few resources as to why we didn’t.


But before I do, please note, there is no judgement coming at you from this post, it’s simply a window into our approach regarding our baby’s physical development. Every parent is just trying to do their best!


Since we’re very health-conscious, but musculoskeletal development is not our speciality, we sought out information from trusted sources like our functional chiropractors. As such, our overarching philosophy towards physical development with our baby boiled down to this:


Do not place the baby in a position she is not developmentally ready for. Once she has mastered the skill on her own, we can use equipment occasionally, but not before.


Rationale

Let’s take the hugely popular, Bumbo as an example. The whole ideal behind the Bumbo is to help babies sit upright, who cannot yet sit up on their own. Good in theory. Not so great in practice. Babies typically sit up on their own in the 6-9 month window. By placing them in seats like the Bumbo (or other chairs), not only do you slow down their progress (the wobbling is key for developing stabilizing muscles); it creates an environment for developmental imbalances, by forcing the pelvis into a posterior tilt, shortening muscles, weakening others; and becomes risky as some kids fight to get out of the unnatural position. More info here.

The same can be said for the Exersaucer or Jolly Jumper, which artificially places babies in a standing position, before their joints (hips, spine) and muscles are developmentally ready to handle those loads. It is also the reason why Not To Help A Baby Walk Before They’re Ready.

For more information from specialists in this area, check out Grazed & Enthused’s article on The Risks of Baby Equipment (she’s a paediatric OT) and CanDo Kiddo’s article on How To Know If Your Kid Is Ready For A Chair (another paed OT).

What I Did Instead – Tummy Time & BabyWearing

If you want your kid to develop the muscles for sitting, crawling, rolling etc. they need to use them! And they need to use them in a way that follows the natural developmental progression. This starts with moving their eyes around, then turning their heads, then trying to lift their heads… all of which happens during Tummy Time.

Now, Tummy Time does not mean you take an infant who has been on their back or in your arms their entire life, and throw them face down on the floor. That’s totally not fair, and it makes sense that they hate it. It’s scary because they don’t have the muscles to even lift their heads up. Instead, you can start Tummy Time from the day they are born, by having them lie on their tummies, on your chest on an incline. Our 2 day old baby girl could lift her head up in this position, so by the time she was a few weeks old, Tummy Time was a breeze. Katy Bowman discusses the math and physiology behind Tummy Time here.

From about 6-8 weeks onward (after she “woke up”), anytime she wasn’t nursing, sleeping or being carried in our arms, we had her on the floor. I swear because of that (combined with her personality), she was rolling across the room with intention by 4 months, sitting on her own at 5 months and crawling like a maniac by 6 months. She’s almost 7 months at the time I’m writing this and she pulls herself up to standing easily, and is currently practicing letting go and clearly trying to figure out how to make her feet move in that position. Granted, this is also part of her personality (I ran at 9 months), but I truly believe that we provided the environment for her to develop at her desired speed, by not providing her with anything!!

Now, in order to get things done (groceries needed to be bought, food cooked, dog walked, fresh air experienced), I also wore her a lot. Not all day, every day, because I knew that wouldn’t be good for my body, but I definitely had her in a baby carrier at least an hour every day, sometimes for a few hours on high-needs days (or for naps during her refluxy period). This had a hugely positive impact both on my psyche (2 hands free! Sun!) and her development as her muscles continued to be challenged in a positive way that facilitated development. By 2-3 months the 2 compliments we kept on receiving about our baby girl was (1) how alert she was – she was able to be alert because she could see everything by being on me, and (2) how strong she was – baby wearing for the win! 

It Takes A Village…

Humans developed in small villages, where everyone helped raise the children. This whole concept of a mom being at home, by herself, all day every day to take care of her child(ren) is fairly absurd, anthropologically speaking. So that’s where equipment comes in. Baby equipment is a babysitter, and when used like that, it can be really helpful and keep babies safe. I had a few things that I used occasionally, to allow me to go to the bathroom or prep dinner when baby wearing wasn’t an option. Here are my favourites:

  1. Baby Bouncer. This mostly reclined bouncer stayed in the kitchen, and was only used during meal prep. We removed the toy-bar to reduce stimulation (and let her decide where to look) and didn’t bother to turn on the vibration. It kept her off the hard floor, but almost on her back, while we prepared food. We could interact with her, but also get dinner made!
  2. Floor Mat. In order for floor time, you need something cushy! We also did a ton of naked time, so protecting the floor was also key. The Prince Lionheart PlayMat is my favourite! We originally had a foam puzzle piece mat, but she quickly learned to pull the pieces up and I didn’t love her chewing on foam… enter this mat which is useful from Tummy Time all the way to Toddler Hood. I love that it’s non-toxic too!
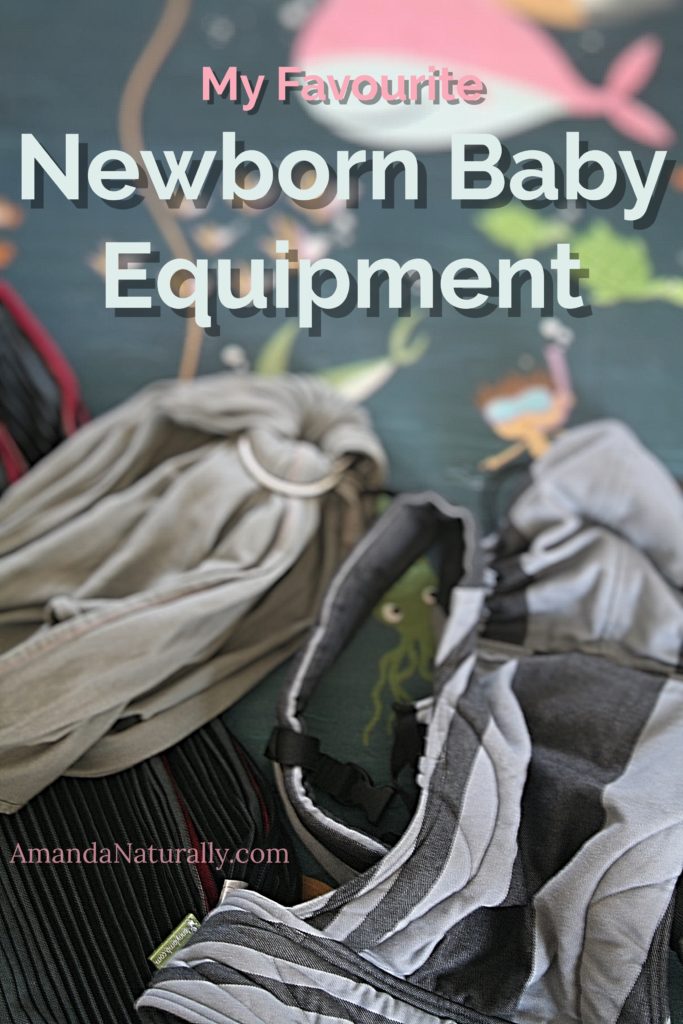
  3. Newborn Wrap (6-10 weeks). I had a MonkeyWrap, which my girlfriend no longer needed, but a similar stretchy wraps is the Boba Baby Wrap. The stretchy wrap allows you to fit both your body (and your partner’s!) as well as the baby’s (regardless of what they’re wearing), so it’s a perfect, and comfortable fit every time. The only downside is you need to learn how to wrap, but once you do, you quickly become a pro. My friend taught me only a few days after baby girl arrived, and it totally changed my life. I had so much more freedom already! I would wrap it on me before I left the house, and pop her out of the carseat and into the wrap to do errands. Bonus is it kept strangers hands off my newborn baby! I also used this to walk the dog starting 3 weeks PP. My husband loved this – it was his “boobs” when I needed a shower and the kiddo really needed me! Haha! 
  4. Soft-Structured Carrier (starting at 4-6 months). There are SO many options – with the Ergo being the most common – but a quick look through a baby wearing Facebook group and you’ll see there are lots of great carriers. I have a LennyLamb which I LOVE. Other popular carriers are the Tula, LilleBaby, Baby K’Tan, Mei Tai, Chimperoo… Lil Monkey Cheeks is my favourite (local) place for information about and purchasing carriers! NOTE: babies should only be worn facing you, with their knees above their hips. Facing out creates undesired pressures on their hips and pelvis, which can potentially lead to developmental issues.
  5. Woven/Ring Sling. Since I was really into wearing her when I needed to get stuff down around the house, instead of placing her in an exersaucer, I had several wraps. I invested in a Woven and a Ring Sling for the period in between the newborn phase and when she was big enough for the soft-structured carrier. A woven is a little more complicated, because it’s just a long piece of fabric and you need to learn how to wrap the baby in it, but I had practiced with my MonkeyWrap so I loved my woven. The Ring Sling was my husbands favourite becase it was simple to use. I used the woven for longer periods of wearing her, like walking the dog, and the ring sling for lots of in-and-out, like errands or around the house. I got mine from Lil Monkey Cheeks. I exclusively use our soft-structured carrier now, but I can imagine using the woven again when she gets large enough for back carries!


So mamas, what things could you not live without during those newborn months??


How to Help a New Mom

The first few days postpartum was something I thought about (and worried about) a lot the last few weeks before baby girl arrived. I had no idea how I would feel and what I would want – both physically and emotionally – but I knew that as an introvert (def: recharging on your own, as opposed to recharging in the presence of others) I might struggle with some of the current societal norms. I spoke with a dear friend about this a lot, and she had some amazing advice (in hindsight), but at the time I felt like I simply couldn’t follow it. And holy moly I wish I had. So, as I do with all of my life experiences – I am learning and growing, I will make changes next time (if there is a next time), and I hope to share with others to help you on your own journeys. 

On that note, the most important thought I can offer, based on my postpartum experience, is this: Immediately after the arrival of a baby… 


How To Help A New Mom | AmandaNaturally.com


Time & Space

The most important thing for recovery from labour, to encourage bonding, to establish breastfeeding and to protect against PPD is to spend the first few days in bed, with your baby, with constant skin-on-skin contact. It is incredibly unhelpful thing to feel the pressure to get out of bed and visit, especially if it means handing over your baby.

In my experience, I was in pain, bleeding, covered in other fluids (both from labour and from the baby), exhausted, worried, emotional and already on a super steep learning curve that did not include any sleep for mental or physical recovery. I needed more time.

Here is how you can help a new mom, by giving her the gift of time and space:

  1. Avoid visiting in the first 24-48 hours. Even if you’re family. This might sound extreme, but I stand by it. I had my mom with me, and I would definitely do this again, but the reason for that is she was there 100% for me, not for my baby. She made me food, did laundry and only snuggled the baby to-and-from the change table, so I didn’t have to get out of bed. She was a godsend.
  2. If you are anything outside of immediate family, consider waiting a few weeks to visit.
  3. If you are family, limit the number of your visits. The big part of my physical recovery took about 3 weeks. So for those first 3 weeks, every day I needed to rest, most of the day. I also needed at least one nap every day, and – for my own sanity – I needed to try to do one thing like shower, or change my clothes, or even make a batch of muffins (which were critical for overnight breastfeeding sessions). A visit usually prevented me from doing both of those.
  4. Limit the duration of your visit. I recommend 20-30 minutes max, those first few weeks. I could barely manage a 10 minute walk even at 3 weeks postpartum. Getting down the stairs week 1 was a trial – and I was lucky not to have a c-section or any stitches to recover from! 
  5. Please, do not expect to hold the baby. It might happen, but it might not. New mom instincts are powerful. There were many times that I cried when I got my baby back – out of sheer relief – which sounds silly, but it is what it is. Hormones are super intense, especially postpartum. The only time I felt right, was when I was holding my baby.
  6. Be flexible and understanding. Breastfeeding sessions the first few weeks are SO long. Anywhere from 40 minutes to 2 hours. And you often only have an hour at most in between. This reinforces the importance of earlier points.


Help

We needed help. I might have looked like I had my sh*t together (and in some ways I was fairly prepared) but oh boy I did not. I really needed help, in any way shape or form. 

Here is how you can help a new mom, by giving her the gift of help:

  1. Bring nourishing food. (If the mom in question has dietary limitations, like me, just keep it simple – chicken and salad, roast potatoes, healthy muffins). I couldn’t get my brain to think about making food for weeks and weeks. Thank goodness my husband is not only great in the kitchen, but enjoys it. 
  2. Do the dishes or clear the dishwasher.
  3. Throw on a load of laundry.
  4. Pick up a few groceries.
  5. Play with the other children (this is especially important if baby #2 has just arrived, since the firstborn will likely be feeling left out!).
  6. Walk the dog. Even for 15 minutes.
  7. Ask, really ask, what you can do to help. Most people will say “nothing”, so try offering a few suggestions.

Gentle reminder: holding the baby so a mom can do these things, is not very helpful during those first few weeks. However, it does become very helpful as time passes!


Take Aways

Every individual in unique, and depending on a mom’s tendency towards introversion or extroversion, as well as the nature of her birth and immediate postpartum experience, some of these recommendations might be too much, or actually might be not intense enough. My intention with this post is to plant some seeds, for both expectant mothers and those around them…

To help new moms know what they might need.

To help those around new moms, who love and support them, know how to do just that.


Pre-Baby Food Prep

I can’t tell you how many people have told me to “just relax, whatever you do before hand, you will inevitably end up eating take out most of the first few months with a newborn”. Aside from the fact that nutritionally, I couldn’t imagine trying to heal/recover from pregnancy, labour & delivery on takeout, OR creating breast milk from nutrient-deplete foods, I know that I simply cannot eat those kinds of foods if I want my body to work properly (more on my health journey here!).

  • Gluten and vegetable oils will instantly cause massive inflammation in my body, specifically joint pain (E.g. once during my pregnancy I had multiple vegetable oil exposures over the course of 3 days and on the 3rd night I woke up in tears with bilateral pulsing pain of my hands, wrists and elbows. Yeah, not fun.)
  • Dairy causes massive digestive distress in me, but it’s also the food my husband is highly allergic to (instant congestion – with a history of asthma – followed by bad eczema that takes months to go away), so since we’re both very reactive, I’m not going to expose our little one to milk before he/she has developed a solid gut. Odds aren’t super great for him/her tolerating dairy well.
  • Gluten-free flours contain corn (which really does a number on my gut), so even gluten-free options are not really options in my world (other than Cup of Tea Bakery which uses rice, tapioca and potato as their flour – no corn! Except some of their products use quinoa and/or bean flours, so I still have to be quite careful.)

While others may think that I’m just Type A-ing it, or being obsessively healthy, not being prepared food-wise is a disaster waiting to happen for me. And by disaster I literally mean PAIN.

So in an effort to prevent pain (as well as set the stage for my healing/recovery and kicking off my kiddo’s postpartum nutrition well), I started stocking my freezer and keeping my pantry full, when I was around 7.5 months pregnant. Here’s what I did…

NOTE: I’m sure I’ll do a follow up post after the baby arrives about how beneficial and/or useless this was, or what I should have made. LOL


Pre-Baby Food Prep

Freezer Meals

Chicken “Noodle” Soup – We got a bunch of soup birds from our favourite farm – The Shulist Family Farm. Starting in July, I would make a batch of broth in my instant pot, pull off the meat and turn it into soup. I always add white rice, because we both tolerate it great and I know I’ll need lots of carbs once the baby comes.

Easy Paleo Hamburger Pie – I tripled the recipe (and made a few mods like adding sautéed onion and a broth/tomato paste combo in lieu of tomato sauce). Had one batch for dinner and leftovers. Froze the other 2 portions!

Banana Muffins – I made 2 dozen of these delicious, high-fat, high-nutrient (nut-free!) muffins, as well as another 2 dozen lemon blueberry, following more closely to the original recipe.

Mom’s Spaghetti Sauce – I tripled this recipe (which is already doubled) and froze multiple litres in 2 cup portions, which will be perfect for last minute meals like spaghetti squash bolognese.

Chicken Liver Pate – anyone who follows me on Instagram knows this is my go-to recipe for getting liver into me! Why liver you ask? Check out this post! I doubled up the recipe and portioned it into 10 half cup servings. Not only will liver help me stay nutrient-replete while nursing, but it will also provide lots of life-giving nutrients to kiddo (specifically folate, vitamin A, D, K2 and all the B’s), AND give me what I’m sure will be a much-needed energy boost.

Bone Broth – like it’s going out of style. Go read the post on bone broth for the health benefits (healing, building new tissues) and you’ll see why I prioritize this incredible food. I’ve got lots frozen in little pucks, ready to be added to rice, last-minute soups/stews or slow/pressure-cooked meats. My Instant Pot is also always ready to make more broth, as soon as I run out!

Mirepoix – I pre-chopped about 20 cups of onion, carrot and celery, flash froze on lined baking sheets and then stored in large ziploc freezer bags. Pre-prepared mirepoix will make slow/pressure cooking SO easy. Take any piece of tough meat (brisket, chicken thighs, pork shoulder), throw in a few handfuls of mirepoix and a puck or 2 of bone broth and you’re good to go.

Mexican Chicken Soup – from Against All Grain‘s 2nd cookbook, Meals Made Simple. So delicious!

Sweet Potato Flatbreads – This is one of my favourite of Diane SanFilippo‘s recipes, so I quadrupled it! I love them thrown in the toaster and slathered with ghee. Or as a sandwich for a fried egg. So good!

Lactation Cookies – but I modified them to be nut-free, since I don’t do great with large volume of almond flour. I also added blessed thistle and fenugreek (2 research-based galactagogues), omitted walnuts & chocolate chips, and added collagen.

Burger Patties – every time I’ve made something with ground meat over the last few weeks, I pulled out twice as much meat as I need. So normally I would use 1 lb ground beef for 4 burgers (one each for dinner, leftovers for lunch) or taco night/leftovers. Now I grab 2lbs (and often a combo of ground beef & ground pork – such a solid flavour combo), and do what I normally do, while also making 4 extra patties to flash freeze. I quickly amassed a few dozen burger patties! This isn’t anything too complicated, but you can cook a burger patty from frozen, and a ¼ lb of meat thaws a lot quicker than an entire pound. 

Additional Recipes I Plan To Make (pending early arrival)

Chili (but I’ll add beef heart because, nutrients), Ginger Carrot Soup, Butternut Squash Soup (but I’ll go easy on the thai curry paste, probably just use a little yellow curry paste instead of loads of red like I normally do!) and likely more muffins…


Pantry/Freezer Stock 

Carbs/Starch

  • Sweet Potato Noodles (found in the rice noodle section of Asian grocery stores)
  • White Rice (which is always cooked in bone broth)
  • Sweet Potatoes (for fries or quick hashes like this one)
  • Green Plantains
  • Inka Plantain Chips (from Dollarama)
  • White Rice crackers
  • Frozen fruit (mango, organic berries & cherries – all from Costco)
  • Dates and figs

Protein (our favourite meat places are Shulist Family Farm and BrookersMeat.com)

  • Ground beef & pork for quick meals like burgerstacos and chili
  • Sausages
  • Canned tuna, sardines & salmon
  • Frozen wild salmon (from Costco) for my go-to, super-fast Salmon en Papillote 
  • Lots of roasts/large pieces of meat like pork shoulder, tip/blade roasts and brisket for easy, high-volume slow/pressure-cooker meals like pulled pork and shredded beef (hello leftovers!)
  • Vital Proteins Collagen Peptides (for anything liquid!)
  • Prairie Naturals Grassfed Whey Protein (for smoothies)

Fat

  • Aroy D coconut milk (free of all additives), for smoothies, puddings and soups!
  • My 3 favourite oils: olive oil, avocado oil and coconut oil (all from Costco!)
  • Ghee (I make my own following these directions with Rolling Meadow grassfed butter)
  • Shredded coconut 


Perishables

  • eggs (multiple dozens since they last so long and cook up so quick!)
  • veggies with a long fridge-life like kale and broccoli would be my typical go-to’s (and I’ll still eat them), but they also tend to be slightly notorious for causing belly distress in little one’s, so this will be a bit of an experiment. I can eat an entire head of cauliflower raw, or a massive bowl of cabbage, and have no gut reaction, so it might be okay!
  • boxes of pre-washed organic spinach and baby-kale
  • organic apples & pears (things you can eat with one hand!)


Beyond Babies

While this post is specifically about what I did to prepare for baby’s arrival, there are a lot of great tips that can be totally applied to your normal, every day life. Making a double batch of something and freezing for last minute meals, keeping healthy muffins on hand, stocking your pantry with delicious and nutritious items – these habits will help keep you on track and healthy throughout your life!


Okay mamas, help a newbie out! What else should I be making to get ready for kiddo’s arrival??


Copyright 2014 Amanda Naturally | Design by The Nectar Collective