Hands down my favourite days to cook are Sundays. I am often at home for a good chunk of the afternoon, so I have the ability to get fancy and creative in the kitchen! I’m talking slow-roasted ribs, braised chops, roast duck (new accomplishment as of yesterday)…oh how I wish every day was like Sunday!
http://instagram.com/p/tgnok4C9id/?modal=true
But alas that’s not how life works. And to be honest, I love work, and Sundays are the only day I don’t work, so if every day was Sunday, I wouldn’t be able to do what I love.
So what do our week day meals look like?
Often it’s pork chops, burgers or sausages. But there are days that we get home from the office at 8pm and you can bet that we are STARVING at that time! Those nights we try to get dinner together as quickly as possible! What can I throw together in 10 minutes or less???
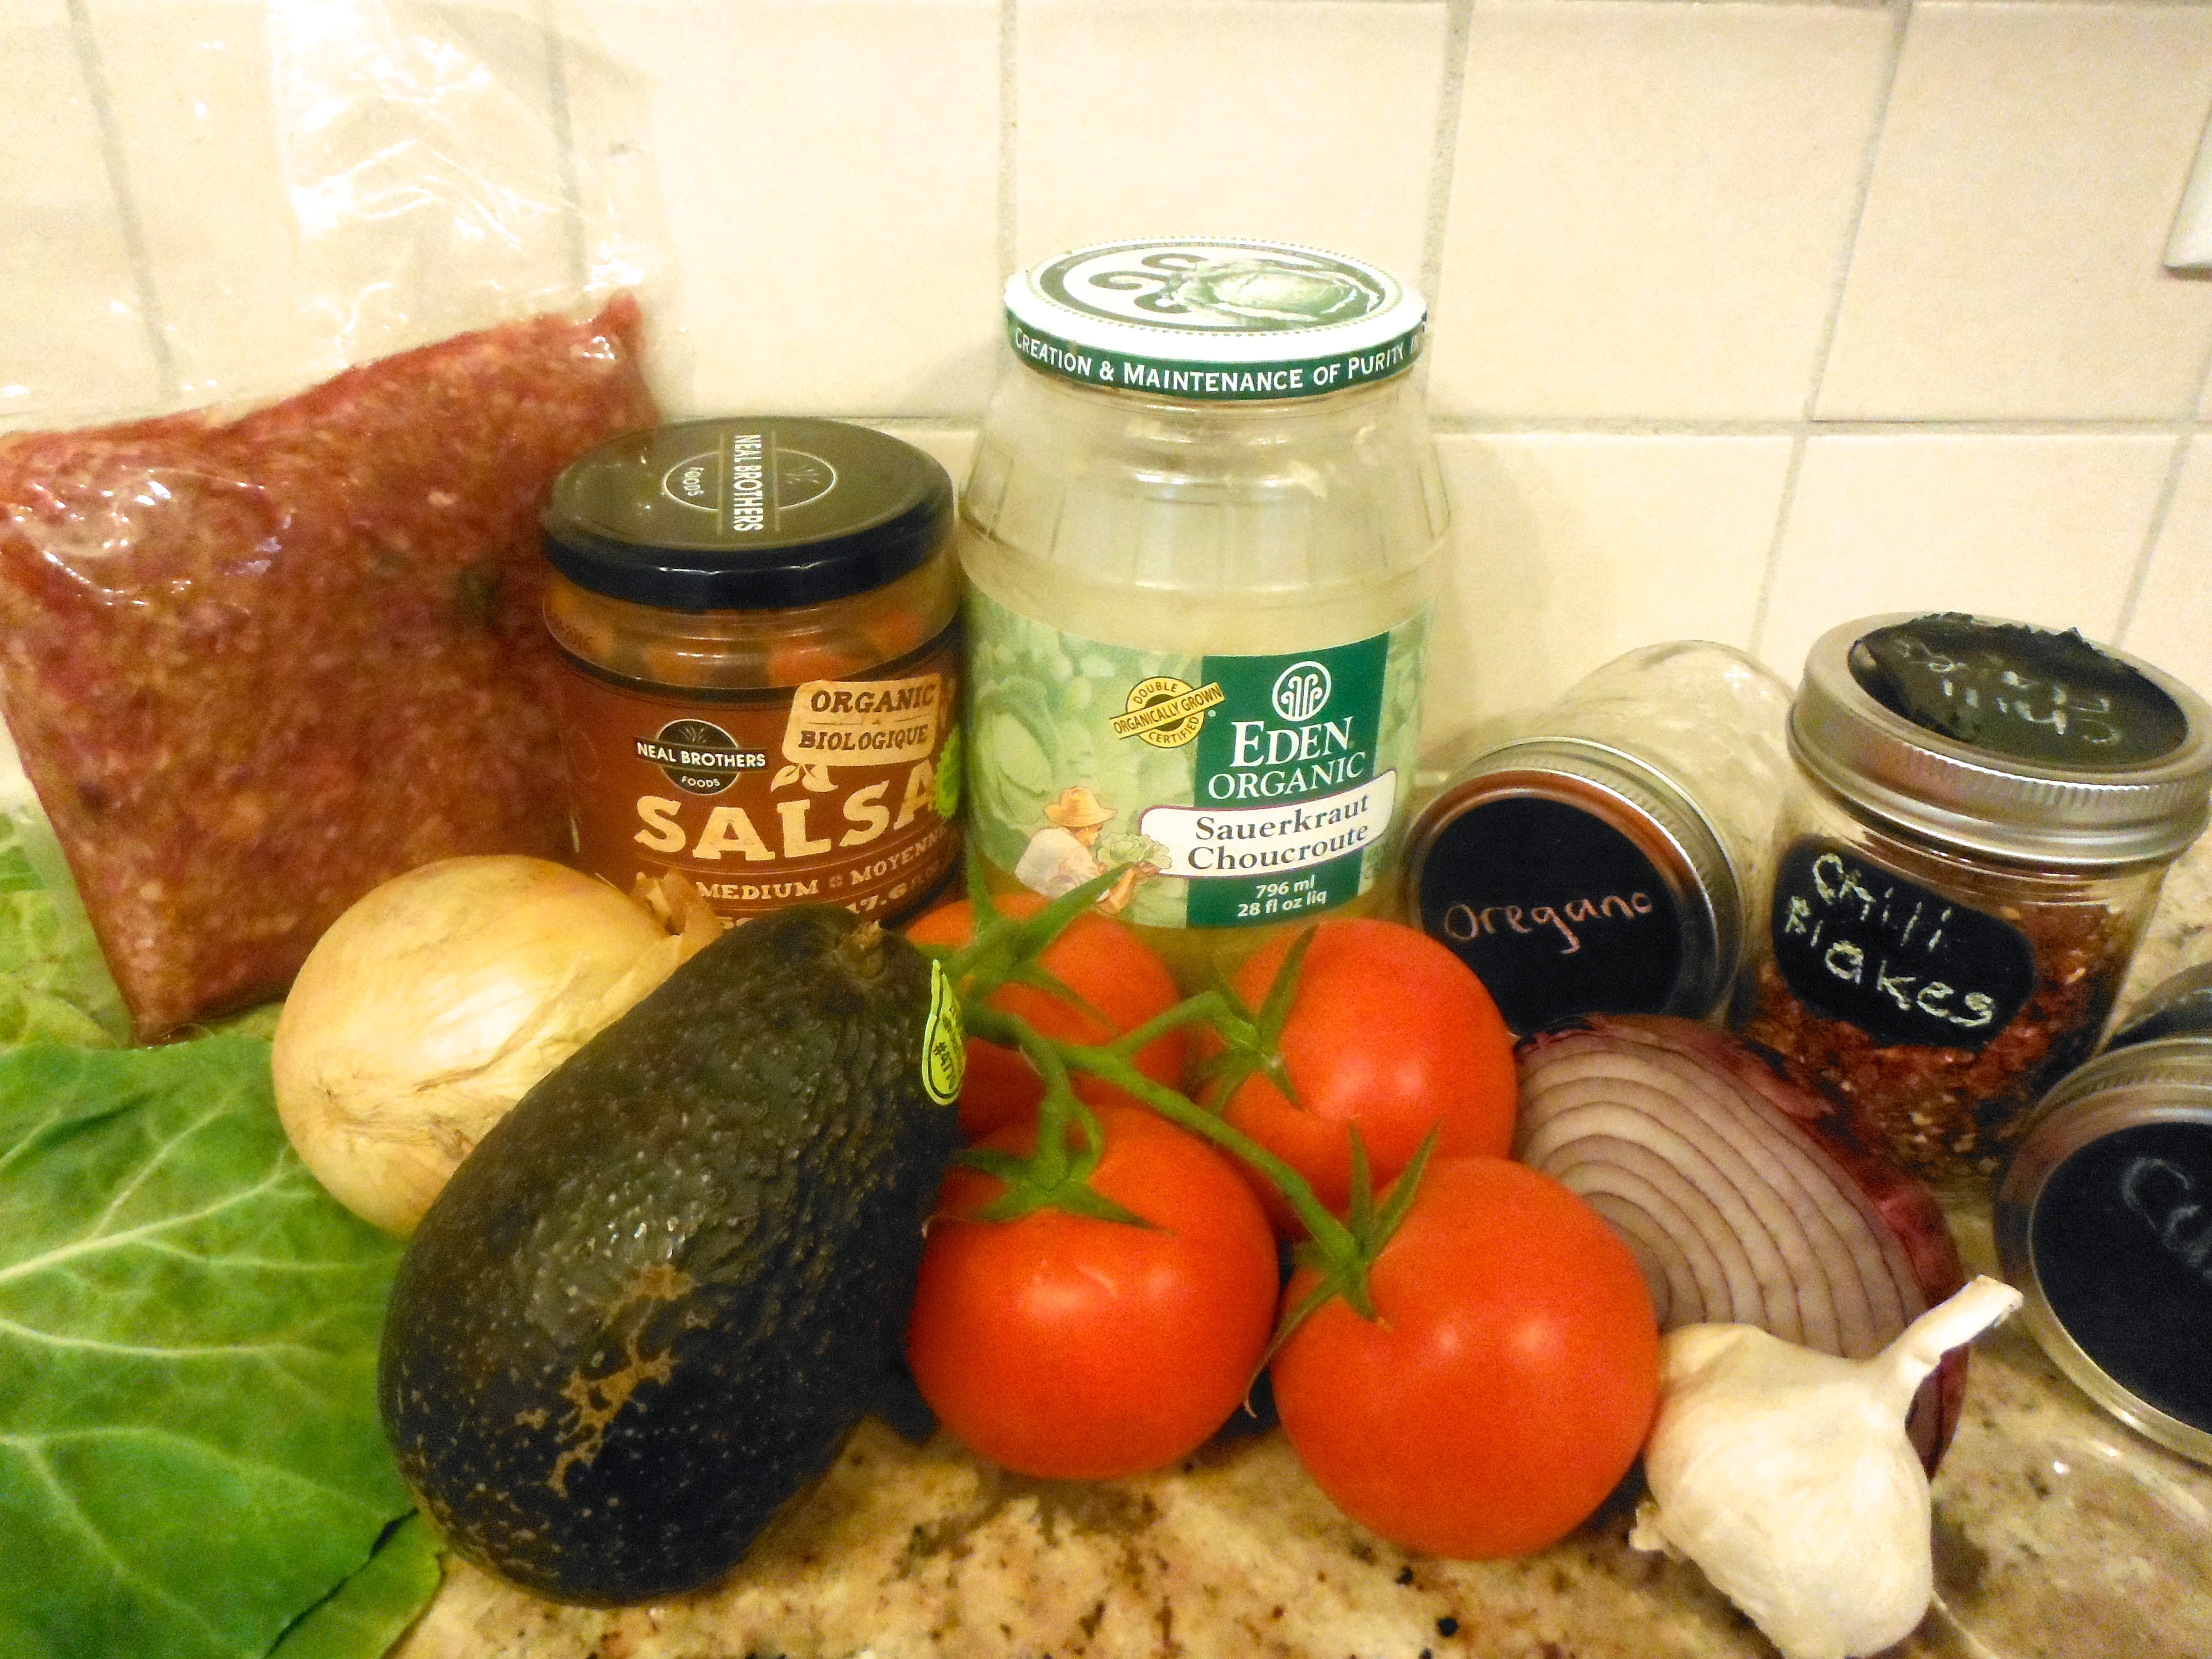
Lettuce Wrap Tacos!
The best part? You can get as fancy as you want, or keep it simple and straight forward. It can also be modified to any diet – autoimmune protocol, low-carb, dysbiosis protocol, SCD, GAPS. Odds are you have most of these ingredients in your kitchen right now!
Optional prep step: Sautee onions and garlic in some fat (coconut oil, organic lard / tallow, bacon grease) for a few minutes.
Step 1: sautee 1 lb ground meat (pork, beef, chicken, turkey). We buy our meat from Brooker’s.
Step 2: season liberally with sea salt and pepper
Optional seasonings: cumin, chili powder, chill flakes, oregano, hot sauce, paprika
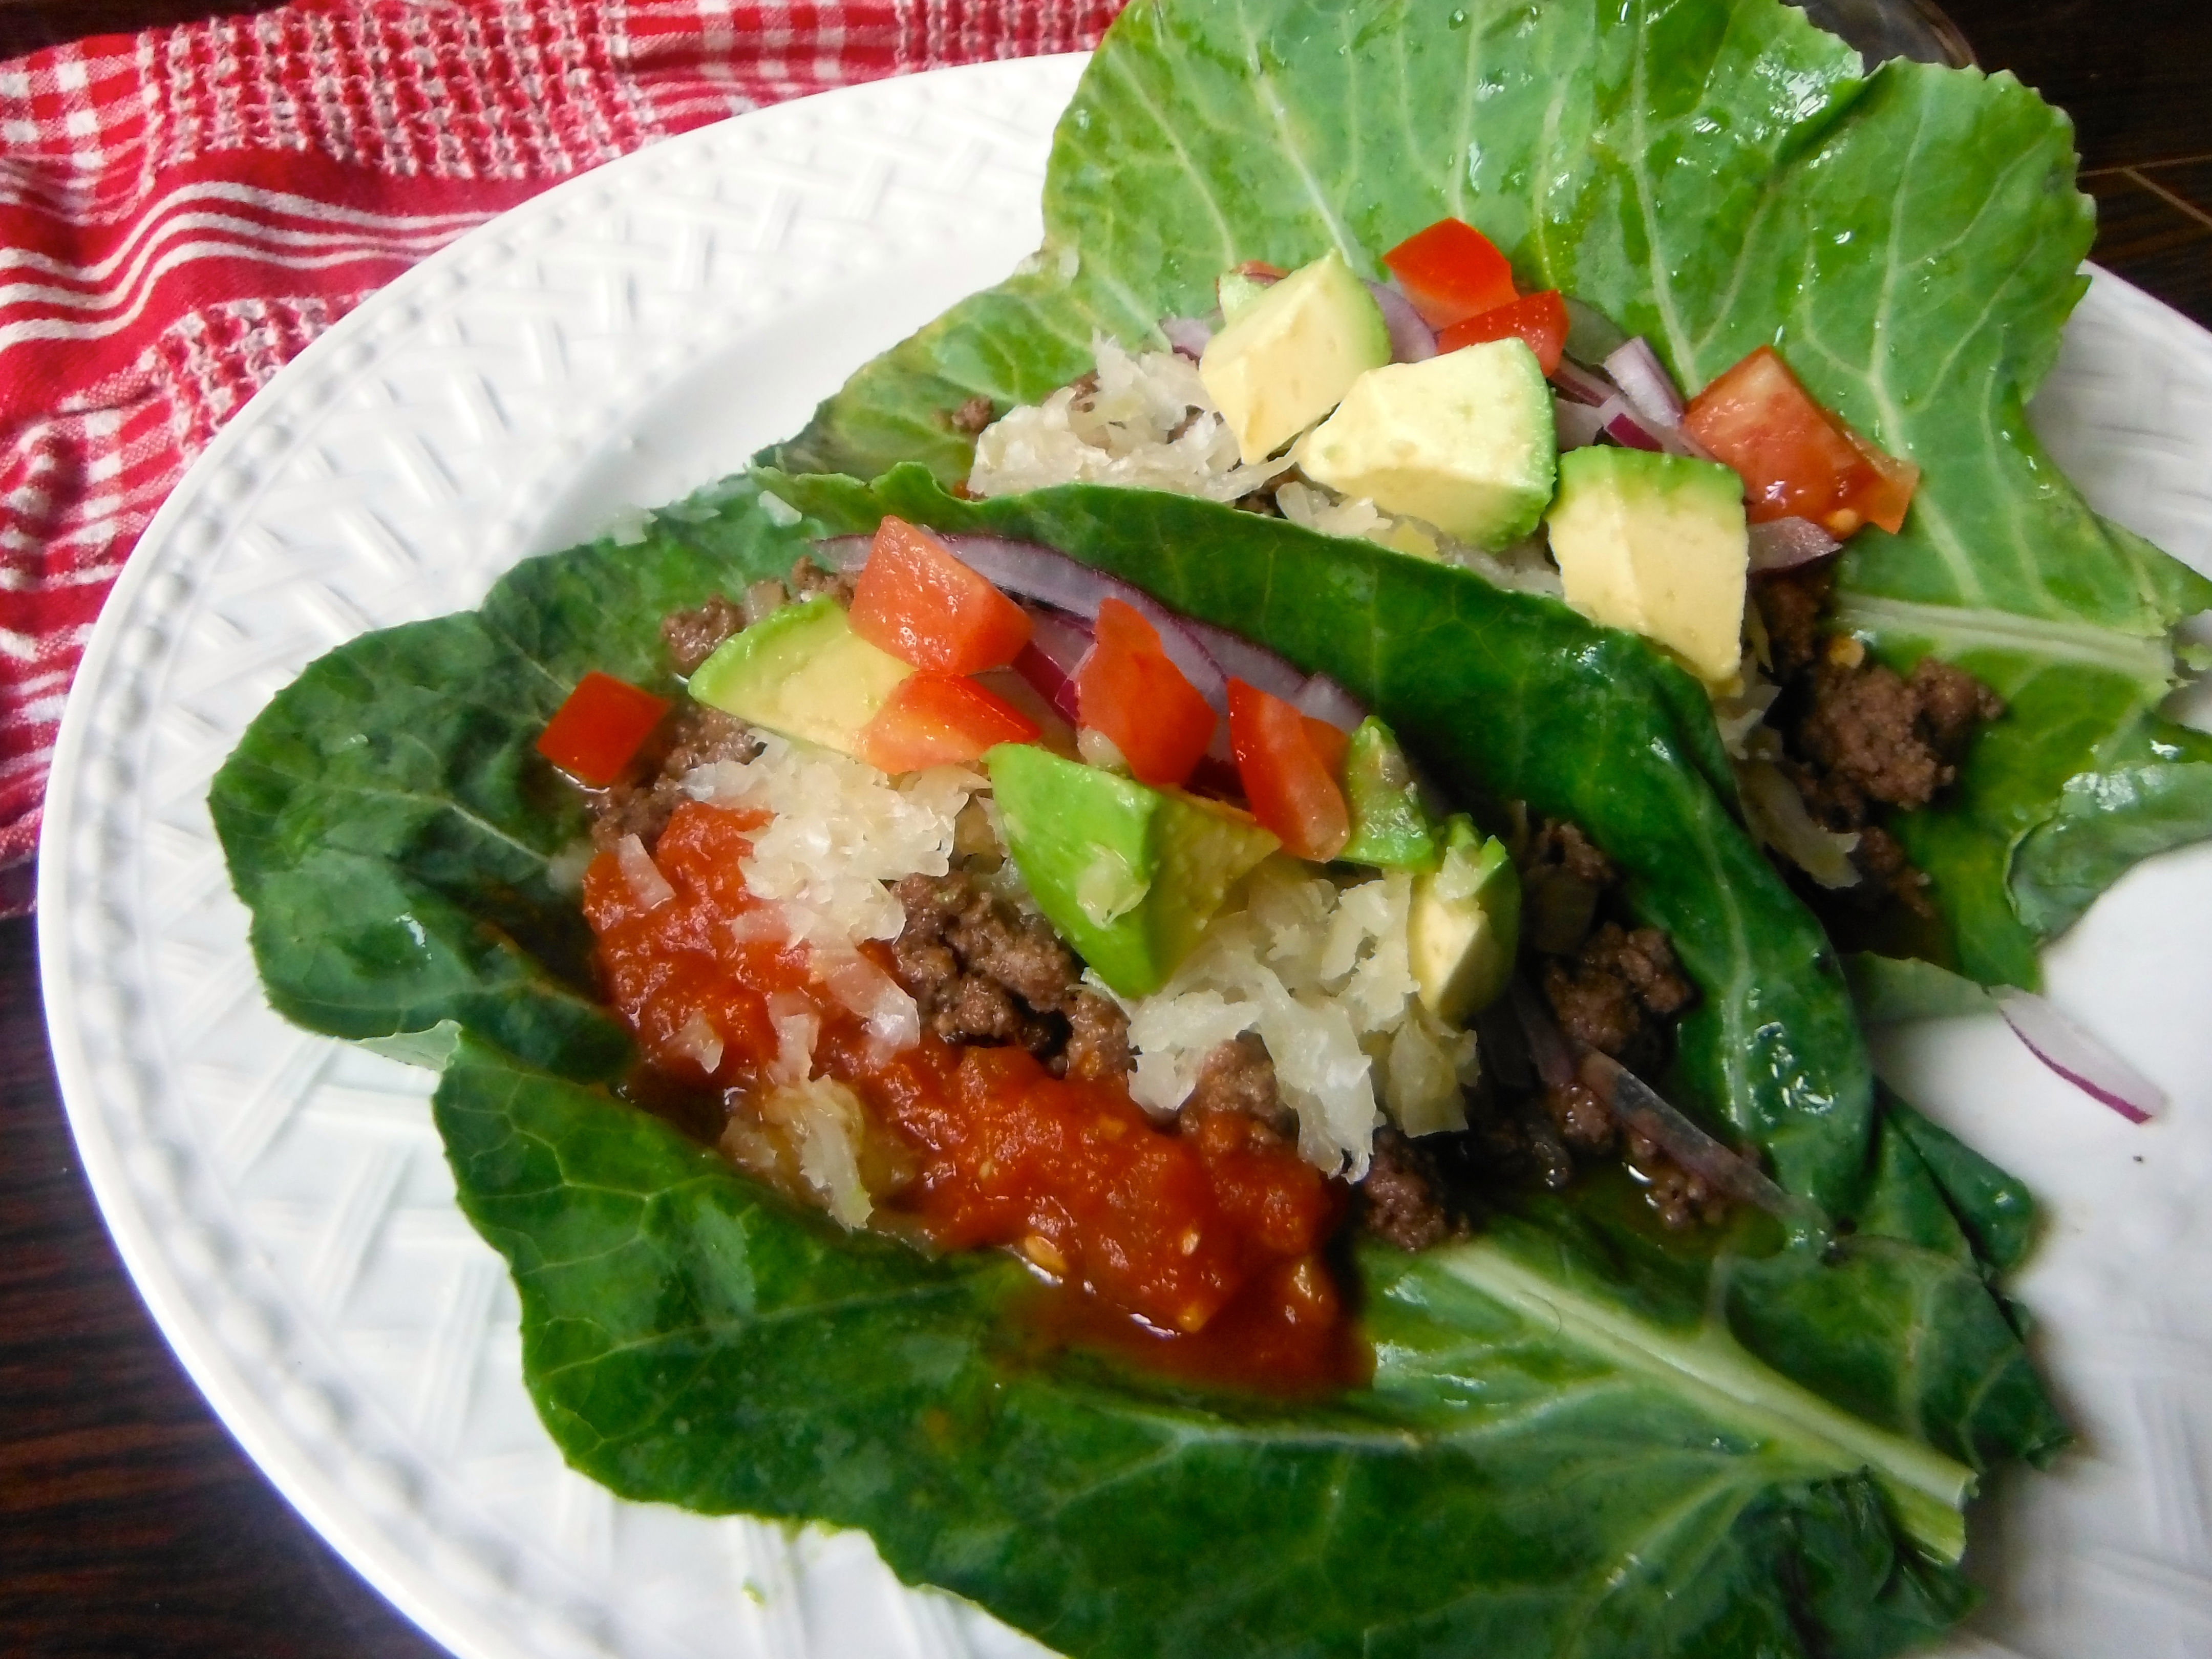
Step 3: while the meat is cooking (keep an eye on it, stir regularly) prep the wraps. Choose a leafy green that is large enough to make into a wrap – butter lettuce and romaine work, but my favourite is the Collard Green. It is so sturdy it never breaks! They can be hard to find organic, so we rely on Mama Earth CSA for ours!
Step 4: prep toppings. This is where things get fancy or stay simple! Choose any or all of the following toppings:
Step 5: Turn off the heat once the meat has cooked through and start building your wraps. We put together our tacos right in the kitchen to save time transferring it to pretty serving dishes! Dish up the meat right from the pan, leave the toppings on the cutting board, and let the lettuce wraps dry in the drying rack.
So there you have it – easy peasy lettuce wrap tacos that turn into great taco salads for lunch the next day! If you don’t scarf it all down at dinner that is…
Lettuce Wrap Tacos
2014-09-29 12:40:32
Serves 4
A quick and healthy mid-week meal that will satisfy all members of the family! Easy to modify based on the contents of your fridge.
Recently I have had a lot of questions on my Instagram account about sauerkraut. What it is, how I use it, where I find it and why I’m so obsessed with it. So let’s chat about it!
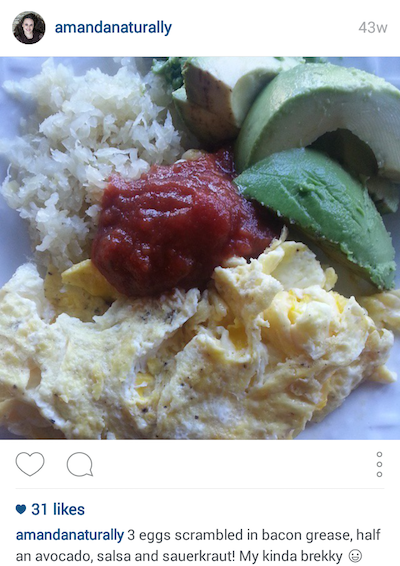
Sauerkraut is fermented cabbage. I know, that doesn’t sound so awesome, but trust me, it’s delicious! To be honest, when I first started eating sauerkraut, I didn’t like it. But I wanted to like it, so I made a conscious decision to work at it. I started with 1 tsp, mixed in with sautéed onions, potatoes and sausage. It was faint, but the flavour was there. Over a few weeks/months I started increasing the amount I was eating. And then one day, I realized I loved the stuff!! I started putting it on everything – hamburgers, tacos, sausages (of course). What’s my favourite food to eat it with? Eggs. How bizarre is that?! Bizarrely delicious, that’s how! If you like it, try it – I promise it’s amazing!
Why have I made such a concerted effort to develop a liking for sauerkraut?
As I said before, sauerkraut is fermented cabbage. Fermented foods are an incredible addition to your diet. For the longest time I was always focused on what to avoid in my diet – no more dairy, then gluten, then garbage-y gluten-free products, then legumes. That was an important part of my healing process, but it was only when I started actively adding in super foods that I really started seeing some amazing changes.
The weakest part of my body is my digestive tract. I feel like it’s always a work in progress. It still flares up from time to time, which is frustrating considering I’m supposed to be coaching others on how to heal themselves, and I’m still working on myself! Whenever I start down that thought path, I try to take a few steps back and imagine where I would be if I hadn’t made the interventions I had when I did. Probably on some serious IBS drugs and en route to a full blown autoimmune condition like arthritis.
Lately, I’ve been having digestive attacks less and less, and I swear it coincides with aggressively including fermented foods in my diet on a regular basis. I try not to go more than a day without a fermented food, and it seems to have done wonders for my belly!
So what’s the deal with fermented foods??
First and foremost, they are an absolutely incredible source of probiotics. Sauerkraut is made by allowing non-oxygen dependent microorganisms to grow on the cabbage. These microorganisms are powerful probiotics – way more potent and diverse than anything you can get at a health food store! Constantly consuming probiotics (in food form) will slowly start to change the landscape of your colon – in a good way! If pathogenic gut bacteria are starting to grow over (a.k.a. dysbiosis), regularly reintroducing healthy bacteria can keep them in check! Having a healthy gut microbiome is the foundation of a healthy body. Fermented foods are an easy and inexpensive way to keep your gut healthy!
Second – fermentation increases the bioavailability of certain vitamins and enzymes. The cabbage is pre-digested by the microorganisms, which makes it easier for us to digest and absorb the nutrients.
Third – it’s an easy and delicious way to get some extra veggies in! If we’ve been out of town and come home to an empty fridge, I know I can grill up some meat from my freezer and add some cabbage for a complete meal!
Lastly – it’s empowering. Eating a delicious food (well first learning to find it delicious) on a regular basis, and knowing that it is actively working to heal my digestive tract and support my overall gut health is super amazing. It’s the simplest thing that keeps my digestion healthy, my immune system rockin’ and my nutrition status through the roof! All from eating a little kraut! Super cool.
Where to buy the good stuff?
First of all, it is absolutely imperative that you eat raw sauerkraut. The standard stuff found at most grocery stores isn’t actually fermented – it’s pickled. Not the same thing! Pickled kraut is found on the shelf. Fermented kraut is always in the fridge.
I used to buy my sauerkraut at the farmer’s market, because it was to die for! They added fun herbs such as nettle and dulse, which helped mellow out the sour flavour. Unfortunately as I started to eat more and more of it, $10/jar started to add up quickly. There are some great products at local health food stores that are slightly more reasonable. My 2 favourite brands are Bubbies and Eden Organics.
http://instagram.com/p/W69BSgi9qL/?modal=true
One day I decided to learn how to make it myself. It couldn’t be that hard since practically every culture in human history has some kind of fermented food in their diet. And at $3 for a head of cabbage – I couldn’t beat the price!
Homemade Sauerkraut 101
My first 4 batches of sauerkraut had a 50% success rate. The first batch I followed directions I had found online somewhere. It didn’t recommend keeping an eye on it, so I put it in the back of a closet and left it for 3 weeks. When I went to grab it at the end of its fermentation time, it was a mouldy mess! I hit the internet and realized what had happened. The good bacterial growth needs an anaerobic environment. This means it needs no exposure to oxygen. So it has to stay submerged under water at all times!
So, round #2. Total and complete success! I diligently checked the sauerkraut every day and topped up the jars with a salt water solution regularly. I was thrilled! Also, I used purple cabbage, so it was beautiful!
http://instagram.com/p/mLffMqi9gp/?modal=true
Round #3. I got cocky. I had nailed the last batch so I thought it would be a breeze this time round. I even poured the leftover sauerkraut juice on my new batch of kraut to speed the fermentation process. I didn’t check it nearly as often, so what happened? Mouldy mess.
Round #4. I perfected my technique. A perfect balance of keeping an eye on it, without being obsessive! This is how I make my sauerkraut.
Homemade Sauerkraut
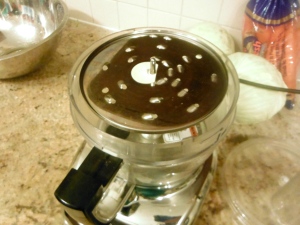
1. Add your shredder attachment to your food processor. If you don’t have a food processor, you can shred your cabbage using a Spiralizer or a good knife!
2. Peel the outer few layers off your cabbage.
3. Chop the end off your cabbage. You can cut out the core as well, but it’s not necessary!
4. Cut cabbage into slices that will fit into your food processor spout.
5. Shred the cabbage!
6. Dump shredded cabbage into a large bowl. Sprinkle liberally with sea salt. I used about 1 tbsp sea salt per head of cabbage and I usually do 2-3 heads of cabbage at a time.
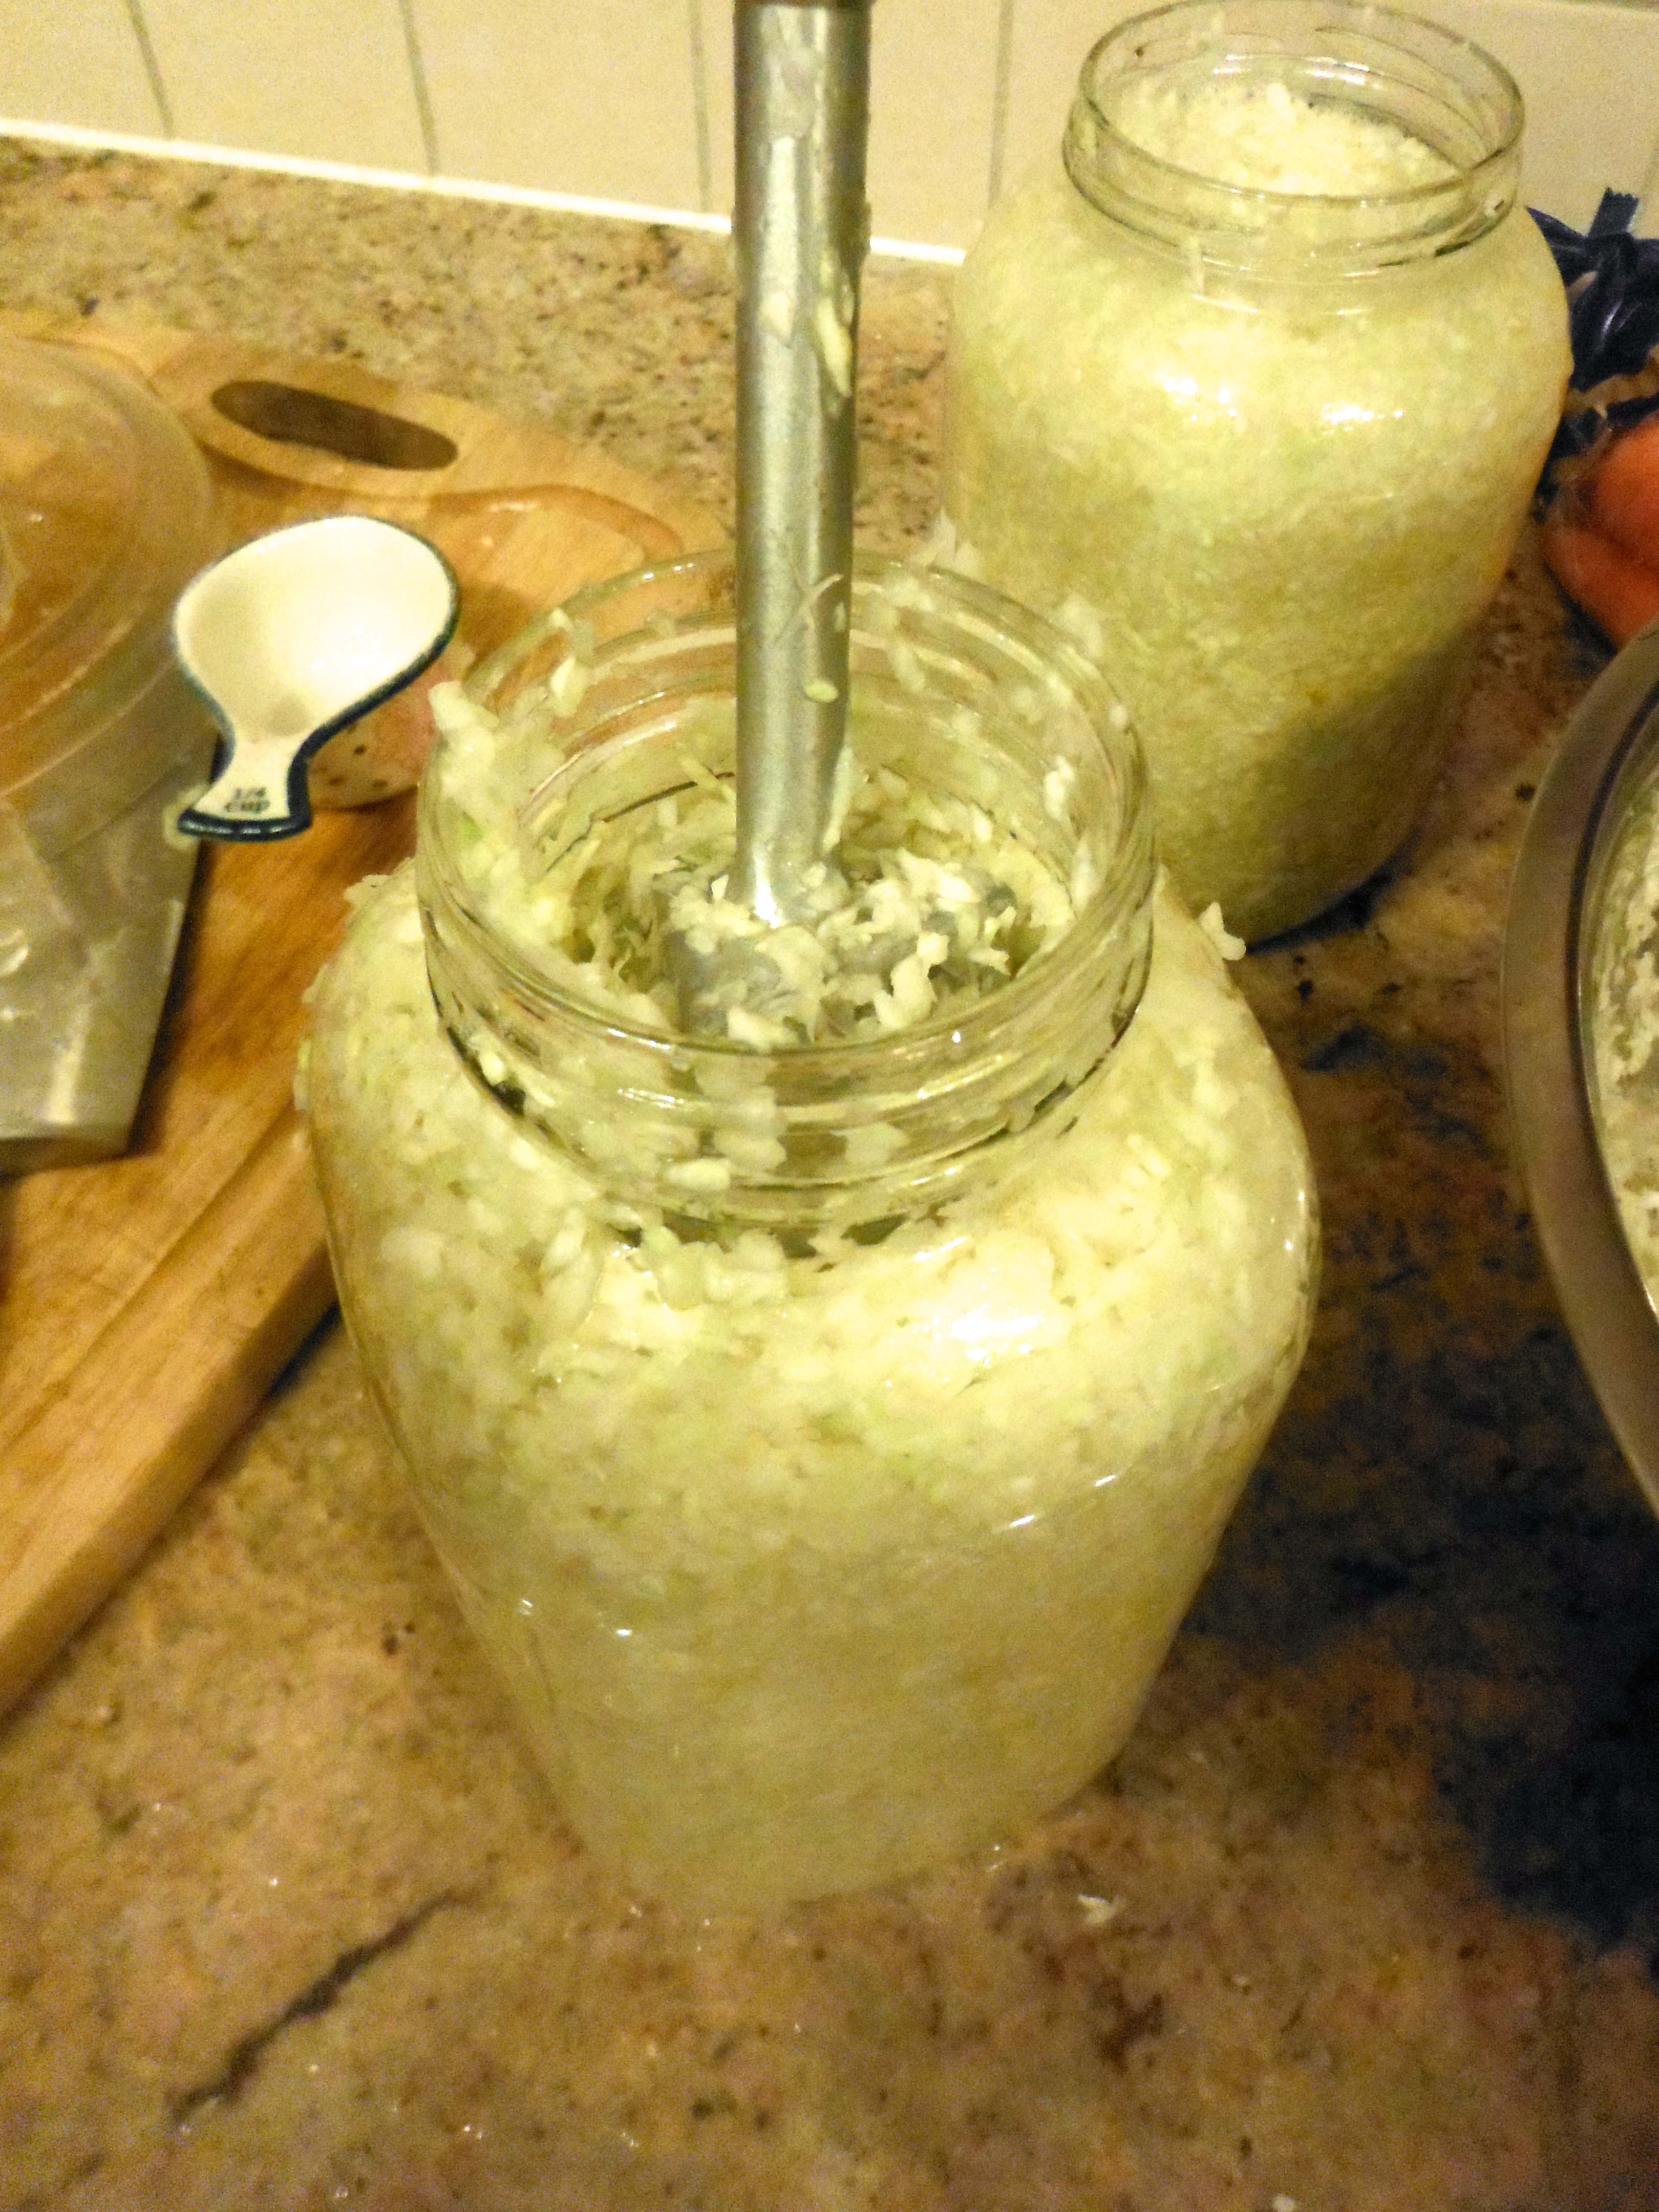
7. Smash your cabbage with a meat mallet or your hands for a few minutes, until the cabbage starts to soften and releases some of its liquids.
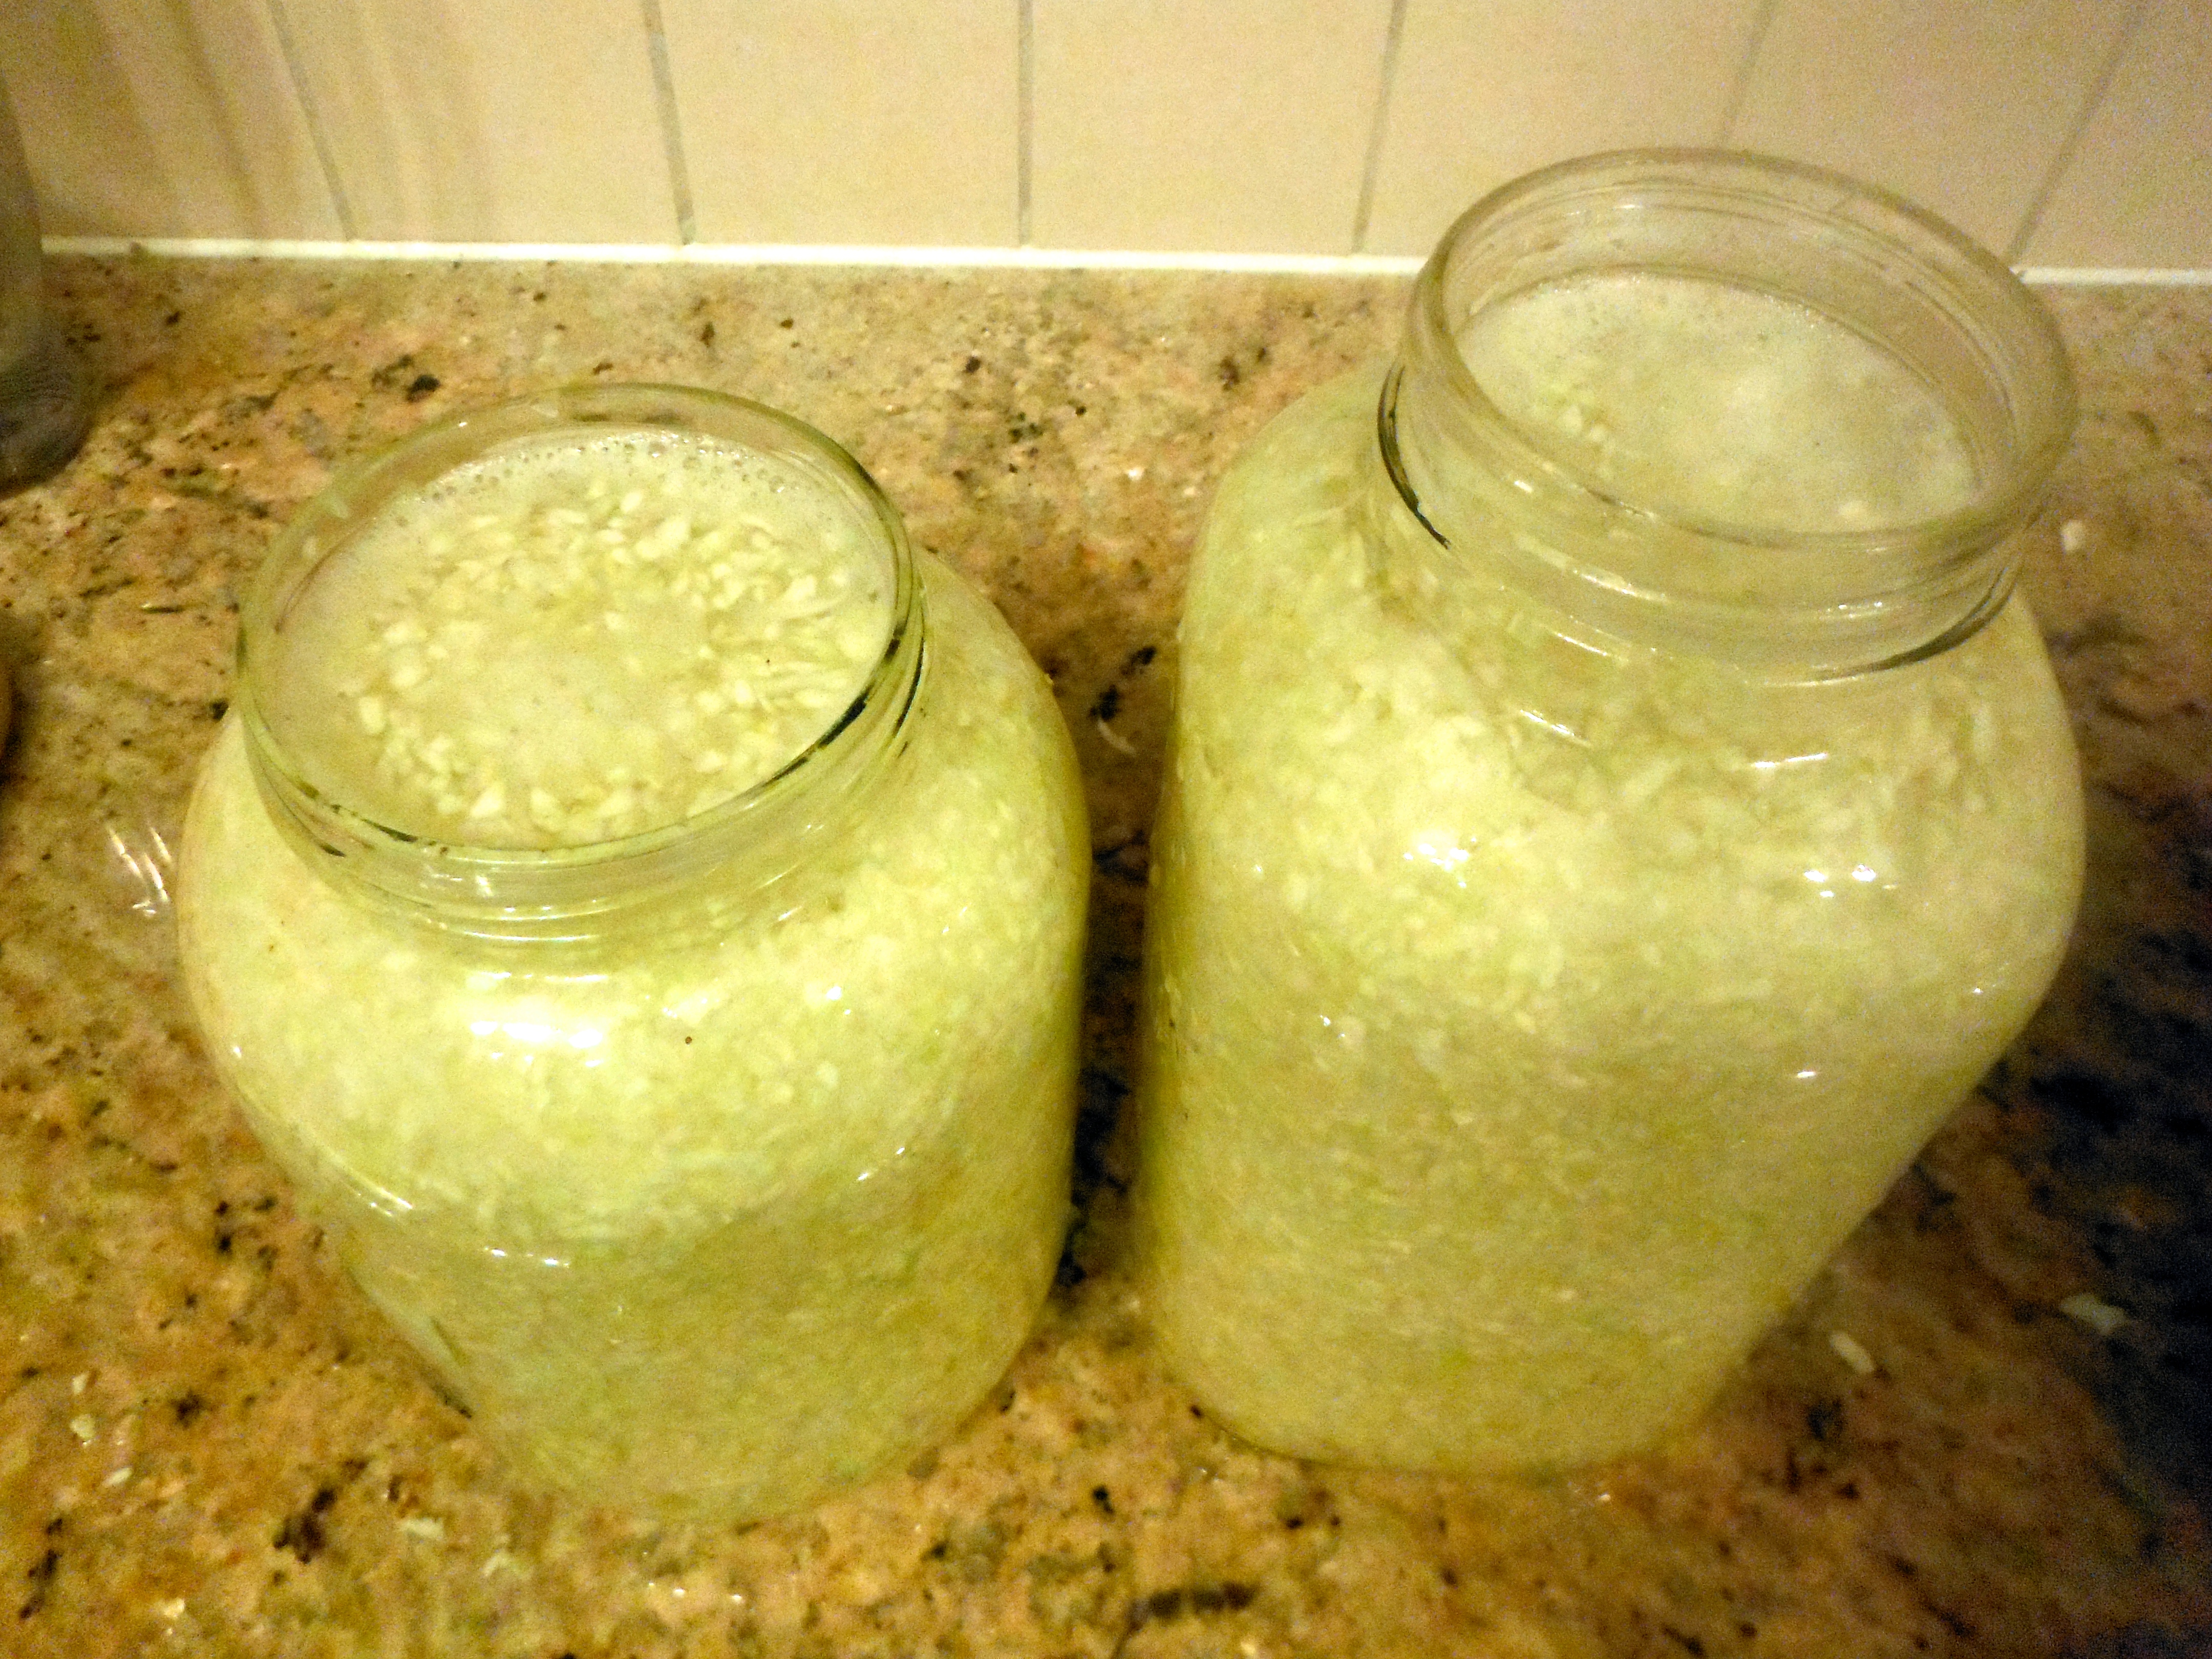
8. Pack the cabbage as tightly as possible into jars.
9. Sprinkle the top with some additional sea salt (I used a few twists of my salt grinder) and add enough filtered water to make sure the cabbage is all below the surface. A few pieces will float on top, that’s okay!
10. At this point, my kitchen is usually a total disaster and cabbage is everywhere. I fasten the lid to the jars, so I can rinse the cabbage off in the sink. (NOTE: make sure to remove the lid after you rinse off the jars!)
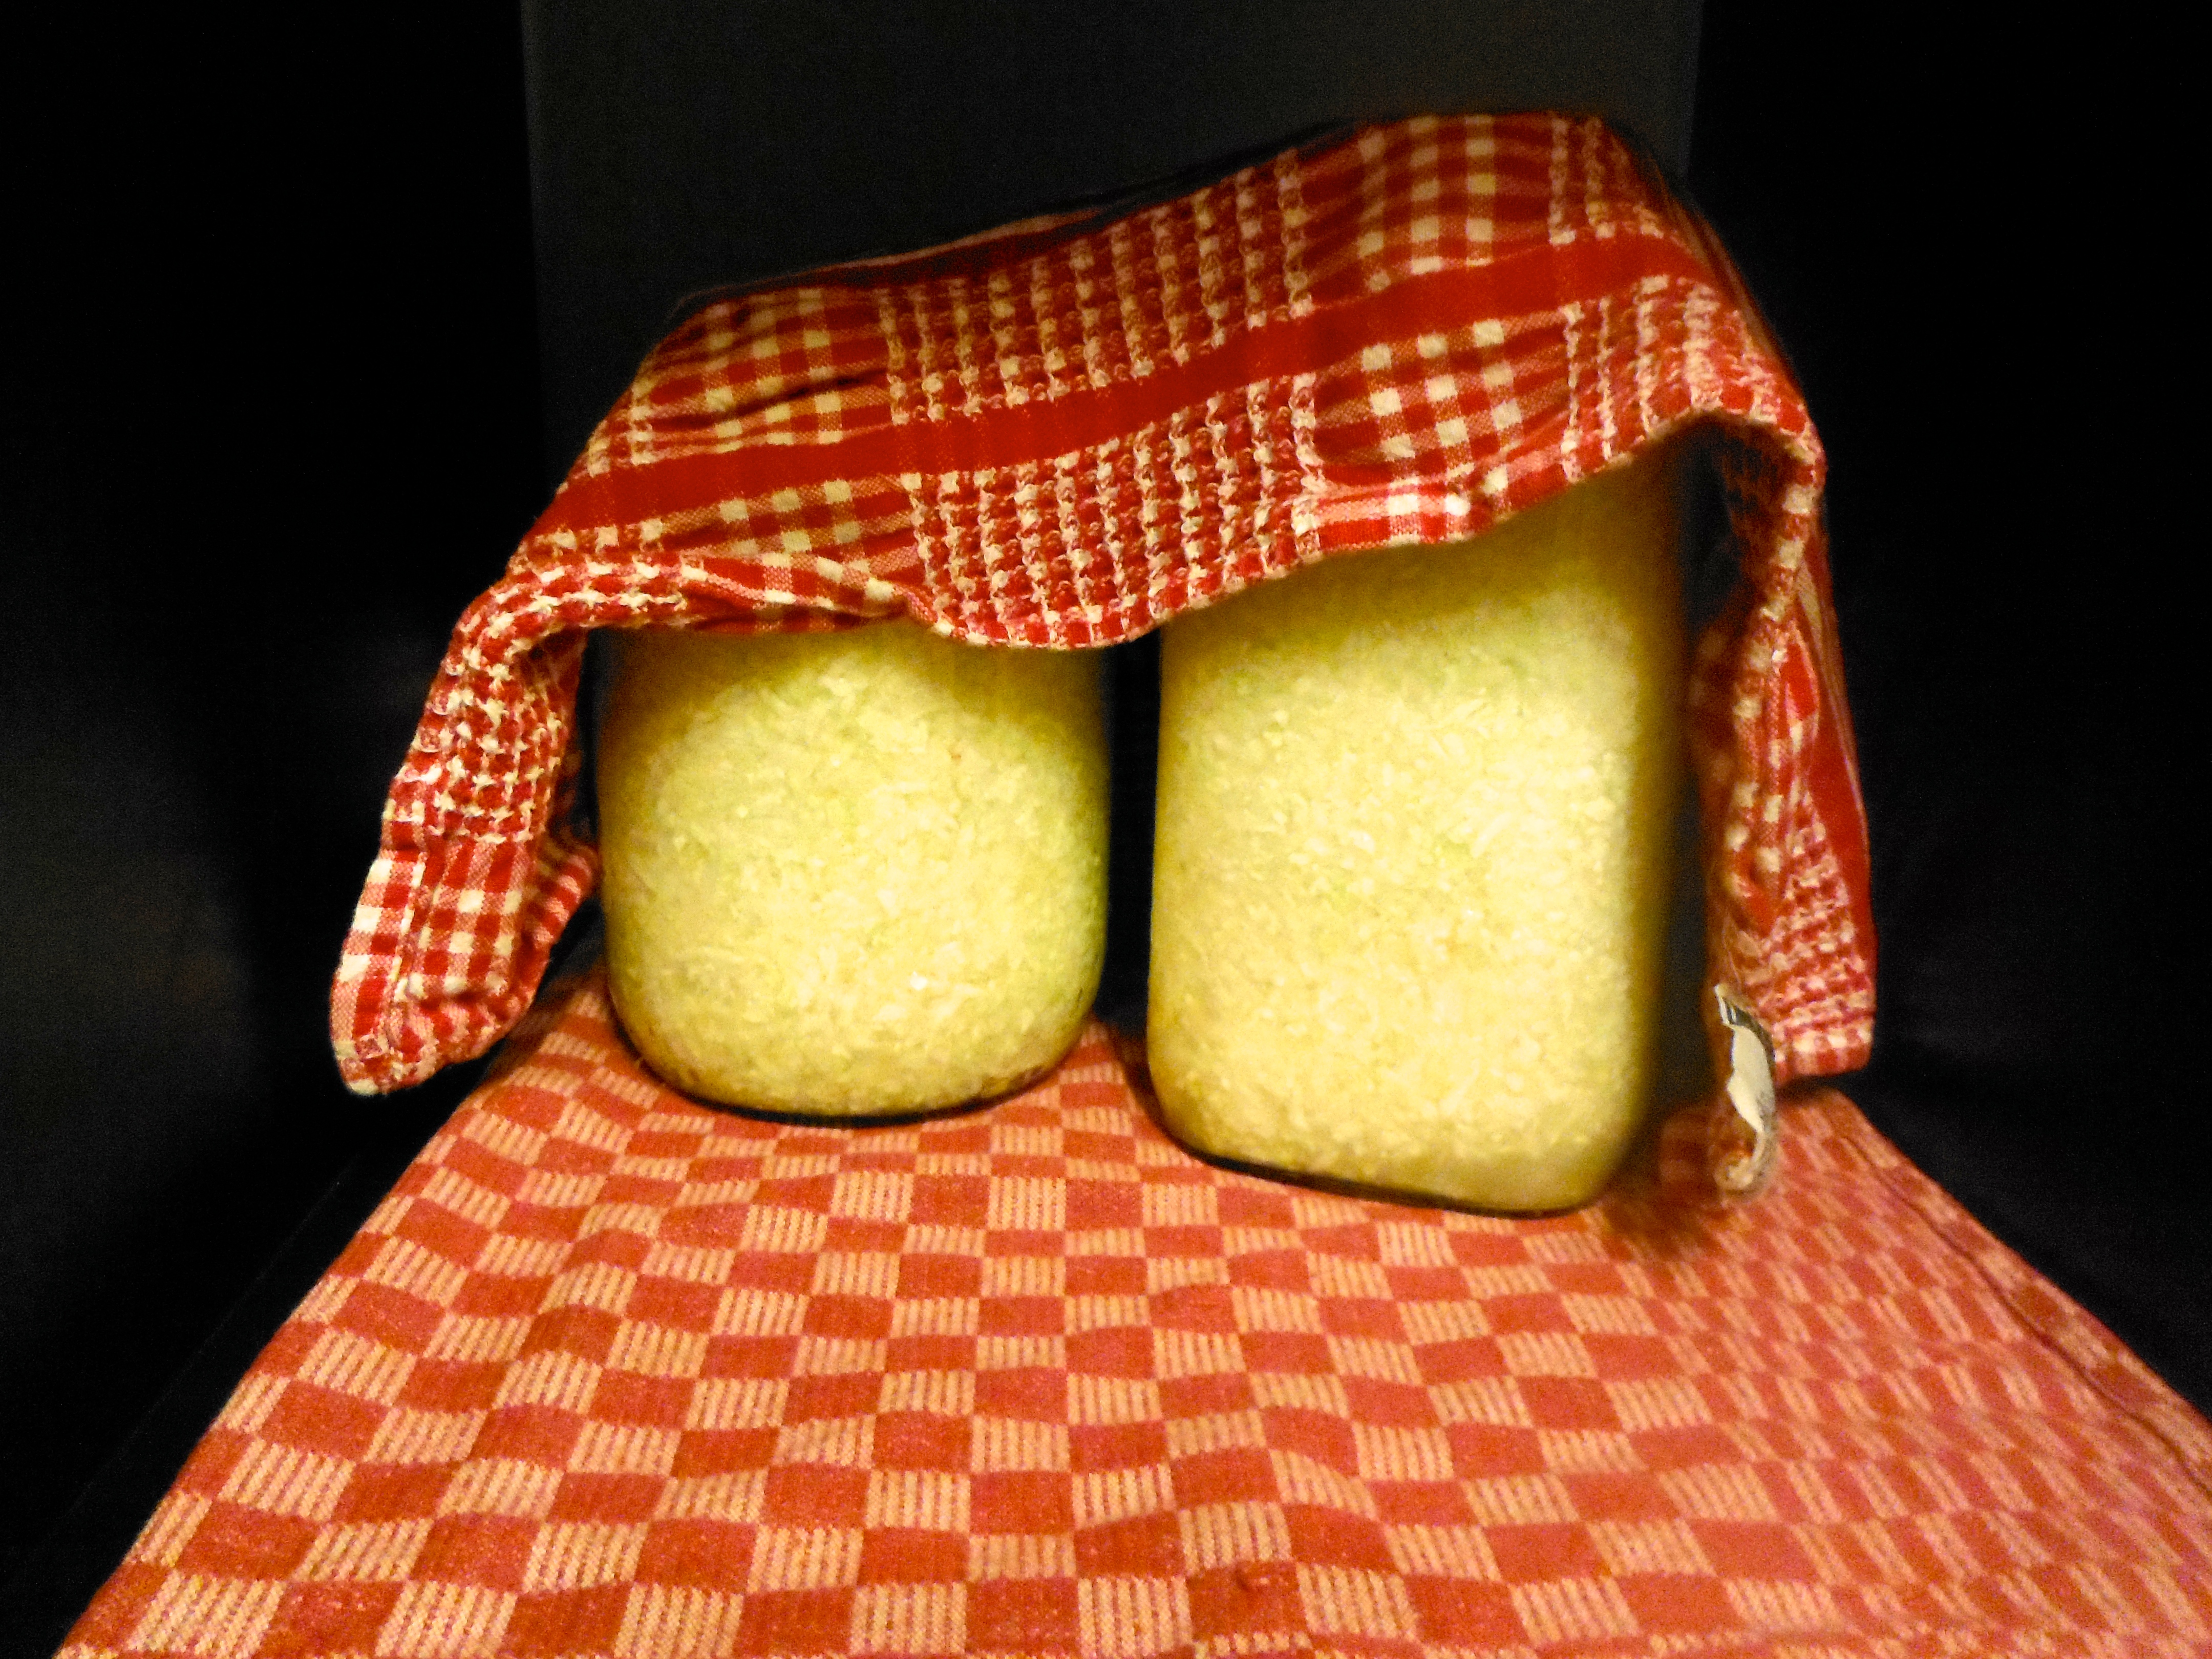
11. Place your jars in an area of your home where they can sit undisturbed for 3-4 weeks. It needs to be relatively dark (no sun exposure) and a fairly consistent temperature. You also need to be able to access it easily! I keep mine on a shelf in my living room!
12. Cover with a tea towel to prevent dust and bugs from getting in. You might want to place it on a plate, tray or another towel, because sometimes liquid can bubble up and over in the first few days. It can be a little stinky the first few days too – this goes away!
13. Every 2-3 days, check on your sauerkraut. If you notice that the water has dropped below the cabbage, simply add a few more grinds of sea salt and some filtered water.
14. In 3-4 weeks, with the help of some amazing beneficial bacteria, your cabbage will have turned into sauerkraut! At this point you can add the lid and place in the refrigerator for regular use. Enjoy!
UPDATES:
1. Please do NOT rinse your sauerkraut after fermenting it! I have had many people say they were worried about the salt content, so they rinsed it off. You will be rinsing away the good bacteria at the same time! Sea salt is not bad for you, in fact it is a fabulous source of minerals. If you are eating real, whole food you actually need to make sure you get enough salt in your diet.
2. Do NOT heat your sauerkraut. It will kill the bacteria.
3. My kraut-making technique has evolved over the last year or so. I now use a fermenting crock because I make extra large batches. You can also use these nifty jar top fermenters. Both are great because they force the cabbage to stay submerged, decreasing risk of mould.
So tell me, have you ever fermented any foods? Do you have any recommendations for other fermentation projects I should try?
Nut and seed butters are a key pantry staple for quick grab and go snacks. While I absolutely love peanut butter, I’m careful with how much I eat because I have a sensitivity to legumes and recently I’ve noticed that it kind of makes my mouth tingle. That’s clearly not ideal!
When I first started eating a real food diet and throughout my initial candida cleanse, almond butter was my lifeline. Any time I had a craving for something sugary I’d dunk a spoon into a jar of almond butter and enjoy it straight. Don’t judge – I know you’ve done it, or at least thought about it!
For a while I made sure I always had a jar in my cupboard, but when I started crunching the numbers I realized I was spending way too much money on this jar of deliciousness that would barely last a week. To save money, I switched to a store-bought sunflower seed butter which was half the price. It was ok, but I didn’t really love it because it always tasted a bit off. And then my life changed…
My incredibly awesome parents gave us a Blendtec for our wedding!
They had thought about a getting my soon-to-be husband a watch, and me a nice pair of earrings or a necklace…but when they really thought about the kind of people we are, and what we would actually enjoy (and use!) they went with their gut and bought us our FAVOURITE present ever. The Blendtec. A luxurious kitchen gadget that was worth every penny! We use it every day, at least once!
As much as we love the Blendtec for its incredible smoothies, it’s honestly not worth it if that’s the only thing you’re going to use it it for. It’s all of the other incredible tasks it can handle that really make this a cook’s dream! So far I’ve used my Blendtec for:
pancake batter
muffin batter
ice cream
fruit sorbet
pesto and other sauces
grinding my own meat
homemade jello
coconut butter AND
sunflower seed butter!
Making your own sunflower seed butter is SO much better than buying it. When seeds are roasted and ground, the oils become less stable, and over time will oxidize (go rancid). I’m sure that’s why the sunflower seed butter I was buying tasted off. By roasting and grinding your own seeds, you are guaranteed the freshest butter, with a much richer flavour, and at a fraction of the cost. Not to mention, sunflower seeds are allowed in most schools because they’re not nuts! Here are a few ways to use sunflower seed butter for you or your kids:
on a sliced banana topped with shredded coconut
on a sliced apple topped with pumpkin seeds
stuffed in pitted dates (my husbands favourite)
on gluten-free crackers
as a fruit and/or veggie dip
Or as I’ve been known to do…eat it straight out of the jar with a spoon!
If you don’t have a fancy pants blender like this one, you can achieve a similar consistency with a good quality food processor, but it doesn’t get quite a smooth!
Homemade Sunflower Seed Butter
2014-09-08 06:58:50
An inexpensive, delicious and nut-free alternative to peanut and almond butter!
Roast for 7-10 minutes. Keep an eye on them so they don't burn! If necessary, stir once.
Once seeds develop a golden brown colour and you can start to smell them, remove from oven and let cool.
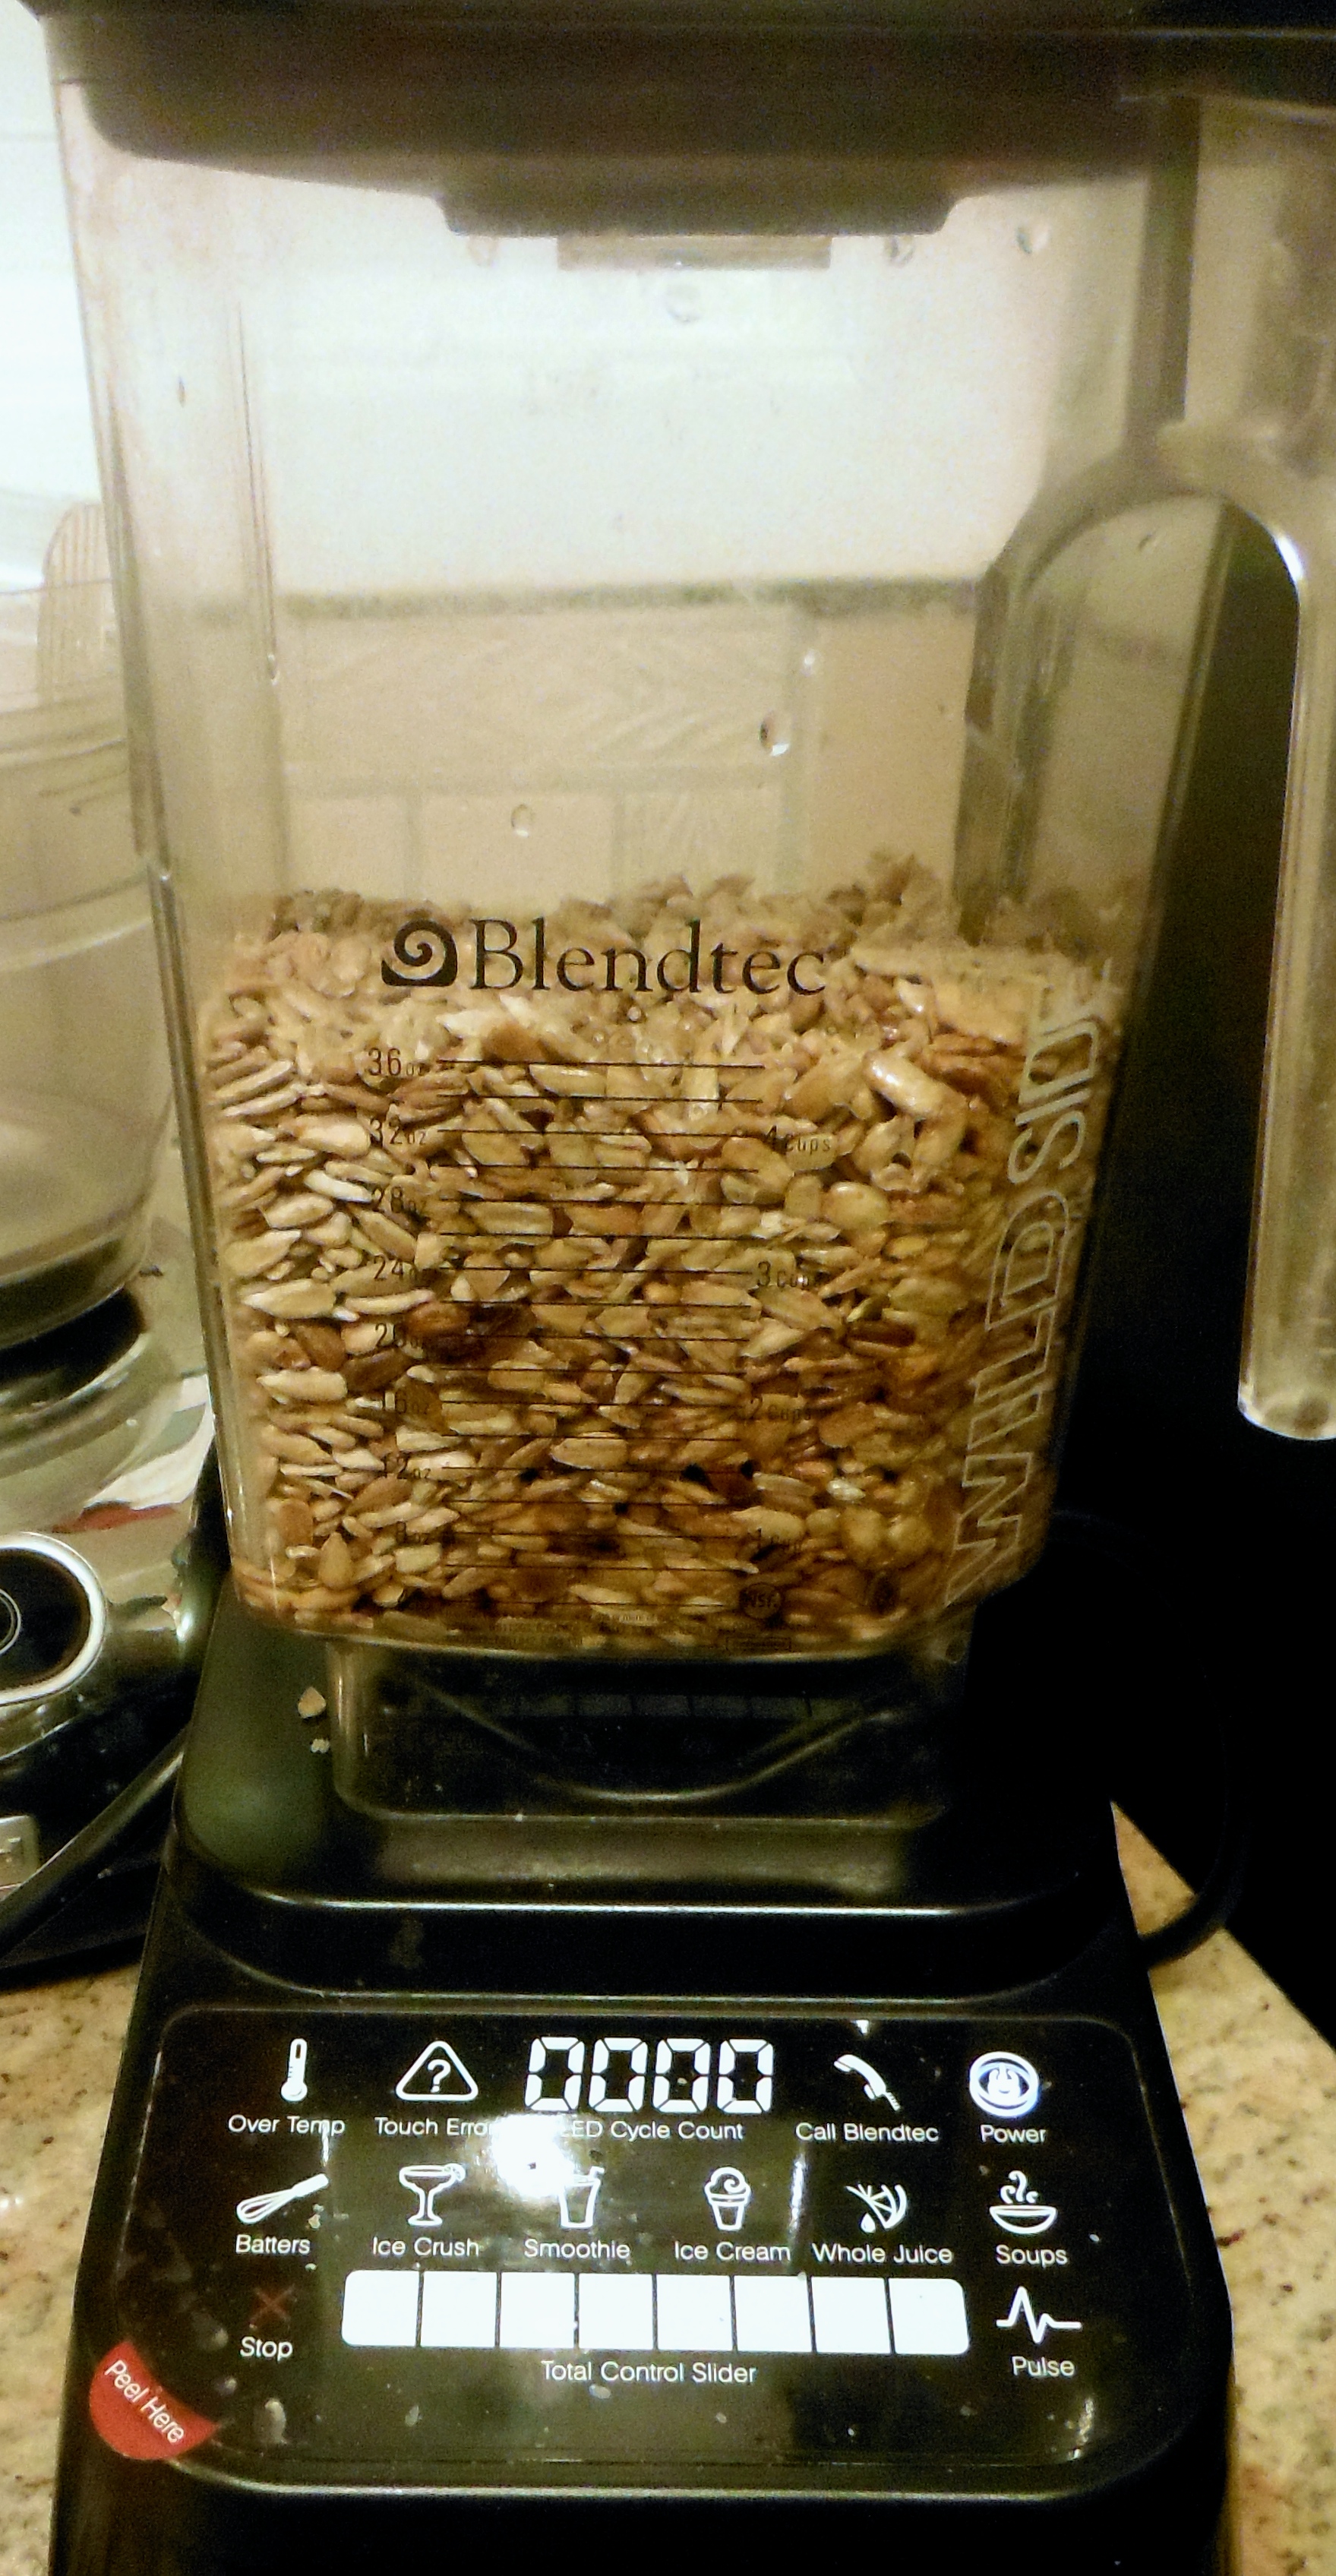
Pour ¼ cup avocado oil in to your Blendtec. Add sunflower seeds and sea salt.
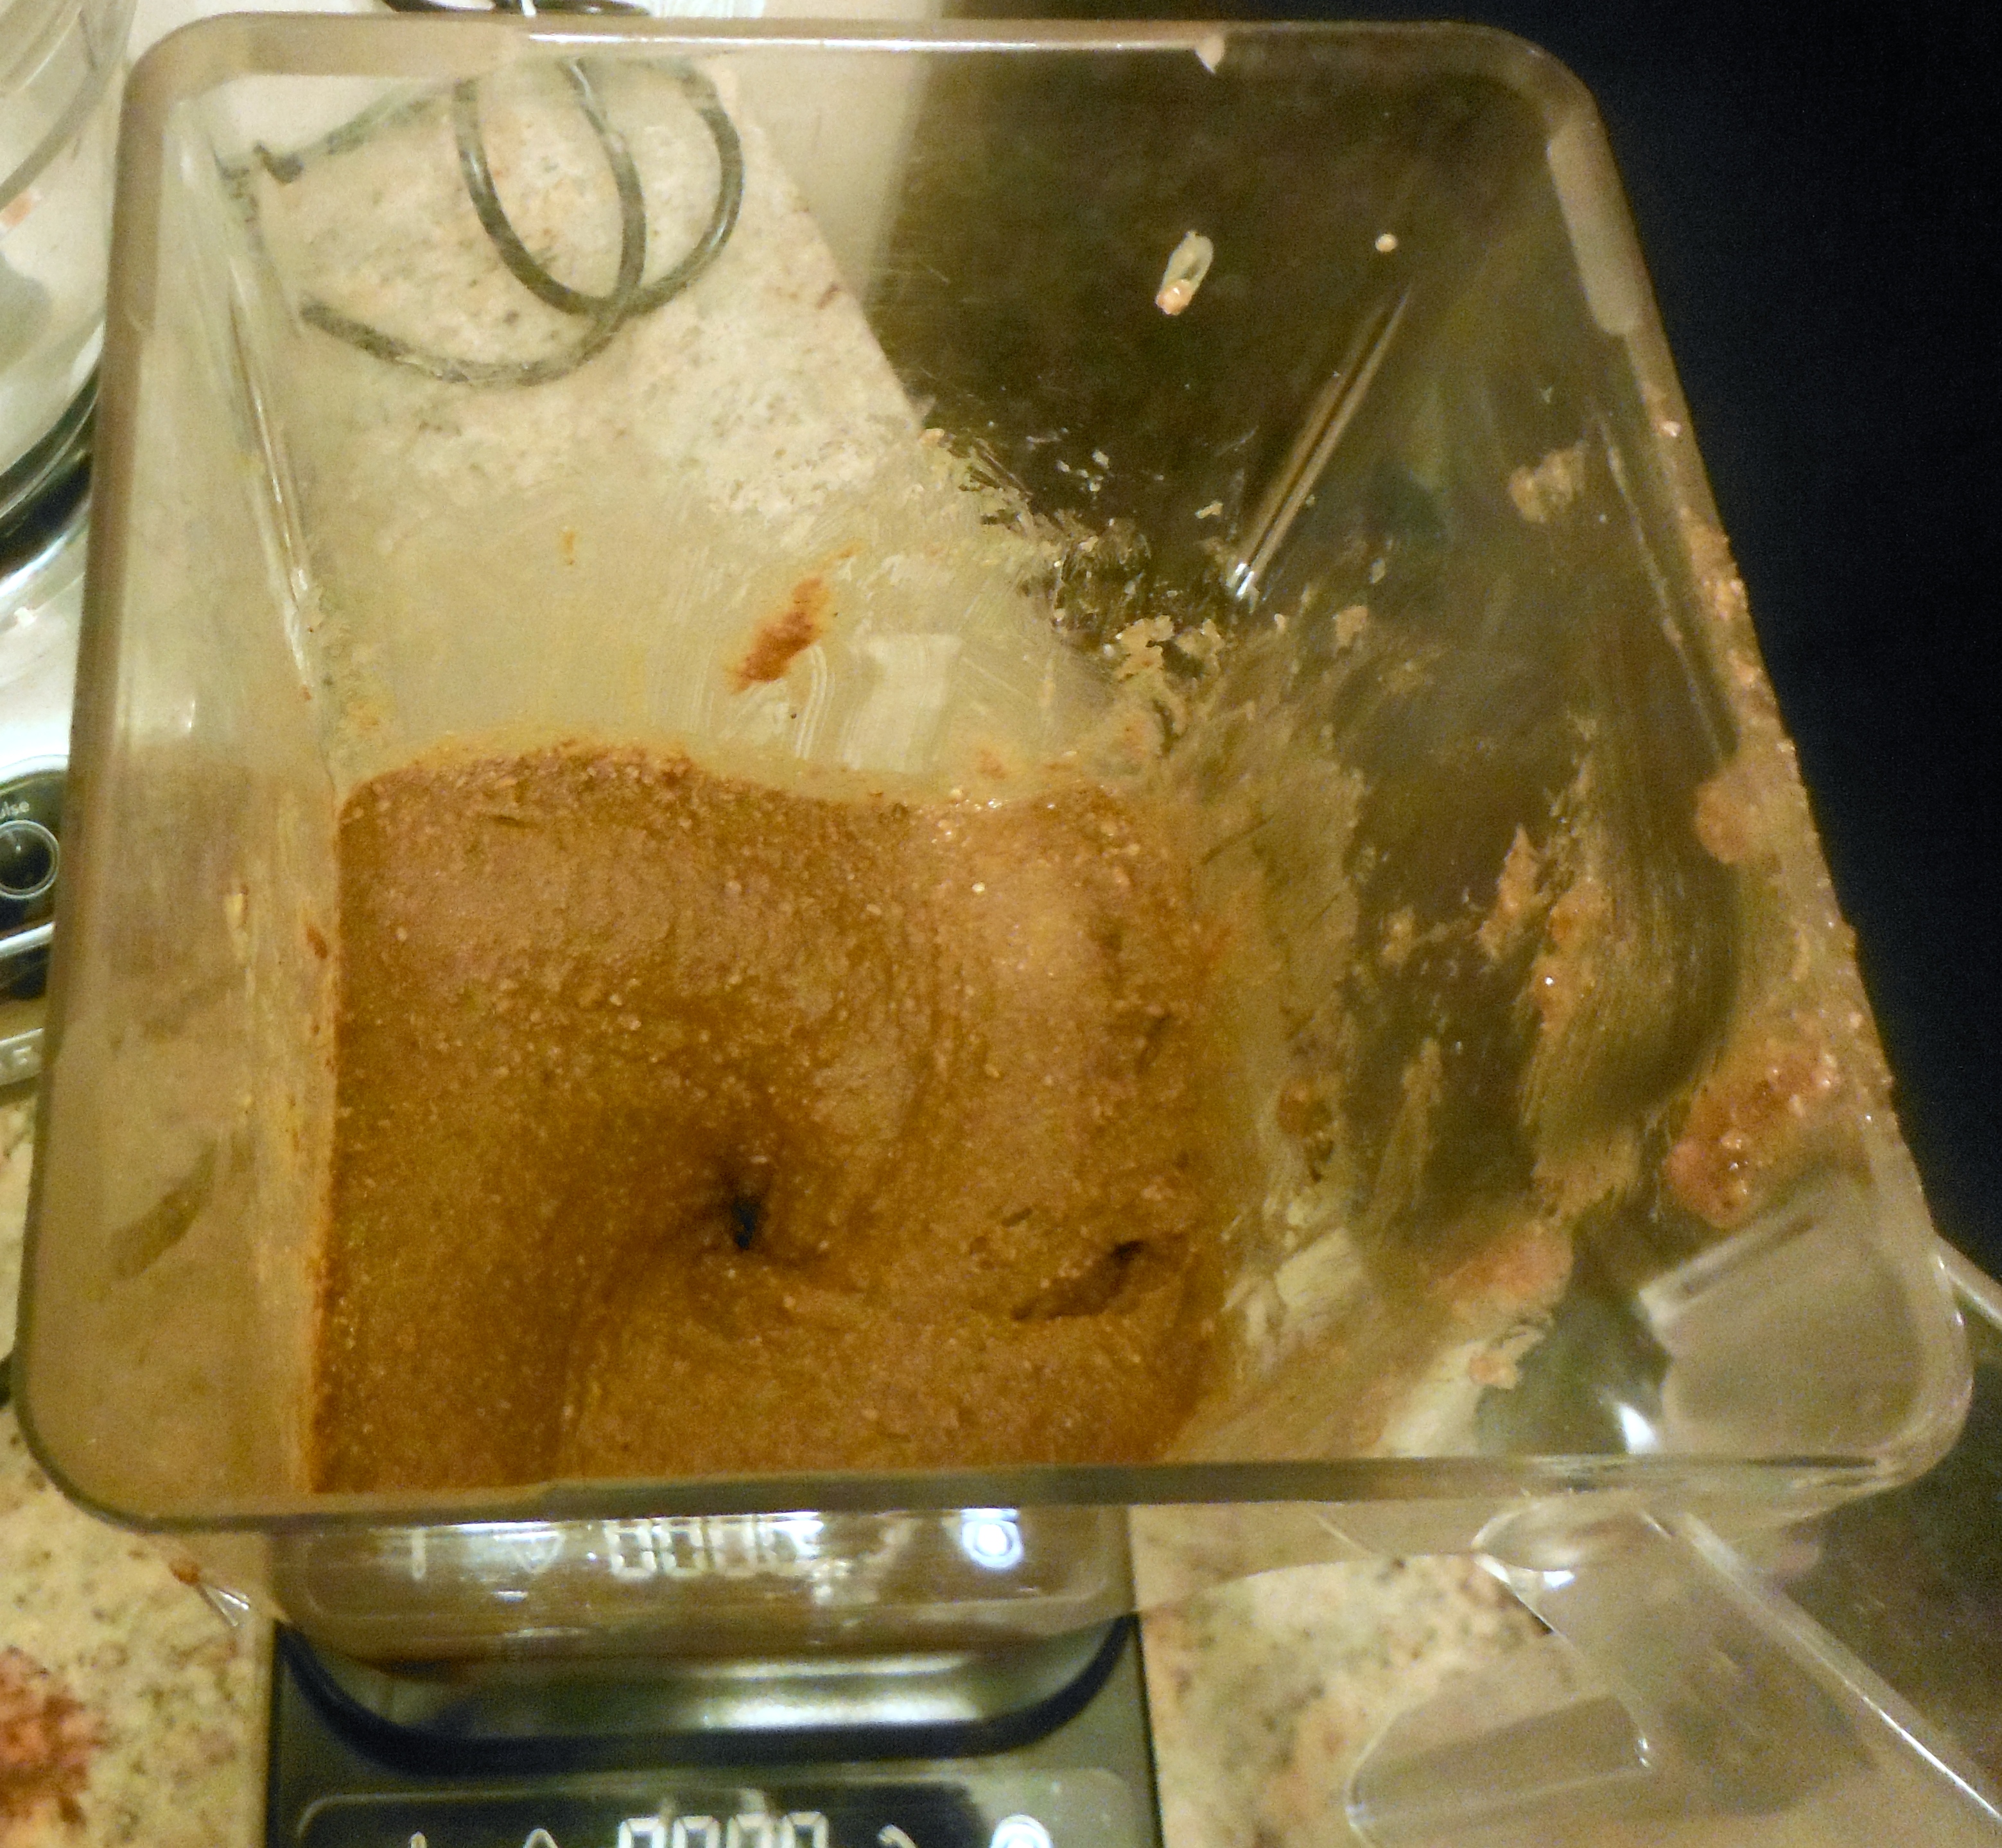
Blend on medium low, using a spatula to scrape down the sides. Be patient, it takes a few minutes!
Add more avocado oil if you need to to achieve the desired consistency.
Notes
Store in the fridge to maintain freshness and reduce oxidation of the oils.
By Amanda Naturally
Amanda Naturally http://www.amandanaturally.com/
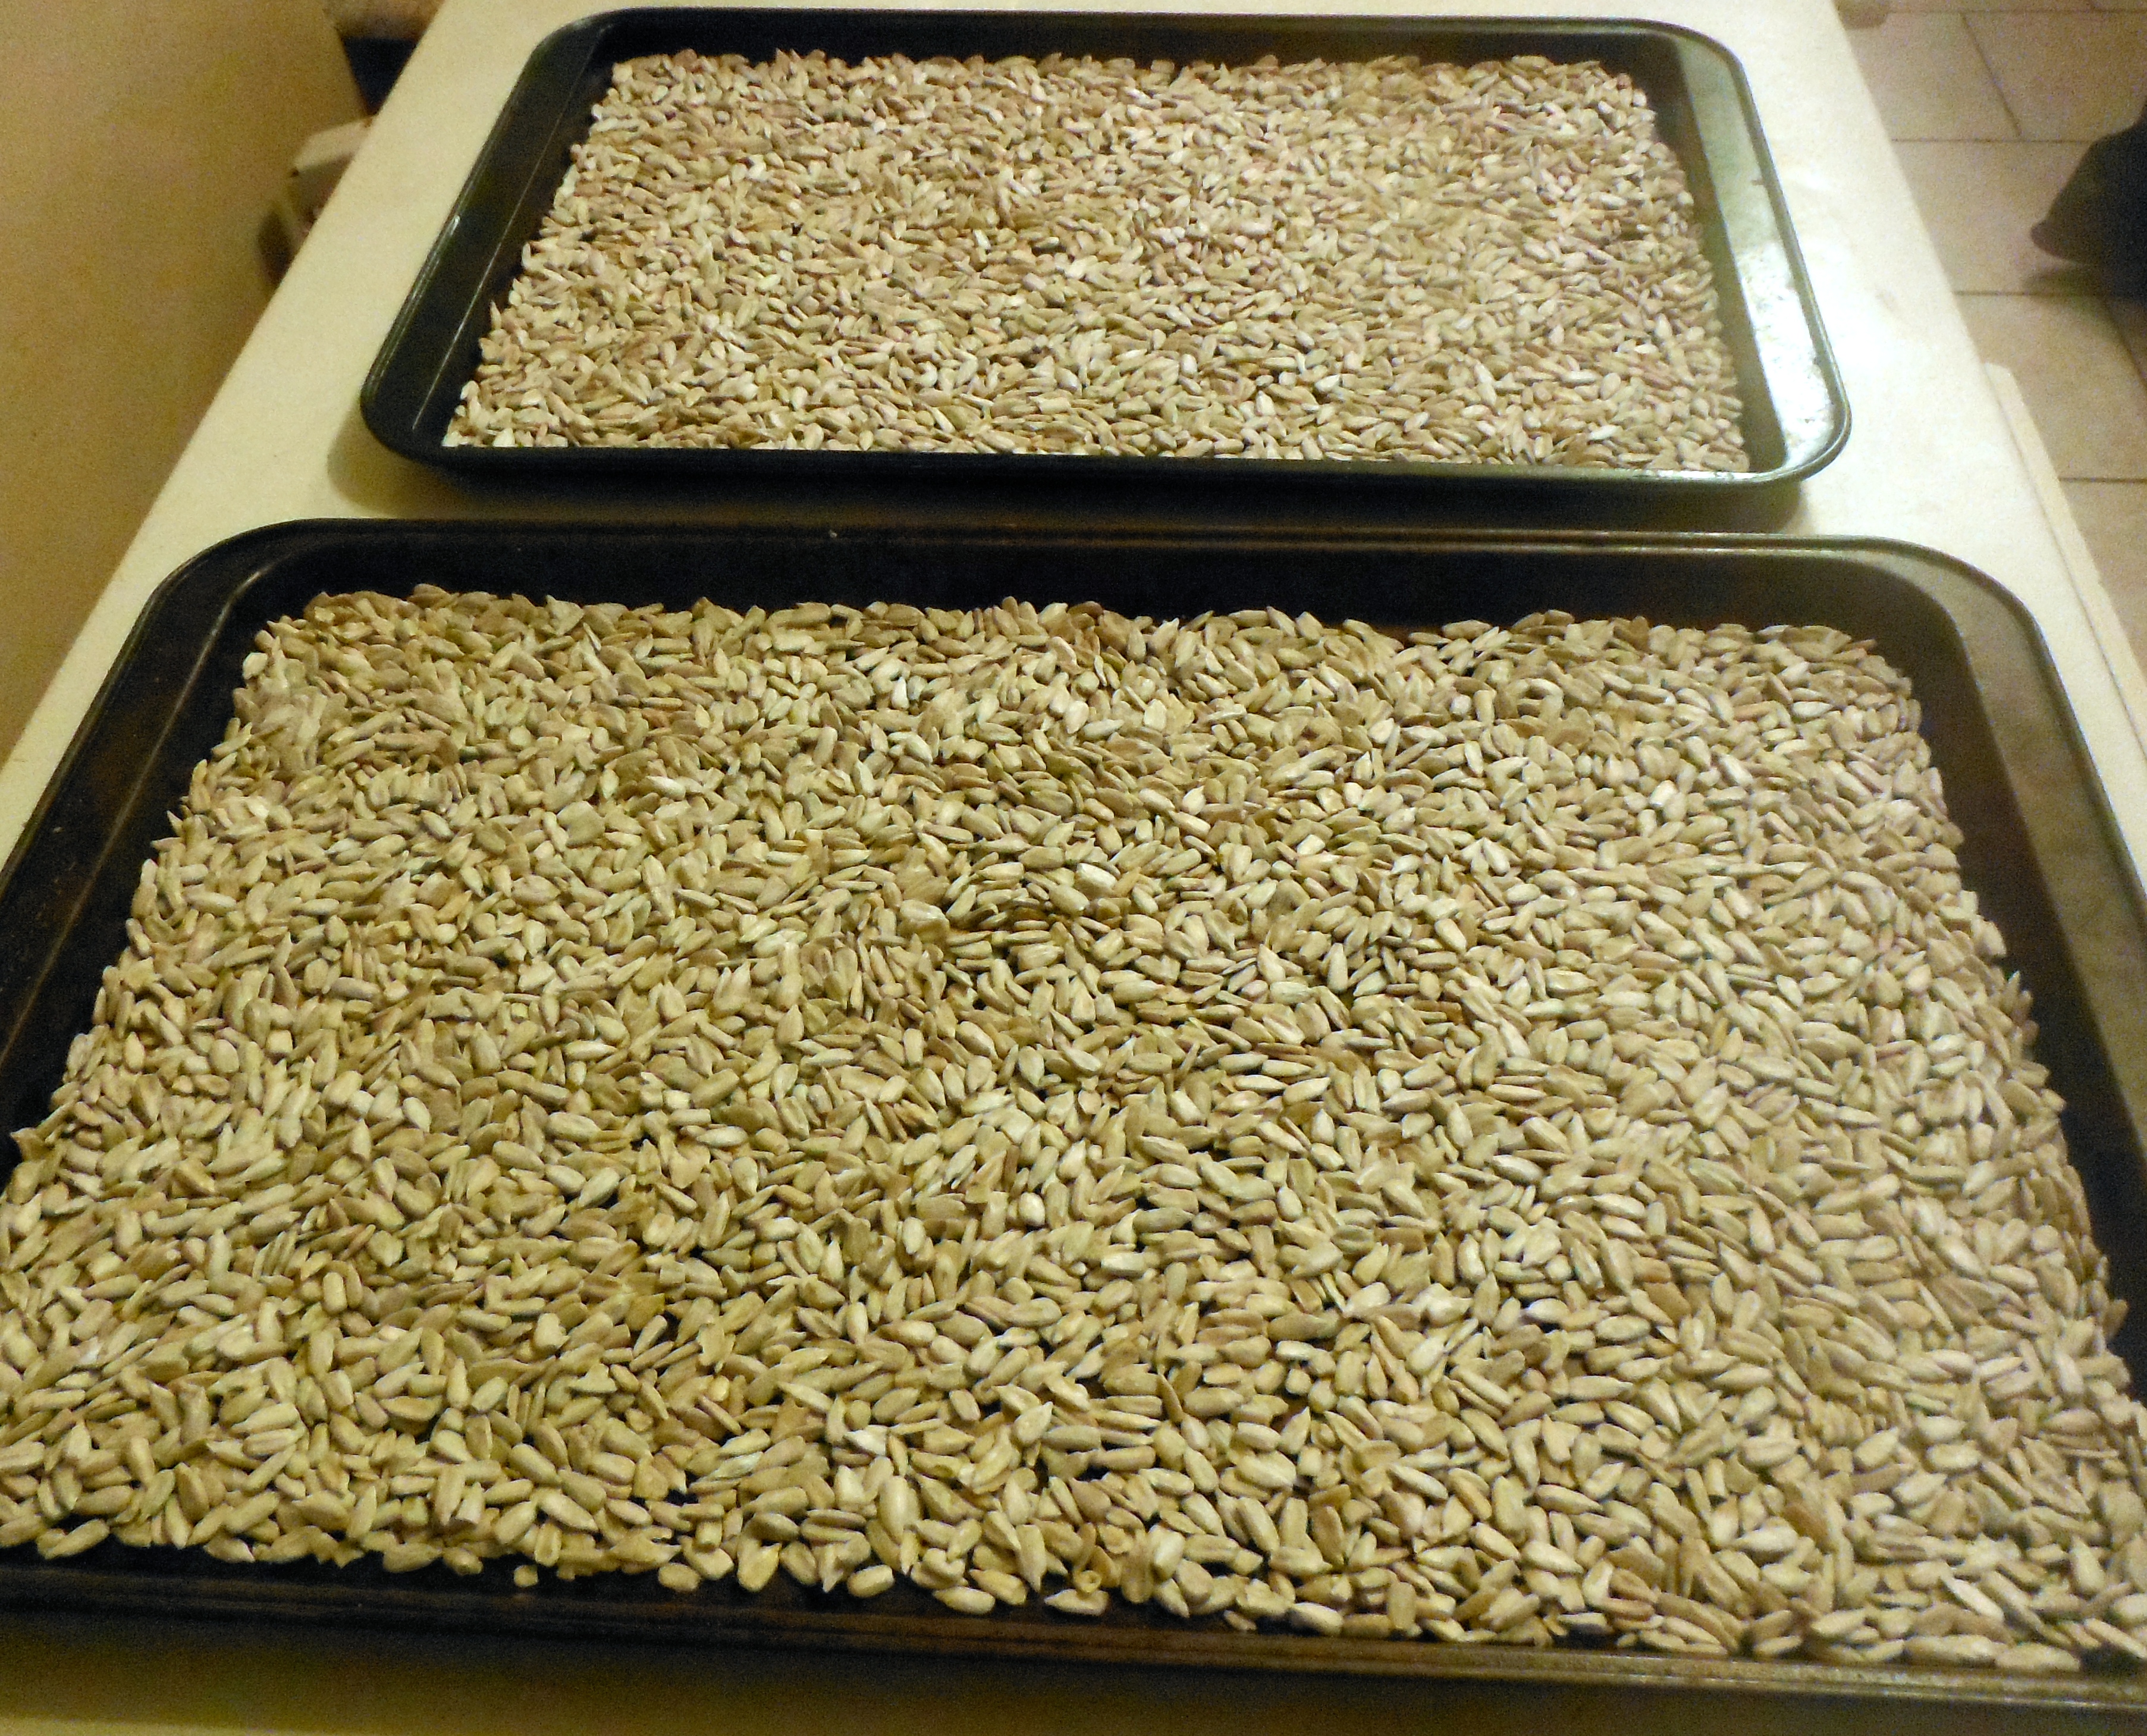
Spread sunflower seeds in a single layer on a baking sheet. It’s better to use multiple sheets than to pile the seeds high on one. You risk burning the seeds on the edges and having raw seeds in the middle! If you only have 1 sheet, either make a smaller batch or stir seeds frequently.
Toast until golden brown. Don’t burn!
Let seeds cool. Add avocado oil, sea salt and cooled sunflower seeds to to Blendtec or food processor. Blend on medium low, scraping down the sides.
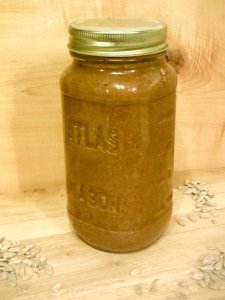
Be patient! Eventually it will turn into a beautiful, creamy butter!
Jar and store in the fridge.
So tell me, what’s your favourite nut / seed butter and your favourite way to eat it?