Tag Archives: coconut

Instant Pot

Instant Pot | Favourite Kitchen Gadget | AmandaNaturally.comI’ve had a lot of people recently ask me how I keep bone broth on hand all of the time. This is a totally fair question because in order to get a really nutrient-rich, gelatinous bone broth it needs to cook for a long time. We’re talking 24 hours on the stove top, or 2-4 days in the slow cooker. So how do I do it? Well, I got another gadget. It’s called…
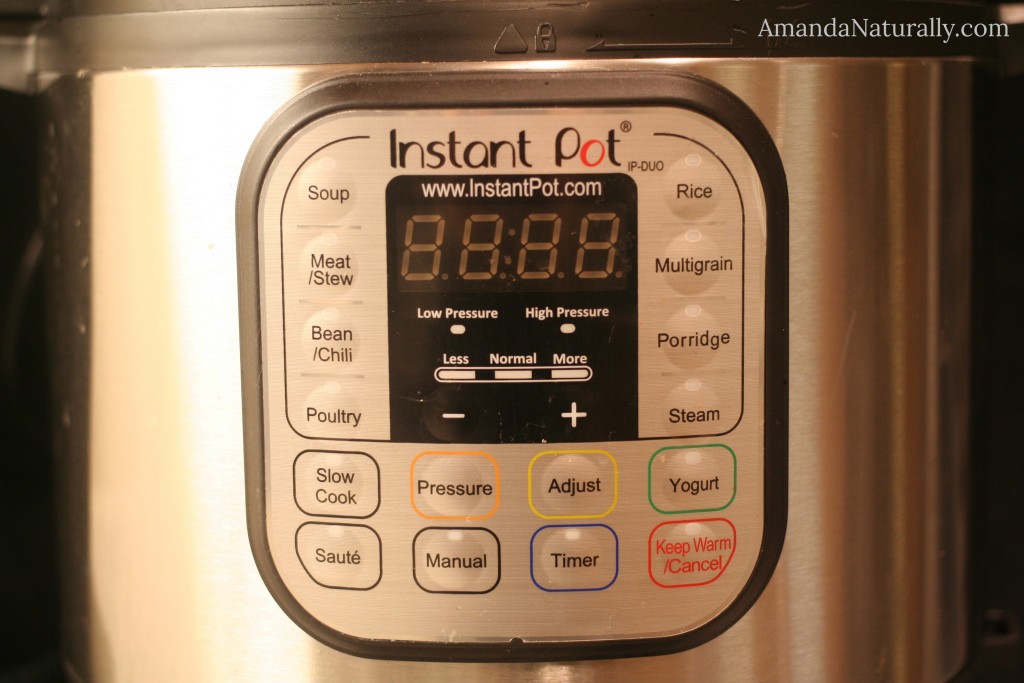
The Instant Pot!

DISCLAIMER: this is not sponsored in anyway. If you click on any links, I may receive a small commission to support my blogging activities, but it does not in any way impact the price of the item, or my opinions on the product. These are my opinions and mine alone! I just want to inform my fellow foodies of fun new gadgets they might enjoy!


The Instant Pot

About a year and a half ago I started seeing people in the real food blogosphere posting about this new gadget on instagram. I didn’t really think I needed another gadget, until I heard that it makes bone broth in only 2 hours. I was sold. However, I’m not one to splurge on a big ticket item, so I waited and asked for one for my birthday. Luckily my in-laws are awesome and they made my day by gifting me one!

The 7-in-1

The setting I use for super speedy bone broth, is the pressure cooker setting. I’ve never used a pressure cooker before, and neither did my mom. It doesn’t seem to be a very popular kitchen utensil in the western world – however it is hugely popular throughout Asia and countries that utilize tougher cuts of meat. Prior to the Instant Pot, all I could picture was a pressure cooker exploding in my kitchen – which terrified me. However, the Instant Pot is an electric pressure cooker, with pretty much every fail-safe possible to prevent any user error. I have felt extremely confident using it, from the second time onwards! I now use it for making hard boiled eggs (see below), quick stews, homemade yogurt and cooking whole root veggies – fast! It’s probably the most used item in my kitchen right now.

Now, I got the Instant Pot for the pressure cooker / bone broth awesomeness. However, once I was able to play around with it, I learned about all of the other functions!

  1. pressure cooker
  2. slow cooker
  3. rice cooker
  4. saute/browning
  5. yogurt maker
  6. steamer
  7. warmer

Here are my favourite settings:

Saute / Browning Mode

This allows me to brown meat in the bottom of the pot, before either pressure cooking OR slow cooking. While not a huge deal, it does save on dishes by not needing to brown in a separate pan.

Warmer

This is one of my favourite settings. You can cook something on pressure mode for 45 minutes in the middle of the day (or morning, or at bedtime), and as soon as the 45 minutes are up, it will switch over to slow cooker mode, on low. So you don’t have to be in the kitchen an hour before you want dinner prepared. You can throw everything in the pot in the morning, pressure cook it, and let it stay on warming all day.

Steamer

All I can say is – steamed whole sweet potatoes take 15 minutes! Plus time to build up pressure, but again – you can throw them in, press steam and leave them. No need to monitor the oven for 1-2 hours when roasting. This is especially awesome when I want to make a recipe for things like sweet potato biscuits, that calls for steamed, roasted or pureed sweet potato.

Yogurt Maker

Since I don’t tolerate dairy, and the store-bought coconut “yogurts” are full of junk that really bug my gut (guar gum etc), my only option is to make my own. This is something I had always been interested in doing, but never dove into. Once I had this great gadget, I jumped in head first and boy was it a success! If you tolerate cow dairy, or goat dairy, here are a great set of directions for DIYing it. However, if you don’t tolerate milk (like me), full-fat coconut milk can make an awesome yogurt alternative! It’s actually a way simpler recipe, because you don’t need to pasteurize the milk first. See directions below.

Homemade Coconut Milk Yogurt

1. Heat 4 cups of full-fat coconut milk (I prefer the Aroy D brand) in a pot, to 110F. Use a candy thermometer, or an electronic meat thermometer ( <– another favourite kitchen gadget). As soon as the temperature hits 110F, pull it off the heat.

2. Immediately whisk in ½ cup of a previous batch of yogurt (you can use dairy if tolerated, store-bought or your previous batch) or 2 packets of Vegan Yogurt Culture (I love the Cultures for Health product, although it does have a bit of rice starch in it – something to note if you’re sensitive or following the AIP protocol). Apparently you can use 2 or 3 probiotic capsules, but I haven’t tried this. (UPDATE: a friend told me she uses ¼ tsp of probiotic powder, or 2-3 capsules, and 1-2 tbsp maple syrup)

3. Whisk in 2 tsp grassfed gelatin. Without this, it won’t thicken. You will still have a yummy, tangy coconut milk, but it will definitely be milk, not yogurt. Apparently you can use agar agar to keep it vegan, but I haven’t tried this since I’m always looking for extra ways to get in gelatin!

4. Pour into jars, or a glass bowl (that fits in the pot), and place in the bottom of the Instant Pot. Secure the lid, press the “yogurt” button, adjust the time to 12 hours and walk away. (NOTE: don’t put the yogurt directly in the Instant Pot. Since it is stainless steel, mine retains a slight hint of what was previously cooked – usually broth. And trust me, broth-flavoured coconut yogurt is not good.)

5. 12 hours later, remove from Instant Pot and store in fridge for a few hours to let set. 

NOTE: if you don’t like really tangy yogurt, start checking the flavour around 8 hours.


Favourite Recipes using the Instant Pot

Bone Broth – in only 2 hours!

  • Fill pot with bones.
  • Add in some aromatics (onion ends, smashed garlic) and some bonus nutrients (egg shells, sea weed).
  • Add water until bones are just covered.
  • Add 1 tbsp apple cider vinegar.
  • Close pot, make sure pressure valve is set to closed and press “Manual”, adjusting the time to 120 minutes.
  • Use slow release method so it doesn’t spray up through the pressure valve!

Hard Boiled Eggs (fool proof, easy to peel – even if truly farm-fresh). This is hands down my favourite way to make HB eggs – nothing else compares!

  • Place as many eggs as you want, on a steamer or the trivet.
  • Pour 1 cup of water into the bottom of the pot. 
  • Close the lid, make sure the pressure valve is closed.
  • Press “manual” and set for 5 minutes. Let it do its thing. 
  • As soon as it beeps, use the quick release method and dunk the eggs in an ice bath. Once chilled, store in the fridge. (UPDATE: As of May 2016 I no longer do the ice bath. As soon as the eggs are done, back into the carton and in the fridge they go!)

Other Egg Recipes

Baked Sweet Potatoes – you don’t need to wrap in tin foil before, but it will help if serving individually.

Squash – this is great for steamed squash (for soups) or spaghetti squash. However, the squash won’t have that caramelized, roasted taste. So if that’s what you’re going for, use my Squash Tutorial.

  • Slice squash in half, remove the seeds.
  • Place trivet in the bottom of the Instant Pot. Add 1 cup of water.
  • Place squash on top of trivet.
  • Close lid and make sure pressure valve is closed. Set to “Manual” for 5 minutes (for spaghetti, acorn… for a large butternut, you might need to do 7 minutes).
  • Use the “Quick Release” method when the 5 minutes is up!

Instant Stew You can follow these directions, or you can do what I do and put the stewing beef on the bottom, add onions, garlic, quartered potatoes, carrot chunks, a can of tomatoes, 1-2 cups bone broth (cover the food with liquid), sea salt, pepper, bay leaf, oregano. Press “beef/stew” and go.

Nom Nom Paleo (an incredible cook and foodie) is also obsessed with the Instant Pot, and has converted dozens of her slow cooker recipes. Definitely check her out!

Instant Pot Website – hundreds of resources!

Tips and Lessons Learned

  1. Unlike the slow cooker, this loses liquid instead of creating it. So make sure there is enough liquid! 
  2. Time to reach pressure needs to be accounted for. Quick things like eggs take 10 minutes to reach pressure, and then 5 minutes to cook. Sweet potatoes only take 5 minutes. However, larger volumes (like stew or broth) can take up to 20 minutes to reach pressure. If lots of frozen items are going in (like when I make broth), it can take 30+ minutes to reach pressure. Make sure to factor this in!
  3. The quick release valve releases a lot of steam that can burn you if you’re not careful. I always throw a dish towel over it before turning it to release.
  4. If you fill up the pot too far, you can’t use the quick release. It will shoot liquid out of it. Not ideal.
  5. You can only use your previous coconut milk yogurt to inoculate your new batch about 2 or 3 times before the bacterial concentration drops too low. There’s very little sugar in coconut milk, so nothing to feed it once it uses up all the rice starch! You could probably add some rice/potato starch, or cane sugar to further stretch your starter culture, but I haven’t tried this yet.

Red Curry Mussels

Red Curry Mussels | grain free, low carb, nutrient dense | AmandaNaturally.com
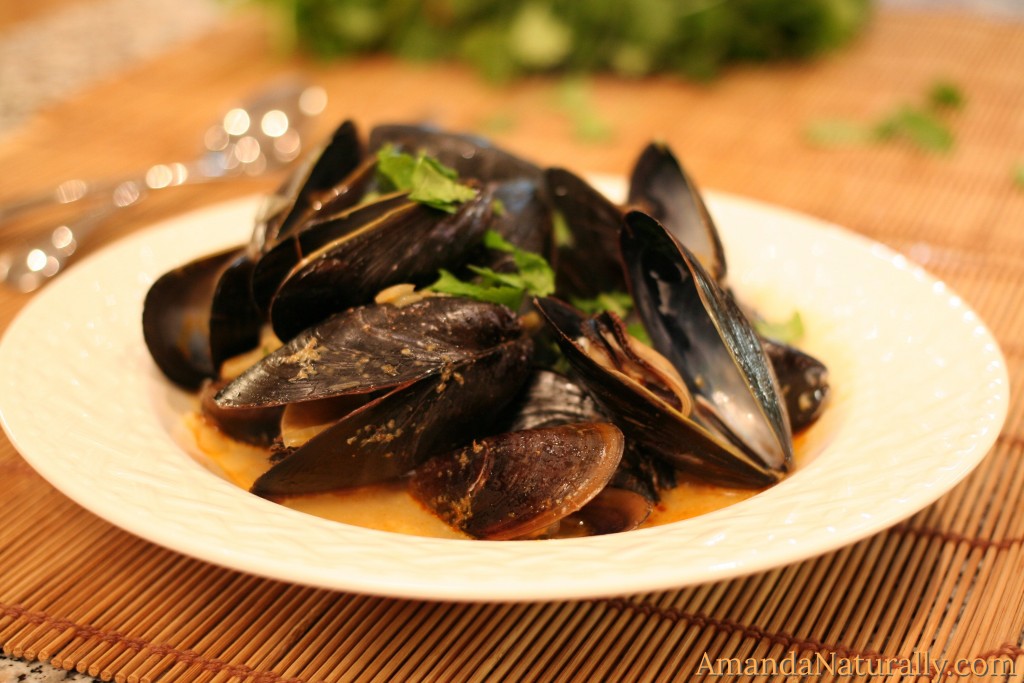
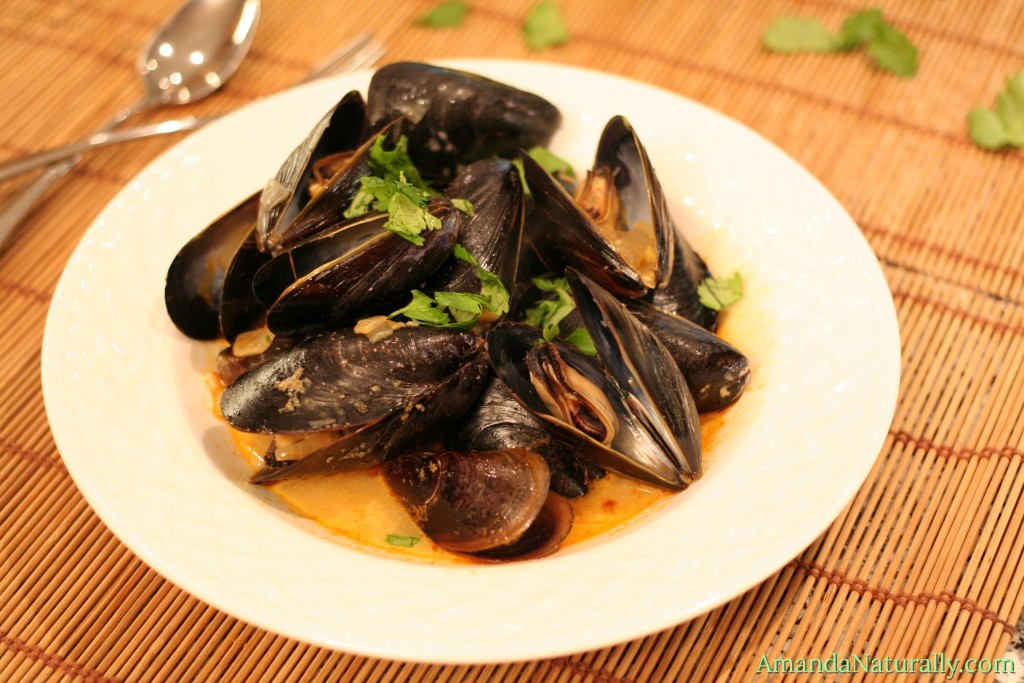
Mussels have been a restaurant go-to of mine for a long time now! Living with food allergies can be challenging when it comes to eating out – especially since so many people love Italian (read: wheat and cheese). However most of the time there’s a mussel dish on the menu, and usually it’s in a simple tomato or wine sauce (although my favourite is thai curry mussels – hence the recipe below!). Add a side salad, or a side of fries if you’re into that (who isn’t?!), and boom – a naturally grain & dairy free meal. Bonus is they’re usually on the appetizer section of the menu so end up being much more reasonably priced than the entrees!
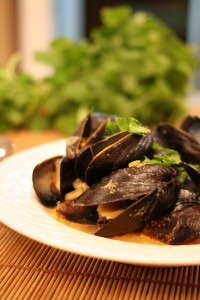
So why would we want to eat mussels? Well aside from being delicious, they’re incredibly nutrient dense. Any time we eat the entire animal, we end up eating the organs, and since so many people these days are adverse to eating things like liver, kidney or heart, eating a whole-animal in the form of shellfish gets all that organy-goodness into you, without you even knowing it! (although you know it now, so try to forget it if that knowledge skeeves you out!)

Shellfish are a mineral powerhouse, specifically when it comes to the thyroid-supporting minerals iodine and selenium,  which tend to be quite low in a Standard North American Diet. Seafood is also a highly bioavailable protein that tends to be easier to digest, so if you have a weak, damaged or irritated digestive tract – or if you’re transitioning to animal proteins after avoiding them for any length of time – seafood is a great place to start. Seafood is also high in the protein glycine (also found in bone broth) which is important for supporting connective tissue in the body (ie. healing leaky gut, joints, skin and other membranes!).

Now, when it comes to actually preparing mussels at home, it’s not as straight-forward as say, baking chicken or grilling a burger. But it’s also incredibly simple – I promise! You just need to learn how, which you can below!

Red Curry Mussels

IMG_8598Ingredients

  • 4 lbs mussels, debearded
  • 2 tbsp coconut oil (or other fat)
  • 2 onions, diced
  • 2 cloves garlic, minced
  • 1 tbsp ginger, chopped
  • 1 tbsp red curry paste (I like Aroy D brand)
  • 2 cups broth (homemade is best!)
  • 2 cups water
  • sea salt (omit if using store-bought broth)
  • ½ cup full-fat canned coconut milk (I like Aroy D brand)
  • chopped cilantro, for garnish

Step 1 – Make sure all of the mussels are fully debearded. To do this, hold the mussel under running water and rinse off any debris. If there is gunk coming out from the inside of the mussel, gently pull on it until it releases and discard. 

Step 2 – At the same time as you are debearding, take note of any mussels that are not firmly closed. If slightly open, knock on it, if it is still alive it should close in response to the knocking. If it remains open, discard – you do not want to eat a dead mussel! 

Step 3 – Once all of the mussels are debearded, set them aside. Heat coconut oil over medium high and sauté onions for about 5 minutes.

Step 4 – Add garlic, ginger and curry paste and cook for about 30 seconds, stirring frequently.

Step 5 – Add broth, water and sea salt (if using), bring to a simmer.

Step 6 – Add in mussels, cover with a lid and steam for 5 minutes. 

Most, if not all, of the mussels should open up. Discard any that do not.

Step 7 – Stir in coconut milk, heat through and serve topped with cilantro. Enjoy with a side salad and sweet potato fries to dip into any extra broth!


Red Curry Mussels
Serves 4
Homemade restaurant-style dinner that is quick and jam-packed with nutrients. Free from dairy and grains as well!
Write a review
Print
Prep Time
15 min
Cook Time
10 min
Total Time
25 min
Prep Time
15 min
Cook Time
10 min
Total Time
25 min
Ingredients
  1. 4 lbs mussels, debearded
  2. 2 tbsp coconut oil
  3. 2 onions, diced
  4. 2 cloves garlic, minced
  5. 1 tbsp ginger, chopped
  6. 1 tbsp red curry paste
  7. 2 cups broth (homemade is best!)
  8. 2 cups water
  9. sea salt (omit if using store-bought broth)
  10. ½ cup full-fat canned coconut milk
  11. chopped cilantro, for garnish
Instructions
  1. 1. Make sure all of the mussels are fully debearded. To do this, hold the mussel under running water and rinse off any debris. If there is gunk coming out from the inside of the mussel, gently pull on it until it releases and discard.
  2. 2. At the same time as you are debearding, take note of any mussels that are not firmly closed. If slightly open, knock on it, if it is still alive it should close in response to the knocking. If it remains open, discard - you do not want to eat a dead mussel!
  3. 3. Once all of the mussels are debearded, set them aside. Heat coconut oil over medium high and sauté onions for about 5 minutes.
  4. 4. Add garlic, ginger and curry paste and cook for about 30 seconds, stirring frequently.
  5. 5. Add broth, water and sea salt (if using), bring to a simmer.
  6. 6. Add in mussels, cover with a lid and steam for 5 minutes. Most, if not all, of the mussels should open up. Discard any that do not.
  7. 7. Stir in coconut milk, heat through and serve topped with cilantro.
Notes
  1. My favourite brand of coconut milk and thai curry paste is Aroy D. It can be found at international or Asian supermarkets, or sometimes in the international aisle of a major grocery chain.
Amanda Naturally http://www.amandanaturally.com/

Vegetable Oils (a.k.a. Industrial Seed Oils)

One of the biggest concerns with the current nutrition recommendations are those revolving around fat consumption. Practitioners who are not up to date on current research still advise low-fat diets for weight loss and protection against heart disease. Not only is this information not substantiated by the medical literature, it is actually dangerous. We need fat to survive! It is the building blocks of our hormones, brain and cell membranes – without fat, we will die. It also delivers essential vitamins from our food to our bodies, so if we don’t consume fat we miss out on integral nutrients, and it keeps us full! Low fat diets should be named “hungry all the time diets…”. Luckily there is some movement towards consuming “healthy fats” albeit from plant-based sources, and while some plant-based fats (avocado, olive, coconut, nuts) definitely have health benefits, others are quite the opposite.

(SIDE NOTE: if you want to know about the events over the last century that got us into this vegetable-oil obsessed, fat/cholesterol-fearing mess, you must read Eat The Yolks by Liz Wolfe. Equal parts hilarious and informative, it takes a serious, in-depth look at the history of our current nutrition recommendations.)

What’s the Deal with Vegetable Oils

Well first of all, the term “vegetable oil” is a complete misnomer – although quite a smart marketing move. These oils do not come from vegetables. They come from canola seeds, sunflower seeds, corn kernels, safflower seeds, cottonseeds and soybeans that have been highly processed and treated with chemical solvents to extract oils. 

Let’s think about this – if you were to take an olive and squeeze it through a press what would happen? Some oil would drip out! Now if you were to take a kernel of corn, or a soybean and do the same thing, then what? Nada. No oil drips out. So how do they actually get oil out of something like a canola seed? This step-by-step direct from Diane Sanfilippo explains perfectly:

Rapeseeds + high heat processing with hexane (a chemical solvent) = a grey, awful smelling, non-smooth oil.

> grey, awful smelling, non-smooth oil is then chemically bleached and de-gummed

> bleached and de-gummed, awful smelling oil is then chemically deodorized

> bleached, de-gummed, chemically deodorized oil is then dyed yellow and bottled in plastic

Full details of the process (which originated in 1980 btw) found here.

It’s also important to consider that many of the seeds used are genetically modified (soy, canola, cottonseed, corn) and heavily sprayed with pesticides which is a concern both for our health and the health of the planet.

Smoke Point vs. Stability of Fat

One of the claims made to support consumption of vegetable oils are that they have a high smoke point. Unfortunately smoke point is not the whole the picture. What really matters is whether or not the fat in question is stable. What dictates stability? Well that’s simple – it’s a matter of biochemistry!

Stable fats resist oxidation (ie. damage) by the main culprits oxygen, light and heat. Unstable fats are highly susceptible to oxidation. (note: smoke point is the temperature at which oxidation occurs – so it is just one part of the puzzle. High smoke point oils can still be very susceptible to oxygen and light.)

Oxidation of fats, means a double bond on the fatty acid chain has been broken, which changes the chemical shape of the fat and can release volatile byproducts. In order to resist oxidation, there needs to be little to no spaces for oxygen to disrupt bonds within the fatty acid chain. So the most stable fats have the fewest (or zero) spaces available for disruption. Which fats are those? Luckily the science is very clear on this:

Saturated Fats – by their very nature have no double bonds available for oxidation. Every single carbon molecule is fully saturated with other carbons and hydrogens. There are no double bonds present – that is the definition of a saturated fat.

Unsaturated Fats – the term unsaturated indicates at least one double bond is present. That means there is at least one opportunity for oxidation.

  • Monounsaturated Fats – one double bond is present
  • Polyunsaturated Fats – more than one double bond is present

Trans Fats – polyunsaturated fats that have been hydrogenated, a process which bombards fats with hydrogen atoms to break up double bonds, changing the consistency from oil to semi-solid. In the process the shape of the fat is completely changed, leading to trans fats which, while less likely to spoil, interfere with thousands of essential chemical reactions in the body. Trans fats have been removed from the FDA’s list of “generally recognized as safe” and are being phased out of production. Trans fats have been shown to harden arteries and increase the risk of heart disease and type 2 diabetes.

So then based on the biochemistry of it all, we should be using saturated fats when oxidation is at risk – ie. exposure to light, heat and oxygen. We should be careful when using unsaturated fats, and very, very cautious about polyunsaturated fats. 

NOTE: You can actually experience this first hand by doing the following experiment:

Take a bottle of canola oil, leave it open on the counter for a week. Then go ahead and smell it. It will smell rancid or “off”. You will instantly be able to tell!

Do the same experiment with a bottle of coconut oil, butter or ghee. No change in smell whatsoever. Because the fats found in these oils are stable and not nearly as susceptible to oxidation.

Why Is This A Problem?

  1. Vegetable Oils = Inflammation. And inflammation is the root cause of every single disease our society is facing right now. (personal aside: if I consume vegetable oils, the next day I have global inflammation of my joints, also known as arthritis – I can’t take my rings off, opening jars become challenging and even climbing stairs is uncomfortable)
  2. Unstable (polyunsaturated) fats are incorporated into cell membranes, in lieu of stable (saturated) ones. When this happens, everything starts to fall apart. When I was in high school we learned that the nucleus was the “brain” of the cell, and the cell membrane was simply a fluid wall that held the cell together. By the time I finished university there was a major paradigm shift. The scientific community had learned that the cell membrane is actually the “brain” of the cell. It communicates with the environment; directs the action within the cell; determines what’s allowed in and out; and communicates with surrounding cells. So if the cell membrane is working well, it can talk to it’s neighbouring cells properly, making the group of them work well together. Healthy cell membranes = healthy cell communication = healthy tissues = healthy organs = healthy systems = healthy bodies. 
  3. Omega-6 (inflammatory) fats are incorporated into cell membranes, instead of omega-3 PUFAs. Omega-3 PUFAs found in seafood and to a lesser extent grassfed beef, liver and pastured egg yolks, are integral for maintaining fluidity of cell membranes as well. Additionally they are responsible for maintaining an anti-inflammatory environment in the tissues. Too many omega-6 fatty acids (which are especially high in plant-based PUFAs) displace omega-3’s in cell membranes, contributing to further destruction of cell membranes.

To sum this up neatly:


Vegetable oils are highly unstable and prone to oxidation. Consumption leads to chronic inflammation, which can lead to chronic disease. Consumption also leads to a significant decrease in cell membrane integrity, resulting in poor functioning of cells, tissues, organs, systems and bodies.


Food Forms of Fats

Most fats that we consume are a combination of saturated, monounsaturated and polyunsaturated fats, however there is usually a dominant fat present, so I will classify the fats below based on their dominant fat.

Saturated Fats (great for cooking) – coconut oil, palm oil, butter/ghee, lard/bacon grease (pork fat), tallow/suet (beef fat) and duck fat (NOTE: animal fat must be sourced from properly raised animals – ie. grassfed, pasture-raised, or at minimum organic. Animals store excess toxins in body fat, so consuming conventional bacon fat is not a good choice. Not available? Stick with coconut oil.)

Monounsaturated Fats (use from cold to high heat, depending on the oil) – avocado oil, olive oil and macadamia nut oil

Polyunsaturated Fats (avoid, especially if heated or exposed to oxygen/light) – safflower oil, sesame seed oil, canola oil, vegetable oil, vegetable oil shortening, corn oil, soybean oil, grapeseed oil, margarine. To make matters worse many of these oils are stored in clear containers in the cupboard (or even worse, heated over and over again in deep fryers). Another PUFA – fish oil – has explicit instructions to be stored in a dark bottle, in the fridge and never heated. Yet vegetable oils have the same chemical structure and are not treated this way.

Trans Fats (avoid at all cost) – hydrogenated or partially-hydrogenated fats, found in pre-made baked goods, processed foods and margarines. (NOTE: if the front says “no trans fats” but the ingredient list indicates hydrogenated or partially-hydrogenated fats, the food product contains trans fats. Simple as that. The only reason they can say “no trans fats” is it contains less than 0.5g per serving – but if you eat multiple servings, which most of us do, you’re definitely being exposed to larger amounts of trans fats than advertised.)

For a complete breakdown of each fat, and for a handy print out, check out this Guide To Cooking Fat from Diane Sanfilippo.


Wait, are you saying to eat animal fat?

YESS!!! 

But, but, but – my arteries and heart disease and stroke and….. 


Good news my friends, there is no evidence supporting the correlation between consumption of animal fats and heart disease and stroke. 

  1. Saturated fat is not dangerous. The unsubstantiated idea that saturated fat causes heart disease is still being propagated within the health community, despite the fact that the medical literature does not in fact support this claim. 
    1. In 2010 meta-analysis was published in the American Journal of Clinical Nutrition. The researchers looked at 21 previous studies involving 350,000 subjects for periods ranging from 5 to 23 years. They concluded that “…there is no significant evidence for concluding that dietary saturated fat is associated with an increased risk of CHD [coronary heart disease] or CVD [cardiovascular disease].”
    2. A study in Japan on 58,000 subjects found an inverse relationship between saturated fat consumption and deaths from stroke. So people with the highest consumption of saturated fat also had the lowest death from stroke. 
  2. Saturated fat is stable and creates stable cell membranes. It does not feed into the inflammatory pathways the way vegetable oils do. 
  3. Saturated fat can be used at high temperatures without being oxidized.
  4. Saturated fat, especially from animal sources, comes replete with 2 very important fat-soluble nutrients – vitamin A, D – that are deficient in most people’s diets. Additionally, grassfed butter carries vitamin K2, a vitamin that has had little to no attention until recently, and now is the centre of some of the most exciting research!


Okay, I’m sold. I’ll make the switch. But how do I know which fat to use when?

First of all, make sure you get rid of all of the vegetable oils in your house. The following is a list of both the obvious and the sneaky sources of seed oils:

  • vegetable oil (obv!) – canola, corn, sunflower, safflower, soybean, cottonseed, grapeseed
  • margarine – including earth balance, vegan margarines and “olive oil” margarines
  • mayonaise – even “olive oil” mayo uses canola and/or soybean oil as it’s #1 ingredient, veganaise is included in this list too
  • salad dressings – again, even the “olive oil” based ones all use vegetable oils
  • packaged junk – chips (even “healthy” chips!), crackers, baked goods etc. most processed/prepared foods use vegetable oils because they’re cheap and shelf-stable
  • gluten free and/or vegan treats – many of the so-called “healthy” treats use vegetable oils, especially if they’re catering to the vegan community. Sure vegetable oils and earth balance margarine are plant-based, but it does not mean they’re suitable for human consumption
  • restaurants – practically every single restaurant out there cooks in canola and/or vegetable oil, so do your best to limit your exposure. There’s no way to 100% avoid vegetable oils, without abstaining from eating out, so instead avoid exposure whenever you can (especially in your house!) and when you do need to eat vegetable oils, increase your seafood intake for the next day or 2 to combat the inflammation

Here’s a list of what fat to use when:

High Heat (searing, high heat roasting, deep frying, pan frying, grilling) – coconut oil, palm oil, butter/ghee, animal fat (lard, tallow, duck fat, bacon grease) and avocado oil

Medium or Low Heat (sautéing, lower heat roasting) – olive oil, macadamia nut oil or high-heat oils

Low/no heat (finishing oils, mayo, salad dressings etc.) – walnut oil, macadamia oil, sesame oil

Baking – butter, ghee or coconut oil (if sensitive to dairy)

Salad Dressingsmake your own with olive, avocado, walnut, sesame, macadamia oil

Mayonnaise – make your own with avocado oil or even better, bacon grease!

Chips – choose chips cooked in avocado oil (Boulder Canyon or Good Health brands), palm oil (Inka Plantain Chips) or coconut oil (Jackson’s Honest if you’re in the USA)


The fats that I have in my kitchen at all times are:

  • Terra Delyssa olive oil (Costco)
  • Chosen Foods avocado oil (Costco)
  • Nutiva coconut oil (Costco)
  • homemade ghee from organic (or grassfed if I can get it!) butter (health food store, Loblaws)
  • rendered bacon grease (from my Sunday bacon cook up!)
  • lard and/or tallow if I have it on hand (can be found at Fresh From The Farm in Toronto, or homemade if you have access to leaf fat either from a farmer, butcher or by purchasing part of or a whole hog / cow – great directions found in Beyond Bacon)


Conclusion

The moral of the story is to stick with the fats that humans have been consuming for thousands of years. Cold-pressed oils, rendered animal fats and butter. Avoid highly-processed, man-made fats that have only been brought into our food supply over the last few decades. Rest easy consuming properly-raised bacon and slathering grassfed butter on veggies – not only are you not going to clog your arteries but you are supporting healthy cell membranes and increasing absorption of essential nutrients! And above all, ditch the margarine and vegetable oil!!

Copyright 2014 Amanda Naturally | Design by The Nectar Collective