Tag Archives: breakfast

Plantain Pancakes

Plantain Pancakes | grain free, dairy free | AmandaNaturally.com I used to LOVE pancakes. Seriously love them. I mean come on, refined carbs + sugar + maple syrup – what’s not to love? Interestingly, as I’ve changed how I nourish my body, my palate has also changed pretty dramatically (I say this as I type away while snacking on liver pate…geez, who am I?). Sweet breakfasts simply don’t satisfy me in the mornings anymore. Give me savoury every morning and I’m happy! Well maybe not every morning….

Every so often I still get a craving for pancakes, and since I eat incredibly nourishing food most of the time, I totally give in and enjoy! I’ve tried my fair share of gluten-free and paleo pancake recipes and have a few thoughts about them…

  1. The whole “just mash 1 banana with 2 eggs and fry it – it tastes just like a pancake!” is a flat out lie. It does not taste like a pancake. It tastes like banana-y eggs.
  2. Just because something is gluten-free, does not make it healthy. In fact, when I see “gluten-free” on a packaged product, I run the other direction. Simply using a gluten-free flour in your standard recipe will remove the major gut-irritant (or allergen for some), but it’s still a refined-carb-laden food. You’ll get a massive blood sugar spike, subsequent insulin spike and 1.5 hours later you’ll be starving and/or completely lethargic and ready for a nap. No thanks.
  3. Most “gluten-free” pancake recipes use oat flour, which while technically is gluten-free, both clinically and personally I have found that oats are a no-go until a massive amount of gut healing is done. (FYI 20-25% of certified GF oats are still cross contaminated with gluten)
  4. Most “dairy-free” recipes use margarine – yuck. 
  5. There are many “grain-free” or “paleo” pancake recipes that use lots of arrowroot or tapioca flour. And while these are definitely grain-free, they are still just white flours. I sometimes use these flour, but in very moderate amounts. Not as the main ingredient in a recipe. Again, just because something is “grain-free” does not make it healthy.

Now I’m not saying you can’t enjoy pancakes or waffles with maple syrup! Just know if/how it’s going to impact your body. Flooding my body with refined carbs is not a good scene for me. It results in stomach aches, fatigue and crazy hunger/carb cravings. Not worth it.

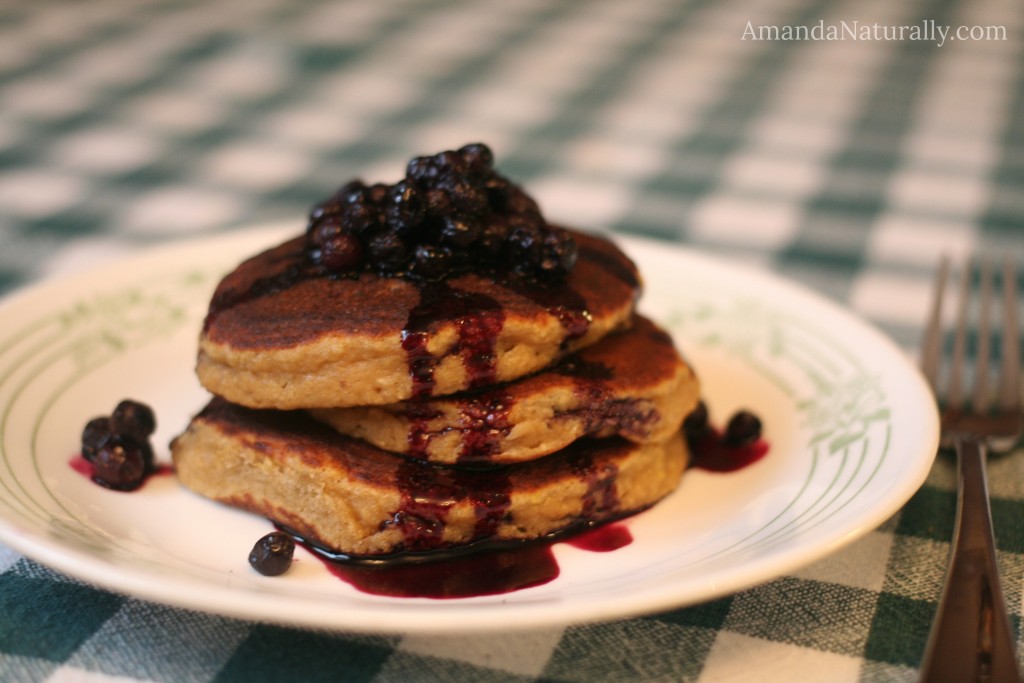
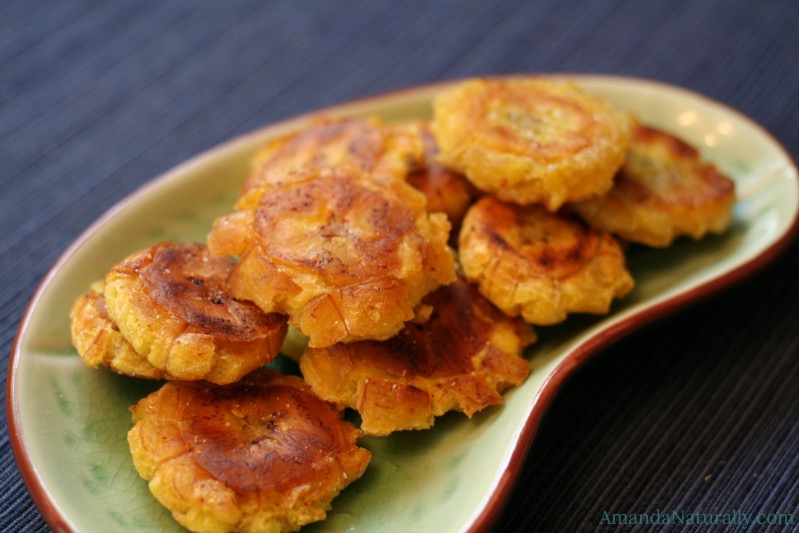
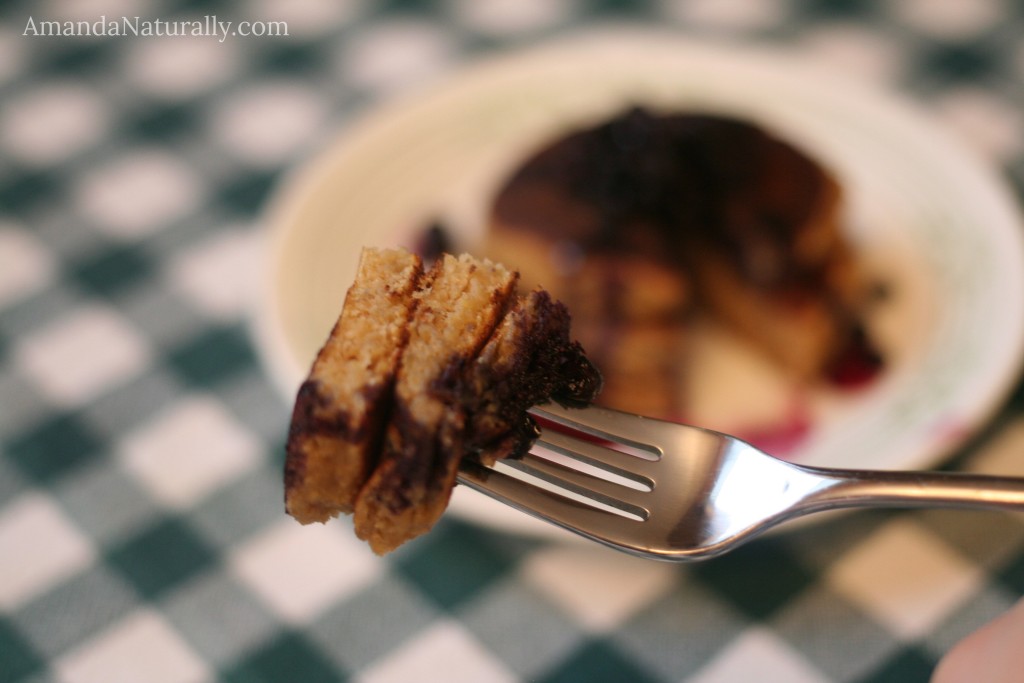
So how do I enjoy pancakes then? Well I make sure to use a real food as the main ingredient! There are lots of recipes out there that use pumpkin or sweet potato as the base – which are good – but I love using ripe plantain. The consistency of the pancakes is so similar to what I remember (disclaimer – it has been over 5 years since I’ve had a real pancake, so I may not remember exactly correct…) and the flavour is on point with just a hint of banana.

I usually just use real maple syrup on top and the hubby uses goat butter and maple syrup. However, occasionally I get fancy and make a quick berry-reduction to top the pancakes. Bonus is it further decreases the sugar!


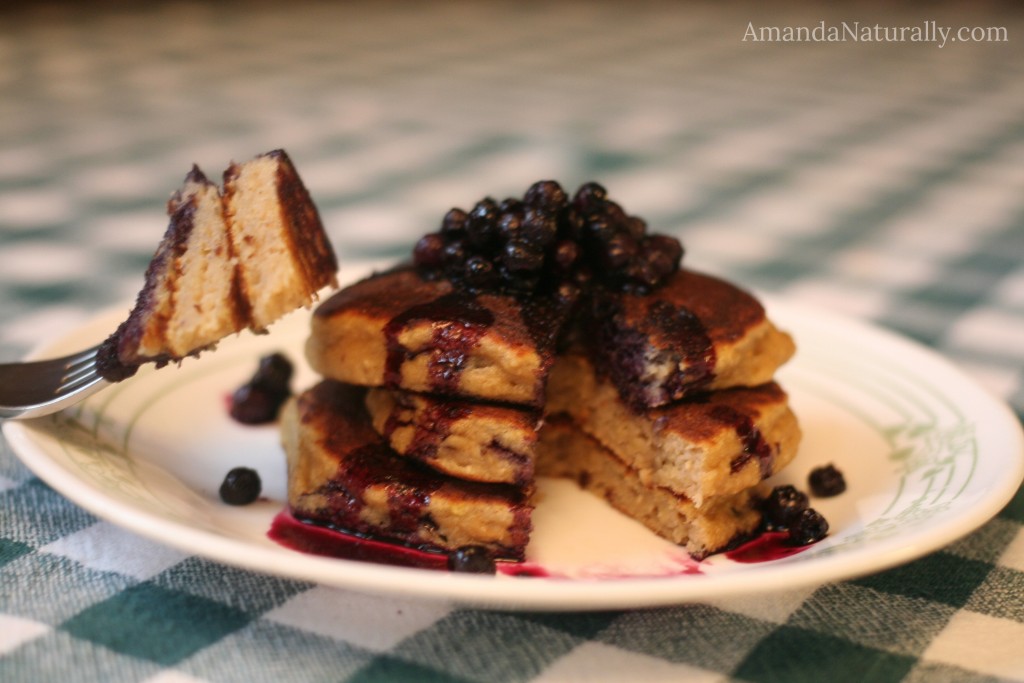
Plantain Pancakes with Blueberry Syrup (optional)

1. I love this recipe because it uses real ingredients. The main ingredients are plantains, eggs and coconut. So really it’s just like having eggs and plantains fried in coconut oil! But seriously, real food results in satiety, energy, nutrients, gut-supporting fibre…this list goes on and on!

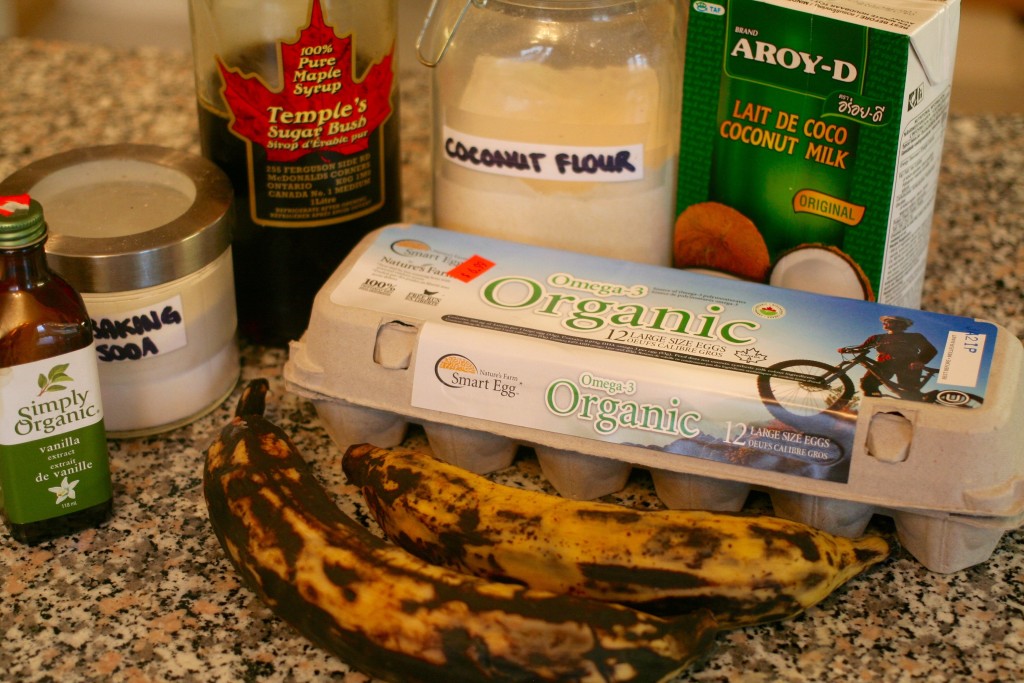
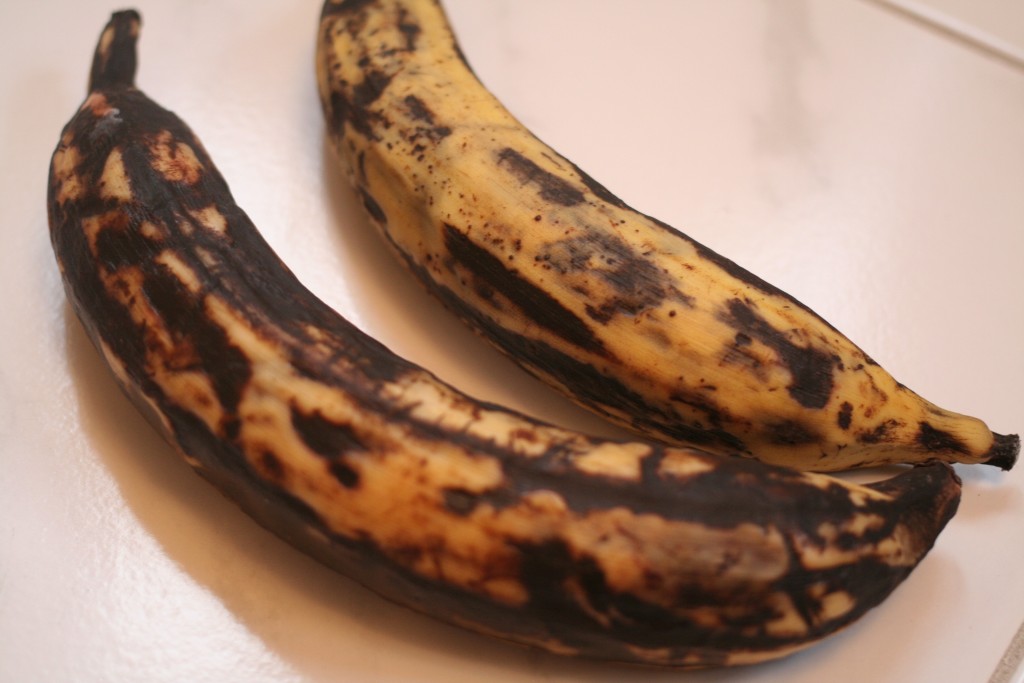
2. This is what a ripe plantain looks like:

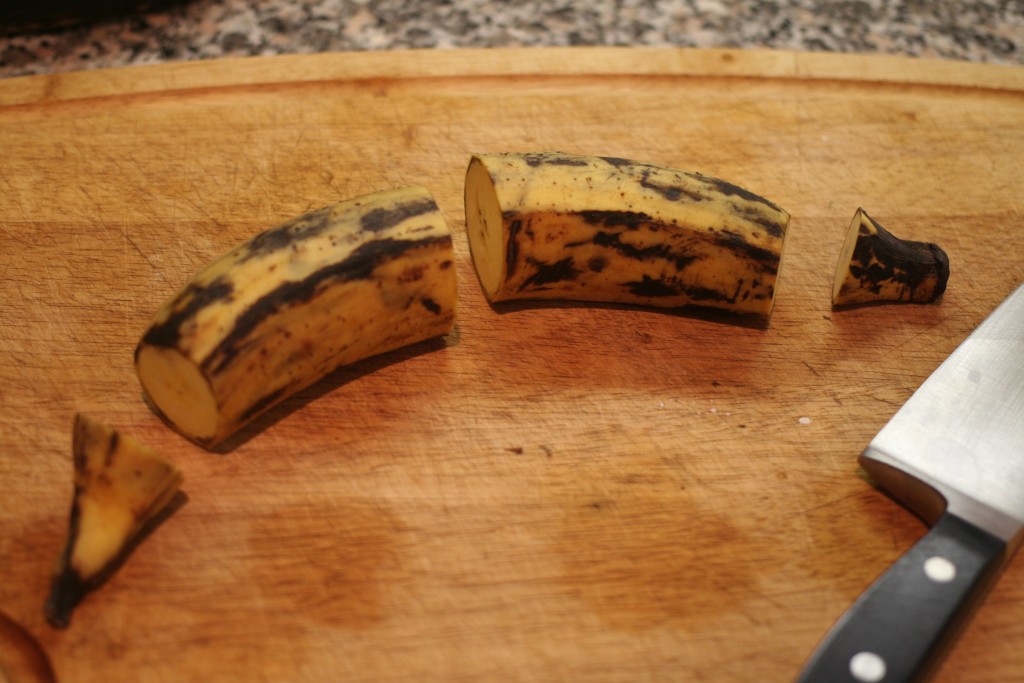
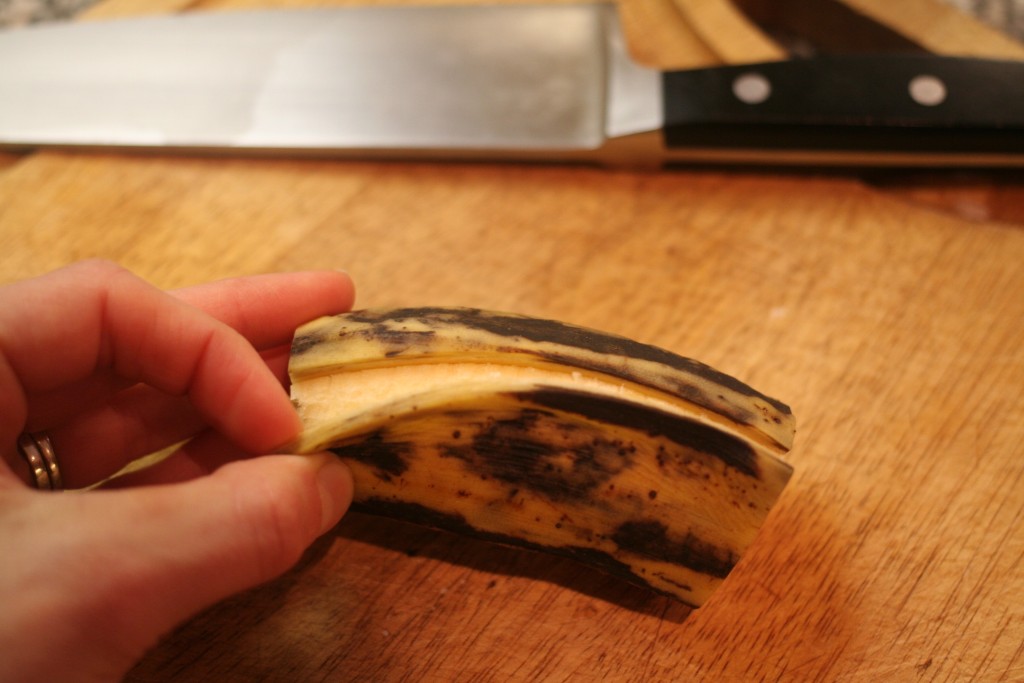
3. This is how you peel a plantain:

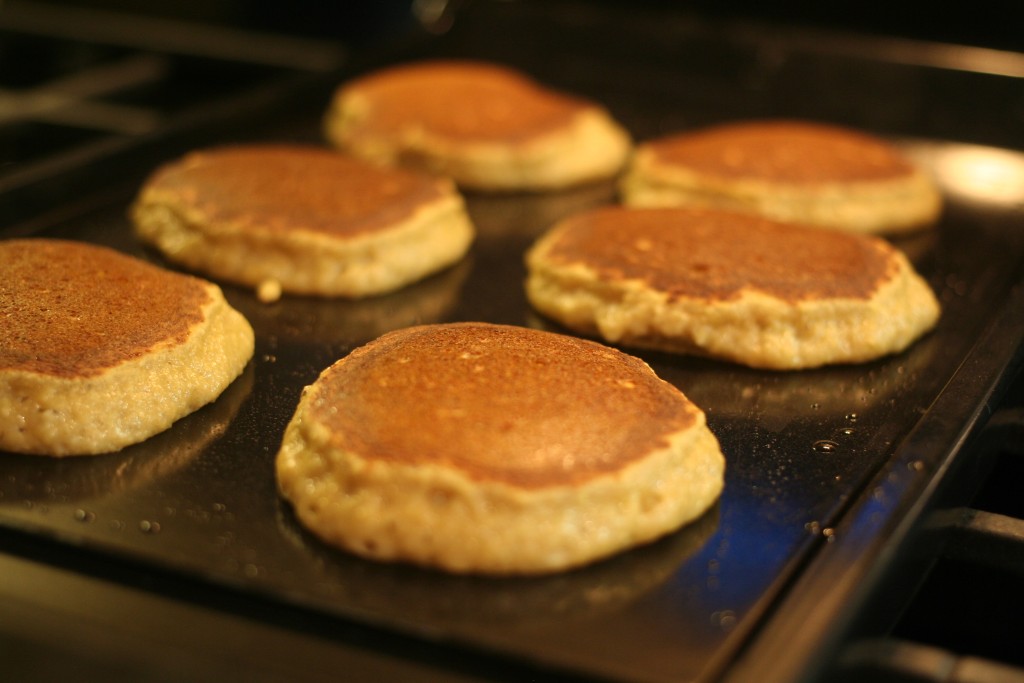
4. Patience is key for this recipe. Don’t try to flip too early! There’s no gluten to hold the batter together before it’s cooked, so let it cook! You want it almost fully cooked through before flipping it.

5. Also, don’t increase the heat to have them cook faster. It doesn’t work and they will just burn.

6. Egg-Free option. I have made this recipe using 3 “gelatin-eggs” to be AIP compliant, and it does work pretty well. The consistency isn’t quite right, but it’s still delicious. To make this with gelatin eggs, do the following:

Combine all main ingredients (except for eggs) and blend well.

Mix 3 tbsp gelatin with 3 tbsp luke warm water.

Then add in 6 tbsp boiling water and whisk vigorously.

Add to batter, blend immediately and start cooking!

Plantain Pancakes
Serves 4
A grain-free, dairy-free pancake recipe that uses real food as the main ingredients!
Write a review
Print
Prep Time
10 min
Cook Time
20 min
Total Time
30 min
Prep Time
10 min
Cook Time
20 min
Total Time
30 min
Pancakes
  1. 2 ripe plantains (approximately 3 cups roughly chopped or 2 cups pureed)
  2. 3 eggs
  3. 1 tsp vanilla extract
  4. 1 tbsp maple syrup
  5. 2 tbsp full-fat coconut milk
  6. ¼ cup coconut flour
  7. ½ tsp baking soda
  8. pinch of sea salt
Blueberry Syrup
  1. 1 cup blueberries (I used frozen)
  2. ¼ cup water
  3. 2 tbsp maple syrup
Instructions
  1. In a high-powered blender or food processor, blend all ingredients.
  2. Heat a heavy pan over medium heat (medium low if your stove top runs hot!). Add cooking fat if necessary.
  3. If making blueberry syrup, combine all ingredients in a small sauce pan and heat over medium for 15 minutes or until reduced. Stir occasionally.
  4. Pour the batter directly on to the pan, keeping pancakes relatively small - max 3" in diameter!
  5. Wait 3-5 minutes before flipping. You want to cook them most of the way before flipping.
  6. Flip and cook for another 2 minutes or so.
  7. Keep warm in the oven at 250F until the entire batch is done.
Notes
  1. 1. Patience is key. Don't try to flip too early! Also, don't increase the heat to have them cook faster. It doesn't work and they will just burn.
  2. 2. Egg-Free option. I have made this recipe using 3 "gelatin-eggs" to be AIP compliant, and it does work pretty well. The consistency isn't quite right, but they are still delicious. To make this with gelatin eggs, do the following: combine all main ingredients (except for eggs) and blend well. Mix 3 tbsp gelatin with 3 tbsp luke warm water. Then add in 6 tbsp boiling water and whisk vigorously. Add to batter, blend immediately and get cooking!
Amanda Naturally http://www.amandanaturally.com/

Pumpkin Spice Muffins

Pumpkin Spice Muffins | grain free, gluten free, nut free | AmandaNaturally.com
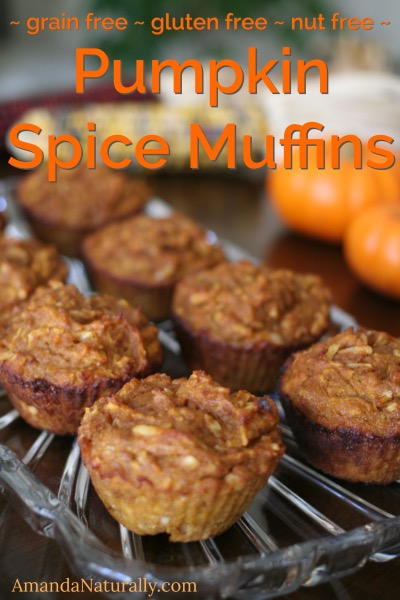
Well it’s about time I posted a pumpkin recipe this fall!

I’m a huge fan of the pumpkin-spice obsession that occurs as of October 1. Normally I stick with homemade pumpkin spice lattes using my pumpkin spice creamer, but sometimes I get a little more creative.

Case in point, this recipe for pumpkin spice muffins! I opened a 500mL can of pureed pumpkin for a few PSLs last week and knew I was running out of time before the remaining pumpkin went bad, so I whipped up a few dozen of these bad boys.

I have a feeling these Pumpkin Spice Muffins will become a common occurrence in our household!

NOTE: you will likely want to double this recipe. If you don’t think you will be able to finish them within a week (you will though, trust me), they freeze really well!

PS. Have extra pumpkin puree? Why not make some delicious no bake pumpkin pie squares?

Pumpkin Spice Muffins
Serves 12
A delicious, fall-inspired muffin - free of grains, refined sugar and nuts! Safe for schools. Perfect for cool fall mornings.
Write a review
Print
Prep Time
15 min
Cook Time
30 min
Total Time
45 min
Prep Time
15 min
Cook Time
30 min
Total Time
45 min
Wet Ingredients
  1. 6 eggs, brought to room temperature
  2. ½ cup coconut oil, melted
  3. ¼ cup honey
  4. ½ tsp vanilla extract
  5. 1½ cups pumpkin puree
  6. ½ cup mashed ripe banana
Dry Ingredients
  1. 1 cup shredded coconut, unsweetened
  2. ½ cup coconut flour, sifted
  3. 1 tbsp pumpkin pie spice (increase if you like really spicy muffins)
  4. 1 tsp cinnamon
  5. ½ tsp sea salt
  6. ½ tsp baking soda
Optional Ingredients
  1. raisins
  2. chopped dates
  3. pecans
  4. walnuts
  5. chocolate chips
Instructions
  1. Preheat oven to 350F. Line muffin tin with silicon liners.
  2. Combine wet ingredients in a bowl.
  3. Combine dry ingredients in another bowl.
  4. Add dry ingredients to wet and mix really well. It will thicken up after a few minutes.
  5. Using an ice cream scoop, scoop a generous serving into each muffin liner. They don't rise a lot, so fill them up to the top!
  6. Bake for 30 minutes, or until set and slightly golden.
  7. Let cool and enjoy!
Notes
  1. It is important to have the eggs at room temperature so they don't cause the coconut oil to solidify. If you don't have time to leave them out, simply place them in a bowl and cover with hot tap water for about 10 minutes, while you prepare the rest of the ingredients.
  2. These muffins freeze really well so I always make a double batch and freeze half.
Amanda Naturally http://www.amandanaturally.com/

Fried Plantains

Oh plantains – how I love thee!Fried Plantains | vegan, paleo, AIP | AmandaNaturally.com

Seriously guys, plantains are the best! Here’s why:

  1. They are incredibly versatile and can be used to make everything from biscuits and pancakes, to tortillas and nachos. Green plantains are savoury and a great alternative to potatoes. Ripe plantains (yellow, or yellow with brown spots) are super sweet and great for making batters.
  2. They last forever in your kitchen (well as long as you don’t eat them) because you can use them at all stages of their ripeness. Seriously, we’re talking weeks before they go bad!
  3. They cook up very quickly. Most people who have switched over to a real-food diet will agree with me when I say whole-food starches take a long time to prep! Sweet potatoes and squash take almost an hour in the oven, and sometimes (ok most times) I don’t have that kind of time! Fried plantains, as you’ll see in the recipe below, take 10 minutes.
  4. They are a very neutral starch, so unless you have a banana allergy, they are usually safe for most people.
  5. They are very nutrient dense (as opposed to grains and flours) and are full of the good kind of starch that feeds your beneficial gut bacteria.
  6. They are a great chip alternative, and while you can make your own, I highly suggest purchasing Inka Plantain Chips. (tip to all my Canadians out there – you can buy the Inka green plantain chips at Dollarama!!)
  7. They’re freakin’ delicious!

They do have one major downside – they’re definitely not local to where I live. So not only can that make them challenging to locate (note: Asian markets and ethnic grocery stores always have them), but it also means they have a high environmental footprint. I try to eat mostly local and seasonal – meat from local farmers, vegetables from a local CSA – but plantains, bananas and coconut are the one exception. Driving a Prius makes me feel a bit better about that!

Plantains can be a little intimidating the first time you make them, so my goal with this post is to show you how simple they are. This recipe is for fried green plantains, also called tostones or patacones, depending on where you’re from! These guys are reminiscent of a french fry or potato wedge. You can follow the exact same recipe for ripe plantains, but you won’t need to smash them halfway. Also they’ll be very sweet. Which ripeness you choose to fry up depends on the meal you’re preparing, your personal preference and if you have any plantains left that were allowed to ripen! 

Fried Plantains (a.k.a. Tostones)

1. Slice off the ends of your plantain and cut into 3 or 4 chunks, to make the next steps easier. 

 2. Score the skin of the plantain, being careful not to cut the flesh. Use your knife edge or fingernails to peel off the skin. It’s a lot tougher than a banana, but the flesh isn’t as delicate so no need to worry about bruising the plantain! 

3. Once the skin is removed, slice the plantains into about 1-2 cm discs. 

4. Heat a decent amount of fat in a frying pan over medium. I love using coconut oil for frying plantains because it really compliments the flavour of the plantain, but you can use any saturated fat (ghee, lard, bacon grease, tallow). You want the melted fat to be a few millimetres deep and covering the entire pan. 

5. Place the plantains in the hot oil and cook for 3-4 minutes. You will notice the bottom turning golden brown. Keep the burner at medium or less, you want the whole bottom half of the plantain to cook through as it turns golden brown. If they are cooking too fast, turn down the heat.

 6. Flip the plantains and cook another 3-4 minutes on the other side. 

7. Once they’re golden on both sides and cooked through (you shouldn’t see any raw plantain in the middle), remove a few at a time and smash them! Take a chef’s knife or a glass cup and gently and evenly press down on the plantain disc until it flattens.


8. As you smash the plantains, return them to the frying pan and continue until they’re all flat. Fry for 1-2 more minutes on each side, adding extra oil if you need.

9. Season liberally with sea salt and serve! 


Foods to Eat Fried Plantains With:

  • eggs and bacon, in lieu of hashbrowns
  • burgers, in lieu of french fries
  • tacos
  • pulled pork
  • beef carnitas
  • whipped coconut cream, cinnamon and berries (using ripe plantains)
  • pretty much anything because they rock.


So tell me, what’s your favourite way to use plantains? 

Never used them before? Give it a go and report back!


Fried Plantains
A simple, nourishing starch free that cooks up in only 10 minutes and is sure to please the whole family!
Write a review
Print
Prep Time
5 min
Cook Time
10 min
Total Time
15 min
Prep Time
5 min
Cook Time
10 min
Total Time
15 min
Ingredients
  1. Green plantains
  2. Fat (I prefer coconut oil because it really compliments the flavour of the plantain, but you can use any saturated fat - lard, bacon grease, tallow, ghee)
  3. Sea salt
Instructions
  1. 1. Slice the ends off of the plantain, and cut into 3 or 4 chunks.
  2. 2. Score the skin of the plantain, being careful not to cut the flesh. Use your knife edge or fingernails to peel off the skin.
  3. 3. Slice the plantains into about 1-2 cm discs.
  4. 4. Heat a liberal amount of fat in a frying pan over medium. Melted fat should be a few millimetres deep and covering the entire pan.
  5. 5. Place the plantains in the hot oil and cook for 3-4 minutes, until the bottom turns golden brown.
  6. 6. Flip the plantains and cook another 3-4 minutes on the other side.
  7. 7. Once they're golden on both sides and cooked through (no raw plantain in the middle), remove a few at a time and smash them! Take a chef's knife or a glass cup and gently and evenly press down on the plantain disc until it flattens.
  8. 8. As you smash the plantains, return them to the frying pan and continue until they're all flat. Fry for 1-2 more minutes on each side, adding extra oil if you need.
  9. 9. Season liberally with sea salt and serve!
Notes
  1. If you are using ripe plantains (which are just as awesome, but quite sweet), you do not need to smash them. Simply cook until golden brown on the first side, flip and cook to golden on the second side. Season with sea salt and serve!
Amanda Naturally http://www.amandanaturally.com/
Copyright 2014 Amanda Naturally | Design by The Nectar Collective