When I was in grade school, we were always allowed to bring in a treat for the whole class on our birthdays. Since my birthday was in June, and it was usually hot out, my mom would always make jello jigglers for me to take! They were always a huge hit because they were delicious, refreshing and fun. Making your own jello jigglers is super simple and can be incredibly healthy, as long as it’s not with the artificially sweetened, food dyed, jello brand.
The flavour of homemade jello that I tend to make the most often is watermelon, simply because a large watermelon is a lot of fruit for 2 people to polish off before it goes bad. By turning it into jello, not only do you extend the life of the watermelon, but you have the opportunity to make an incredibly nourishing treat! Why is homemade jello so nourishing? Because gelatin, especially the grass-fed variety, is the breakdown product of connective tissue. And the best way to support our connective tissue, is to eat it! Why would we want to support connective tissue? Well it’s the scaffolding that our entire body is built upon. More specifically, it’s what keeps the gut strong (ie. not leaky!), our joints healhy and our skin firm and elastic. For more info on the benefits of consuming gelatin, check out this post. I love using homemade jello when working with parents on healing their kids guts, but adults can enjoy them just the same!
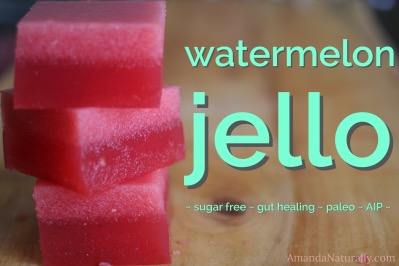
Watermelon Jello
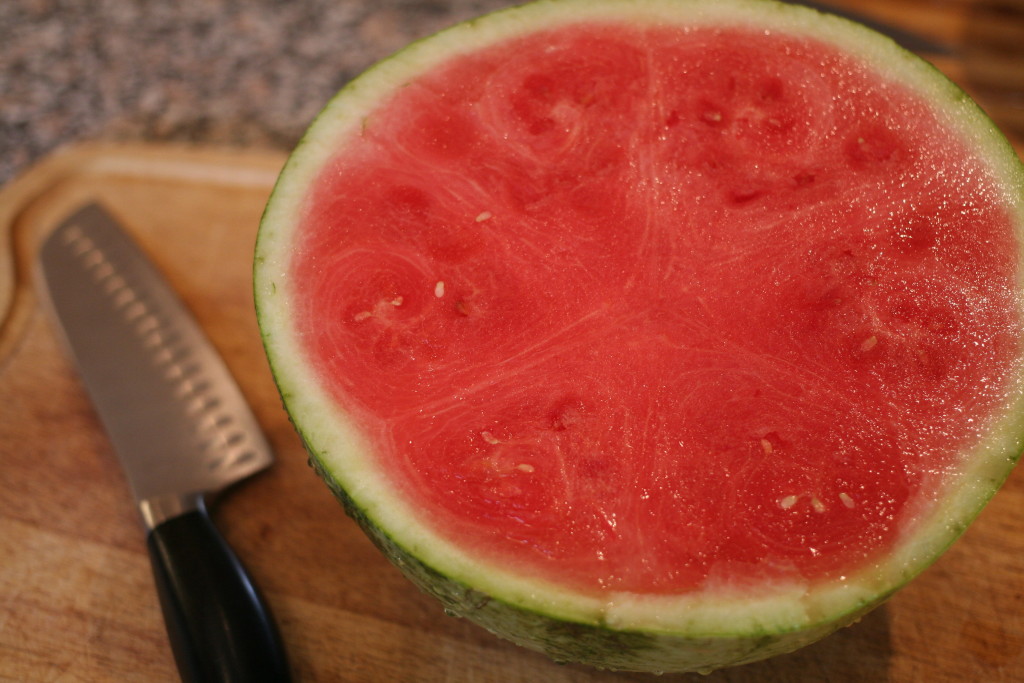
1. Cut open watermelon and chop into pieces or scoop out using a spoon.
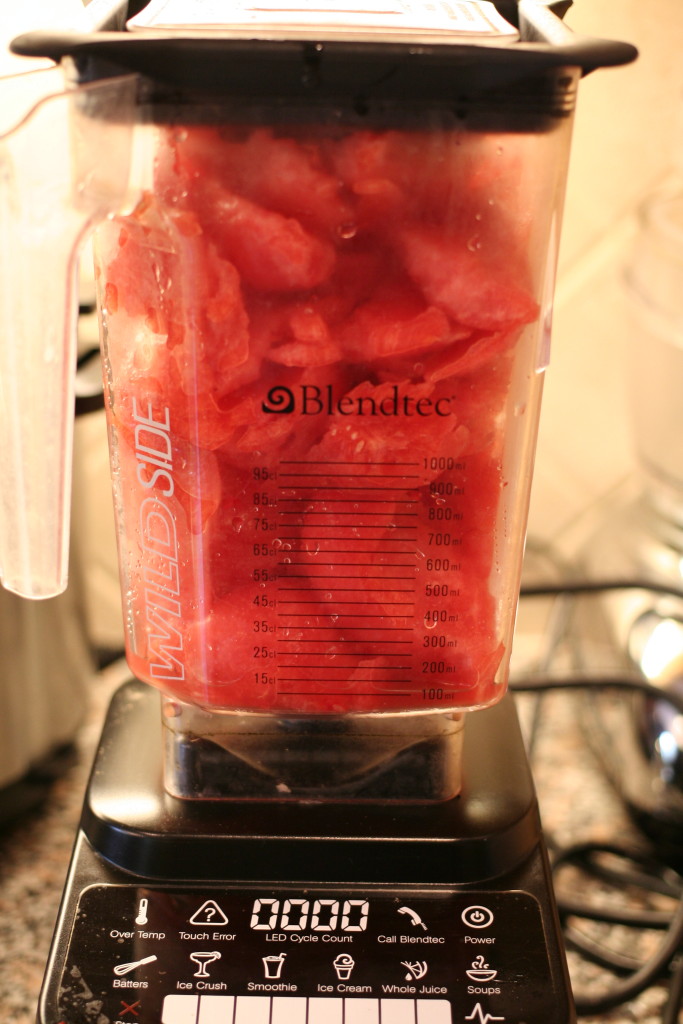
2. Puree in your blender. You will likely have to do this multiple steps since 1 watermelon can give you a lot of material to work with! This watermelon gave 13 cups of pureed juice. (Optional: strain watermelon juice to get rid of the pulp. I’ve done this before but I find it unnecessary and time consuming. The only benefit is you get clear jello, instead of the cloudy layer on top – which I actually kind of like the look of!)
3. Stir in some raw honey and a pinch of sea salt, to your taste. For 13 cups I used 1 cup of honey. A good ballpark number is 1-2 tbsp honey per cup of watermelon. (You can absolutely omit the honey altogether and just use the fruit juice!)
4. Measure your total liquid amount (watermelon + honey). Mine was 14 cups.
5. Place half the liquid in a pot over low heat. Stir frequently and heat until very warm. DO NOT BOIL.
6. Meanwhile, place the other half of the liquid in a bowl and add the gelatin. The amount you need is 1 tbsp gelatin per 1 cup of liquid. So I used 14 tbsp gelatin (or ¾ cup + 2 tbsp). Let the gelatin bloom for about 5 minutes, while you warm the other half of the liquid.
7. Once the gelatin has bloomed (either entirely or mostly), and the liquid in the pot is very warm, dump the gelatin/liquid mixture into the pot. Whisk thoroughly to combine.
NOTE: Small batches work well with allowing the gelatin to bloom and simply whisking it in. I find with large amounts of gelatin like this, the gelatin clumps together. So when you dump it into the pot, use an immersion blender to break up all the gelatin.
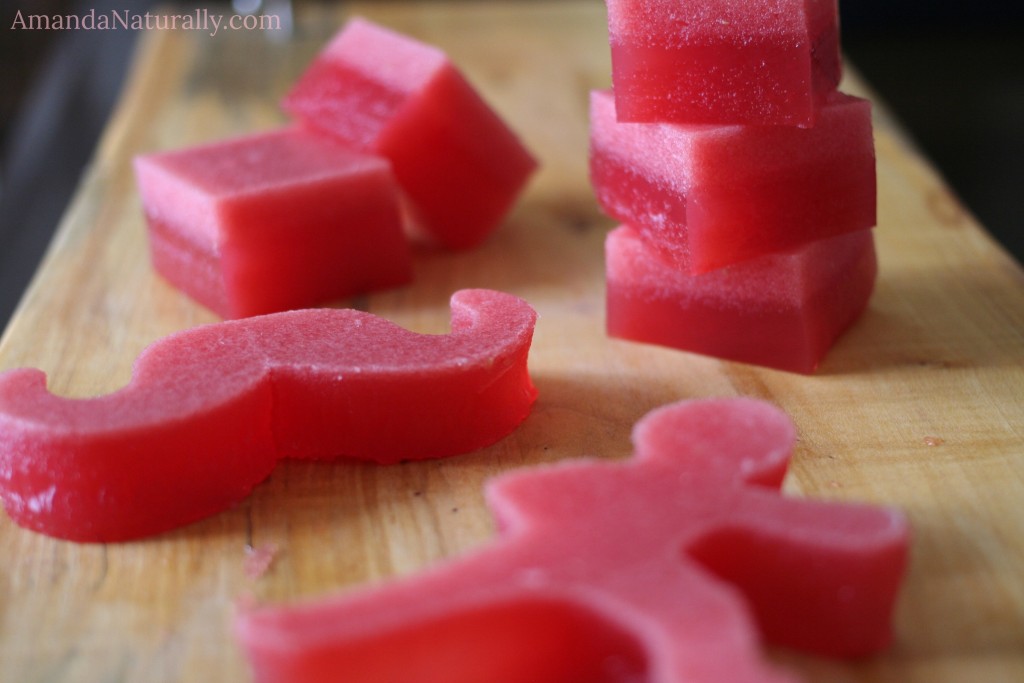
8. Pour mixture into silicon muffin liners/tins, cake pans or chocolate moulds.
9. Refrigerate for 1-2 hours before popping out of moulds or cutting into jello jigglers. You can simply cut into squares, or have some fun by using cookie cutters!
Did any one else’s mom make jello jigglers when they were a kid? Every time I make these I get super nostalgic!
I can’t remember where I first saw this idea, probably somewhere on pinterest, but I can’t take credit for coming up with it! Others have done it before me, but I love this little project so much that I had to share it with you!
Do you squeeze lemon into your water? What do you do with the lemon after the fact? I keep a lemon in my water all day, and then it goes in the compost. Which is preferable to going into the garbage, but wouldn’t it be even better if you could use it once more before composting it? Well look no further as I have the perfect project for you!
Lemon is a powerful de-greaser and anti-bacterial, so it’s a great ingredient for cleaning products. Combine lemon with vinegar, the most useful of all cleaning ingredients, and you create a potent cleaner that not only degreases and shines, but also kills unwanted microbes without any nasty chemicals! Here’s how:
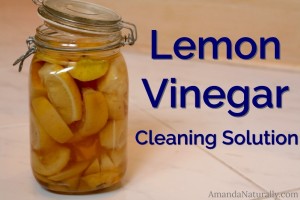
Lemon Vinegar Cleaning Solution
Grab a large jar or bowl and fill it up about half way with plain old white vinegar. Store it somewhere that is an easy reach from your prep area in the kitchen. Every time you use a lemon – either for cooking or in your water – when you’re done, simply throw it into the vinegar. Once you fill up the jar to the top (the lemons should be completely submerged in water), let it sit for 2 weeks. Remove the lemons from the vinegar (now you can compost them!) and voila – you have yourself an amazing cleaning product that is effective and also smells lovely!
You can use it on its own for the kitchen and bathroom, or combine with additional ingredients such as those found in my Bathroom Cleaner!
There you have it! A simple way to reuse leftover lemon peels to keep your house clean and smelling great!
Do you have any tricks for squeezing in one more use out of something before recycling/composting? Share below!
First of all, let me just say that this is not a paid endorsement. I only recommend products that I truly and honestly enjoy, use or believe in. Okay, now that that’s out of the way, let me tell you all about the book I just read and LOVED!
The Purely Primal Skincare Guide by Liz Wolfe
Natural, holistic skin care is something that I totally believe in. I switched away from Clinique, Herbal Essences and Aveeno almost 5 years ago, after learning through sites like the Environmental Working Group’s Skin Deep website and books like Slow Death by Rubber Duck, and There’s Lead In Your Lipstick, that practically 100% of our personal care products are pure chemicals and have no place on our body. Our skin is our largest organ and everything we put on it, ends up inside our bodies. If a product is not safe to eat, it is not safe to put on our bodies. So I headed to my local health food store and started to make the change. However, like most people I switched to natural “products”. As I became more experienced in the natural world, I started to get sketched out that the only coconut in my my natural skincare products was cocoamide DEA.
Luckily, since skin health is at least 90% based on the health of your digestive tract and the food you consume, my skin has stayed fairly clear for me over the years. Yes you read that right:
The health of your skin is almost entirely determined by your food choices and the health of your digestive tract.
That includes acne, eczema, psoriasis, rosacea, dry skin, dandruff, flaking skin…any skin condition you can name, you can connect back to your internal health.
However the key words there are almost entirely. What if you have your digestion working optimally and your diet is on point? Well that was my case. My skin was mostly working for me, but I was still getting some occasional breakouts – mostly on my shoulders and chest. I’d already cut out goat cheese (which I know is definitely a trigger – I’ll still eat it occasionally, but I am guaranteed to wake up the next morning with at least 2 or 3 blemishes). I also still had chronically dry skin – even though I was doing the oil cleansing method with coconut oil! Um hello? Isn’t coconut oil supposed to cure everything??
I finally decided to bite the bullet and purchase Liz Wolfe‘s Purely Primal Skincare Guide (formally the Skintervention Guide) because I listen to the Balanced Bites podcast and I really respected everything I’d heard Liz talk about so far regarding skin health. It’s not an area I know a ton about, so it was time to go to an expert. Boy am I glad I did and here’s why.
Section 1 and 2 – Nutrition and Digestion
The first 2 sections are great overviews of how certain foods harm or nourish your skin and the importance of an optimally working digestive tract. Doing what I do for a living, I didn’t learn a whole lot in these sections, but it was definitely worthwhile to go over real food dietary principals and digestive health, from the point of view of skin health.
Section 3 – Topical
This was my favourite section because I knew none of it! As I mentioned above, I had already been using the oil cleansing method. For those of you who aren’t familiar with this, here’s how it works (in my experience previous to this guide):
When you want to cleanse your face, take some oil (coconut, obv) and rub it all over your face.
Take a warm facecloth (not hot!) and gently wipe it off.
You’re done!
The rationale behind this is “like dissolves like”, which as someone with a science background, makes total sense. If you’re trying to remove oil and gunk build up from the day, oil will dissolve it off! Soap or cleansers will too, but only because it saponifies the oil so it can dissolve into water. And as I learned from this guidebook, you will also strip your body’s natural oils causing everything to go haywire! It makes way more sense to use oil.
As we hit the winter last year, I started realizing that coconut oil simply wasn’t working for me, so I switched to olive oil which seemed to work better. But my face still felt dry, so I started using argan oil as a moisturizer as well. It still wasn’t perfect, but I was getting by.
As soon as I read Liz’s take on the oil cleansing method I immediately changed up my protocol. I hit up my local health food store and purchased some jojoba oil. She recommended a 5:1 ratio of nourishing oil (jojoba working well for most people) and castor oil for people with my skin type (mostly normal, occasionally combination skin). I could not believe what a difference it made after even the first application!! As soon as I wiped it off my skin was glowing – I kid you not! No additional moisturizer needed either.
The next test was my post-gym shower the following morning. Normally I use soap (natural soap, but yes soap) after a workout because I felt like I needed some extra help to get the sweat off. However, all I needed to do was rinse my face off with some water (sweat is water soluble after all) and I stepped out of the shower fresh faced with no dryness. I could not believe it. I’ve been playing with the OCM for over a year now, and with one minor change, my skin has jumped to a whole new level.
Another great tip I learned was to dilute some neem oil in a nourishing oil (I used coconut this time) for any blemishes that you’re trying to get rid of asap. I had a bachelorette party to go to on the weekend and Thursday night I was a little stressed because I had a few blemishes on my chest. I applied a tiny bit of neem oil in some coconut oil over my chest before I went to bed and there was a significant reduction in redness and size by the morning. It was like magic! (side note: you should absolutely spot test oils on a discrete area of your skin in case you react. I didn’t, which in hindsight could have ended horribly. Luckily it worked out!)
One of my favourite parts of this skincare guide is it give you several levels of involvement, depending on your skin health issue. Level 1 uses the most basic ingredients – basic oils, baking soda etc. Level 2 uses some more unique oils and combinations of nourishing oils and essential oils. Level 3 recommends products that are made of real ingredients, or skin food as she calls them! Unfortunately most of these products – such as Primal Life Organics (which oh man looks amazing!) – are only available in the USA, or cost an arm and a leg to ship to Canada, so these aren’t an option for me. However, they do look amazing. Luckily levels 1 and 2 are totally doable if you have access to a health food store or amazon for the products.
My Overall Opinion
If you can’t tell, I simply loved this book. I printed it out, put it in a binder and it now sits in our clinic waiting room. It is full of incredible recommendations for all levels of commitment to natural skincare. The only downside is that the products that are recommended are American, but that is absolutely to be expected since the author is from the US! And there are more 1 or 2 ingredient recommendations than there are products, so it’s not like there aren’t a ton of options for you! If you’re interested in changing your skin care routine to a more natural route (which is probably a good idea!) and don’t know where to start, this is the guidebook for you. With recommendations for facial cleansing, toning, nourishing, moisturizing, exfoliation, deep cleansing, masks, spot treatments for blemishes, hair treatments for all types of scalp issues, brushing tips, hair colouring, washing/moisturizing the body, sunscreen, lip balm, oral health, nail care, deodorant/body odour issues, make up, intimate care, pregnancy tips and skincare for babies/kids – this guide has it all. I can’t wait to try even more of her recommendations like the coffee grounds body scrub and coconut milk hair lather. Stay tuned for updates!

 When I was in grade school, we were always allowed to bring in a treat for the whole class on our birthdays. Since my birthday was in June, and it was usually hot out, my mom would always make jello jigglers for me to take! They were always a huge hit because they were delicious, refreshing and fun. Making your own jello jigglers is super simple and can be incredibly healthy, as long as it’s not with the artificially sweetened, food dyed, jello brand.
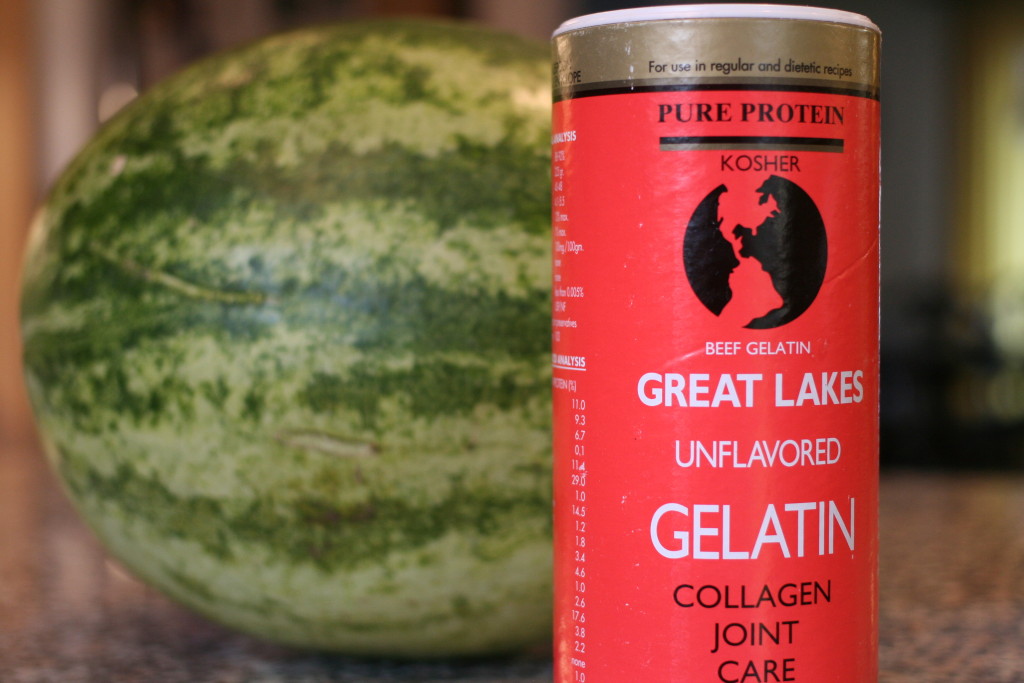
 2. Puree in your blender. You will likely have to do this multiple steps since 1 watermelon can give you a lot of material to work with! This watermelon gave 13 cups of pureed juice. (Optional: strain watermelon juice to get rid of the pulp. I’ve done this before but I find it unnecessary and time consuming. The only benefit is you get clear jello, instead of the cloudy layer on top – which I actually kind of like the look of!)
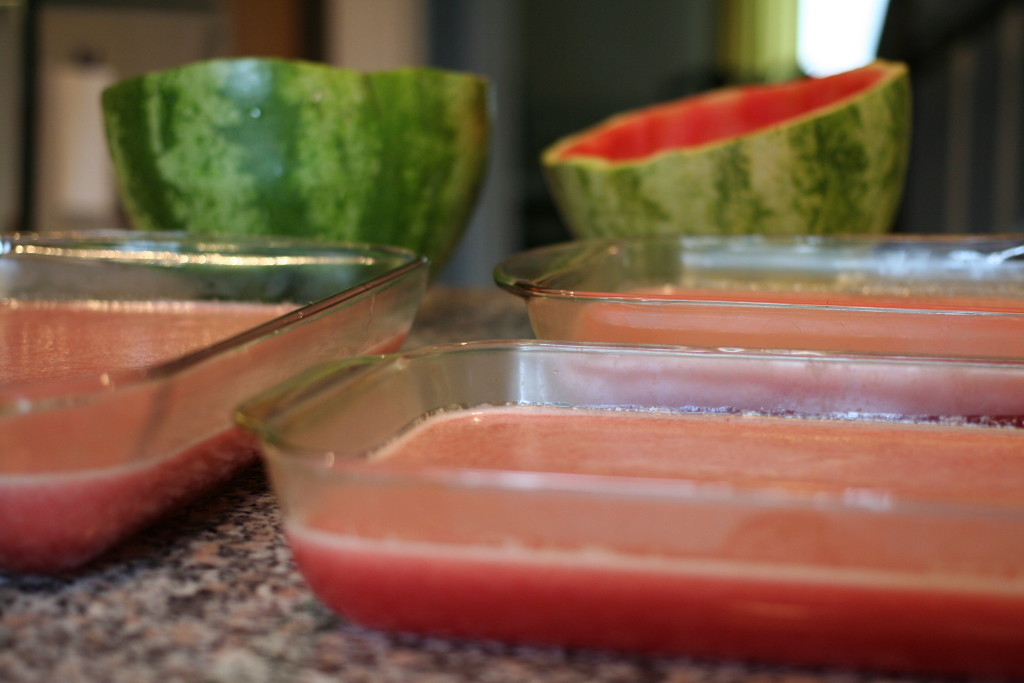
 I can’t remember where I first saw this idea, probably somewhere on pinterest, but I can’t take credit for coming up with it! Others have done it before me, but I love this little project so much that I had to share it with you!
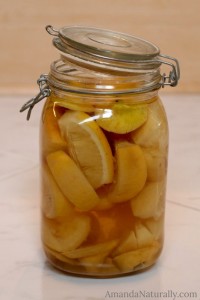 Grab a large jar or bowl and fill it up about half way with plain old white vinegar. Store it somewhere that is an easy reach from your prep area in the kitchen. Every time you use a lemon – either for cooking or in your water – when you’re done, simply throw it into the vinegar. Once you fill up the jar to the top (the lemons should be completely submerged in water), let it sit for 2 weeks. Remove the lemons from the vinegar (now you can compost them!) and voila – you have yourself an amazing cleaning product that is effective and also smells lovely!
