Category Archives: AIP

Grain free, dairy free, legume free, egg free, nightshade free, nut and seed free recipes

Sausage Stuffed Delicata Squash

Sausage Stuffed Delicata Squash - Amanda NaturallySquash is by far my favourite of the fall foods! As soon as the weather cools down a bit in September I throw the first
squash I can get my hands on into the oven and roast it until it starts to caramelize. It is so sweet and delicious, while being a fairly low concentration of carbs, so you don’t get whacked with a massive blood sugar spike. The ironic thing is when I was a kid I hated squash. It would literally make me gag, so I would mix ½ tsp in with a huge spoonful of mashed potatoes so I could taste it less..but then it would ruin my mashed potatoes. Siiggh, 8-year old problems. My brother and I would even fight about who had to carry it to the table, we hated it so.

That all changed when I was in grade 12. I randomly ended up at a sort of friend / acquaintance’s house for dinner one night and her mom served us a quarter of an acorn squash with a pat of butter and some brown sugar. I almost died when I saw it, but I sucked it up and ate it because I didn’t want to be rude. I was shocked to find out it was delicious and I’ve never looked back. Thank you social pressure! My brother still calls me a traitor…

Sausage Stuffed Delicata Squash - Amanda Naturally

My favourite of all the squash is the Delicata. These guys only seem to be out for a short while in the fall, so I scoop them up where ever I find them! I love them for a few reasons:

  1. small in size, so they cook faster
  2. thin diameter and thin skin, so they are less risky to cut open
  3. you can eat the skin!

Speaking of the risk associated with trying to hack open a raw squash. A few years back I was googling around trying to find an easier way to cut squash, because I was sure I’d lose a finger one day. I stumbled across the most incredible trick that I have used on every squash I’ve cooked since!

Wash the skin of entire squash well. Throw it directly into the oven while it is preheating to the eventual temperature you are going to roast it at. Depending on the size of the squash, leave it in there for 15-25 minutes.

Sausage Stuffed Delicata Squash - Amanda Naturally

At about the 20 minute mark, pull the squash slice it open and scoop out the seeds. You likely will want to wear oven mitts because baked squash retain their heat forever!

I have done this with acorn, delicata, buttercup, butternut, spaghetti…. it has never exploded because it’s not in there long enough, and I am much more confident in making it to my 30’s with all of my fingers!

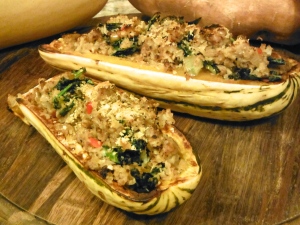
Ok back to my favourite squash….today I bring you Sausage Stuffed Delicata Squash!

I was inspired by a traditional recipe for stuffed peppers, which typically uses rice and ground beef. I used cauli-rice (anyone who hasn’t tried it, do it! It’s delicious!) and farmer’s garlic sausage from our meat delivery guys because it was already spiced a bit, which made my job a whole lot easier! The recipe may look long and involved, but I promise you it is very easy. The only tricky part is there are multiple parts going at the same time. The good news is, it’s really hard to mess up any one part. So while the recipe may indicate that something needs to be cooked for 5 minutes, anywhere from 5-10 is okay! Just keep the heat below medium to prevent burning, and you can take it at your own pace. 

PS. These guys would be amazing stuffed in mini pumpkins for Thanksgiving…just sayin’!

Sausage Stuffed Delicata Squash - Amanda Naturally

Sausage Stuffed Delicata Squash
Serves 6
A delicious and nutritious meal, inspired by local fall flavours.
Write a review
Print
Prep Time
10 min
Cook Time
50 min
Total Time
1 hr
Prep Time
10 min
Cook Time
50 min
Total Time
1 hr
Squash
  1. 4-5 delicata squash
Sausage
  1. 2 tbsp fat of choice (duck fat, lard, tallow, coconut oil)
  2. 2 onions, diced
  3. 1 large bell pepper, diced
  4. 3-4 cloves garlic, minced
  5. 4 pastured sausages
  6. 1 bunch kale, washed and chopped into bite sized pieces
  7. sea salt
  8. pepper
Cauli-Rice
  1. 1 head cauliflower
  2. 2 tbsp fat
  3. sea salt
  4. pepper
Optional
  1. nutritional yeast
Squash
  1. Place whole squash in oven. Preheat oven to 400F. Leave squash in oven for 25 minutes (including preheating time).
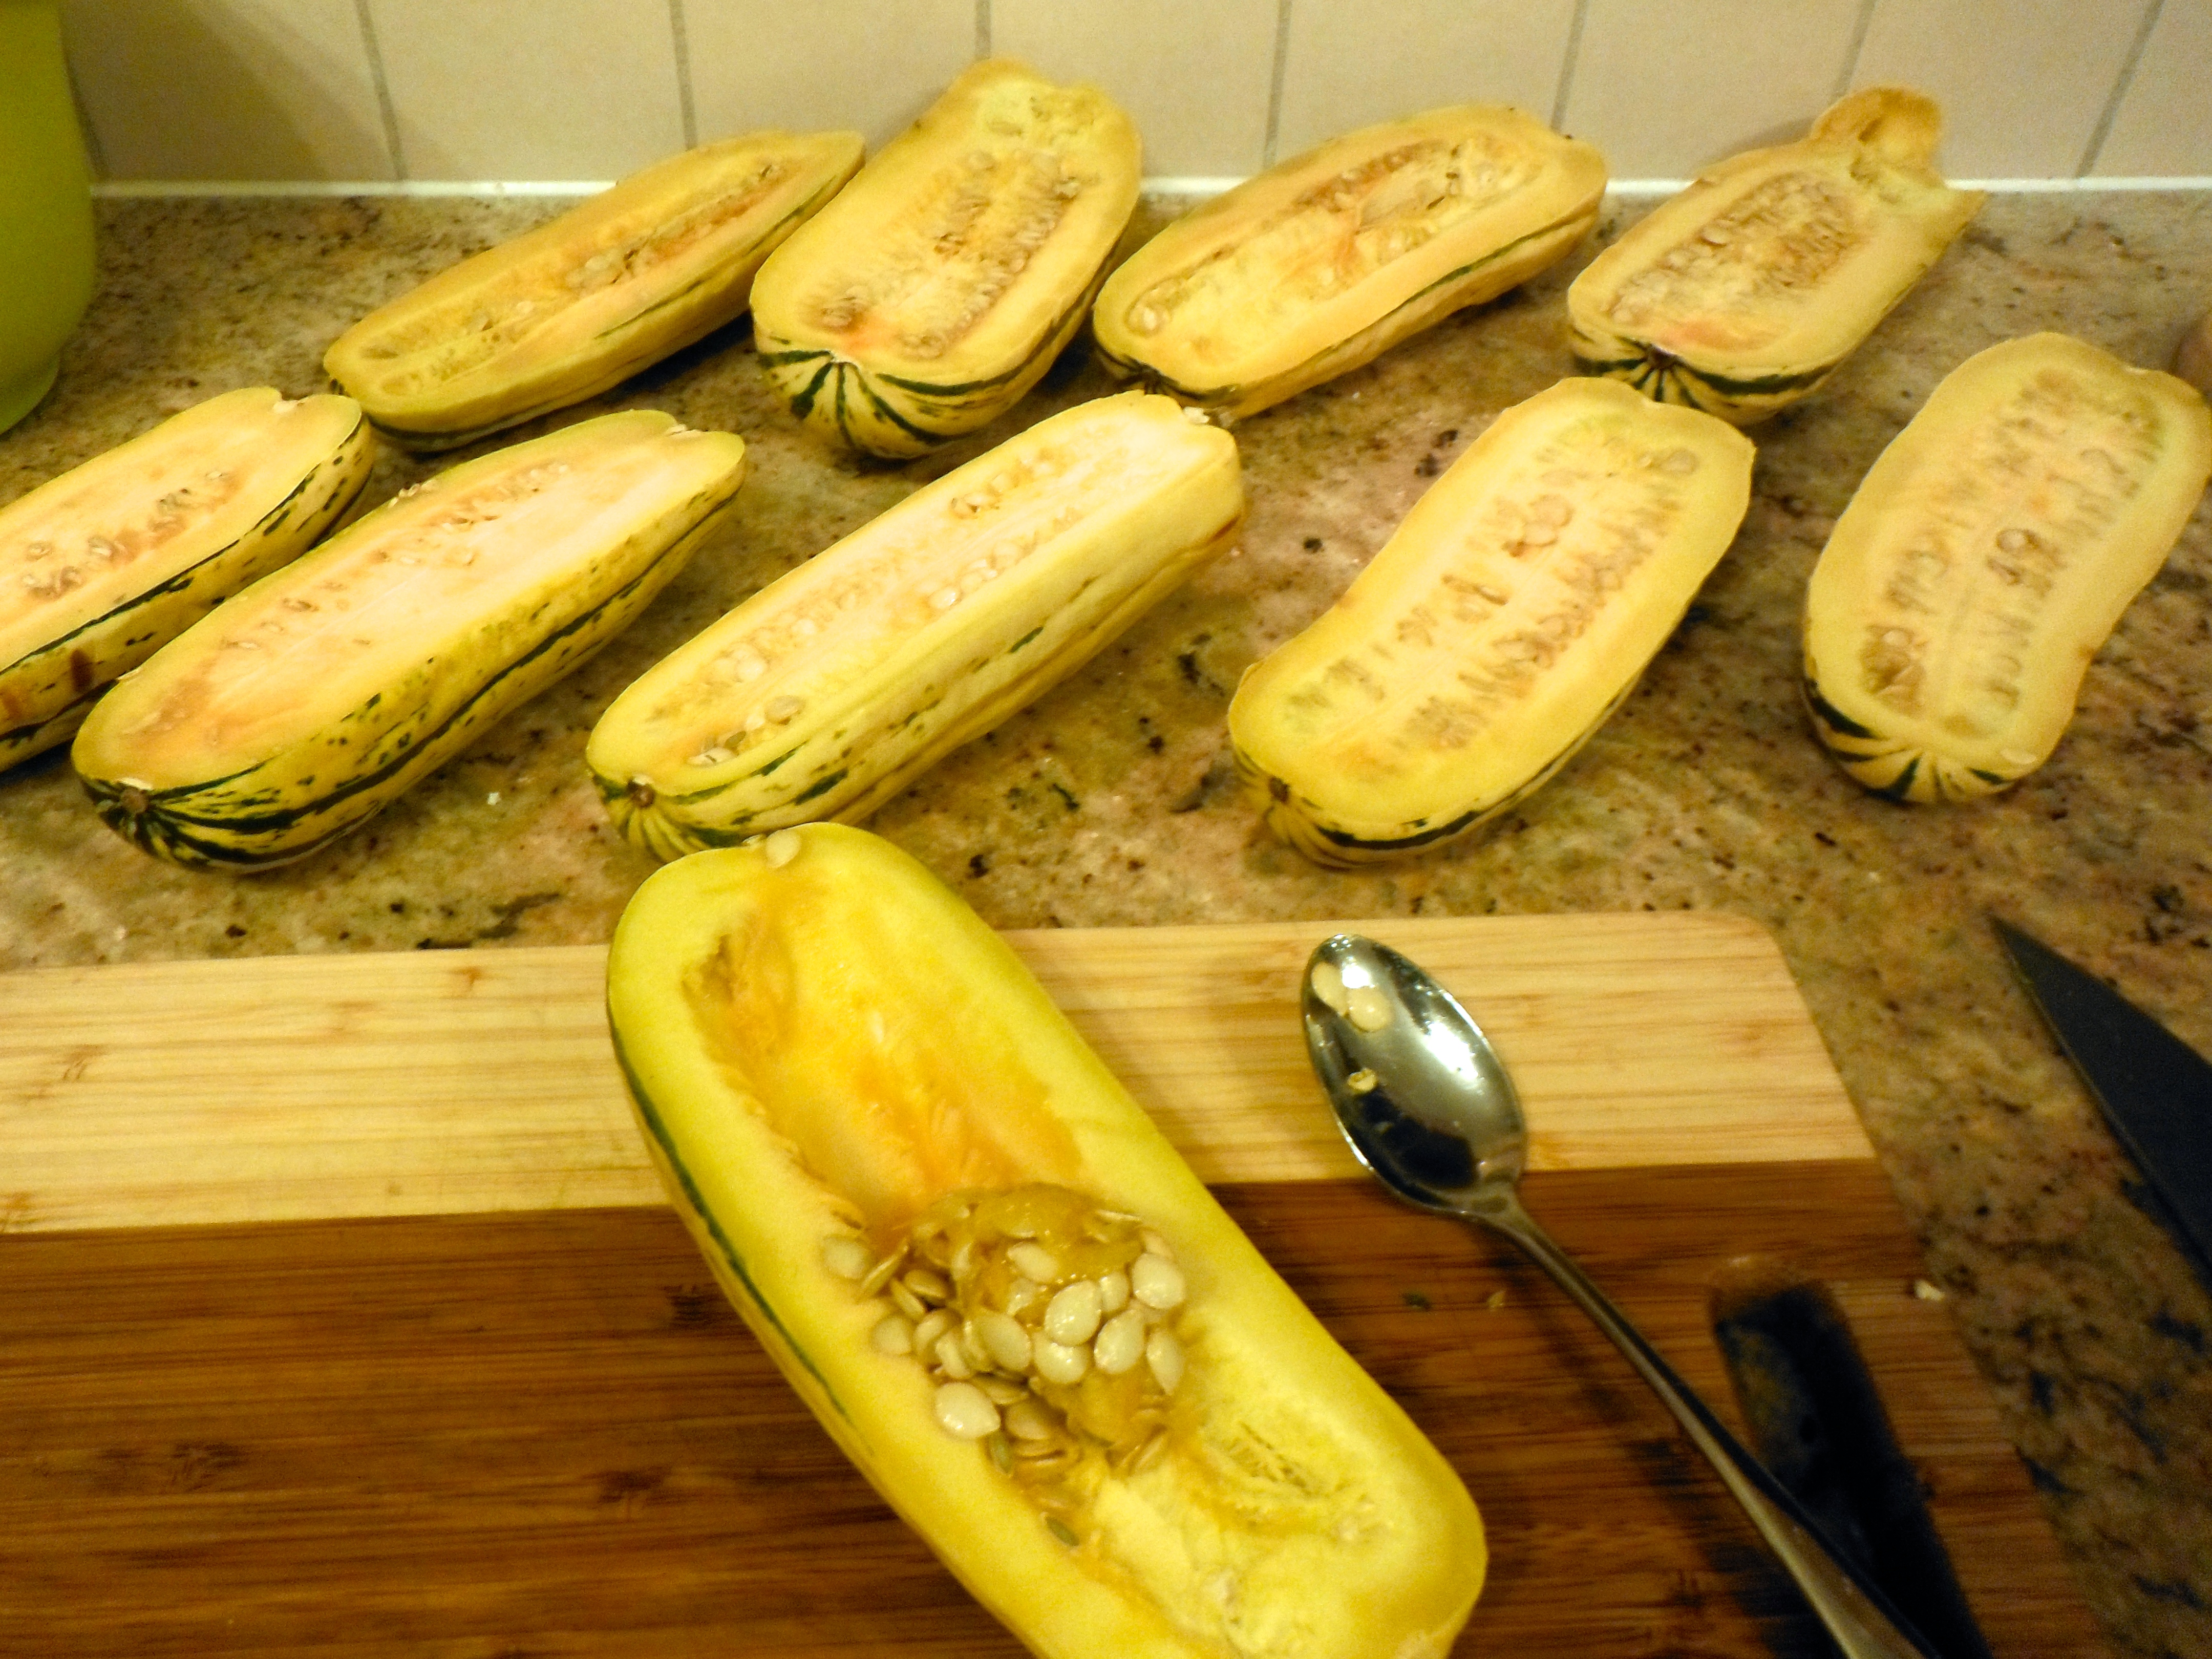
  2. Remove squash from oven. Cut in half length wise and scoop out seeds.
  3. Place cut side down on a baking sheet and bake for another 15-20 minutes.
  4. When the squash gives under pressure, it is done. Remove from oven.
Sausage
  1. While squash is in the oven, prep all veggies. Dice onions and peppers. Mince garlic. Wash and chop kale.
  2. Heat 2 tbsp fat over medium heat. Add onion and pepper. Season with sea salt and pepper. Sautee for 7-8 minutes.
  3. Add garlic. Cook for 2 minutes.
  4. Take sausage out of casings and add to pan. Season again with sea salt and pepper. Stir occasionally, until cooked through, approximately 5 minutes.
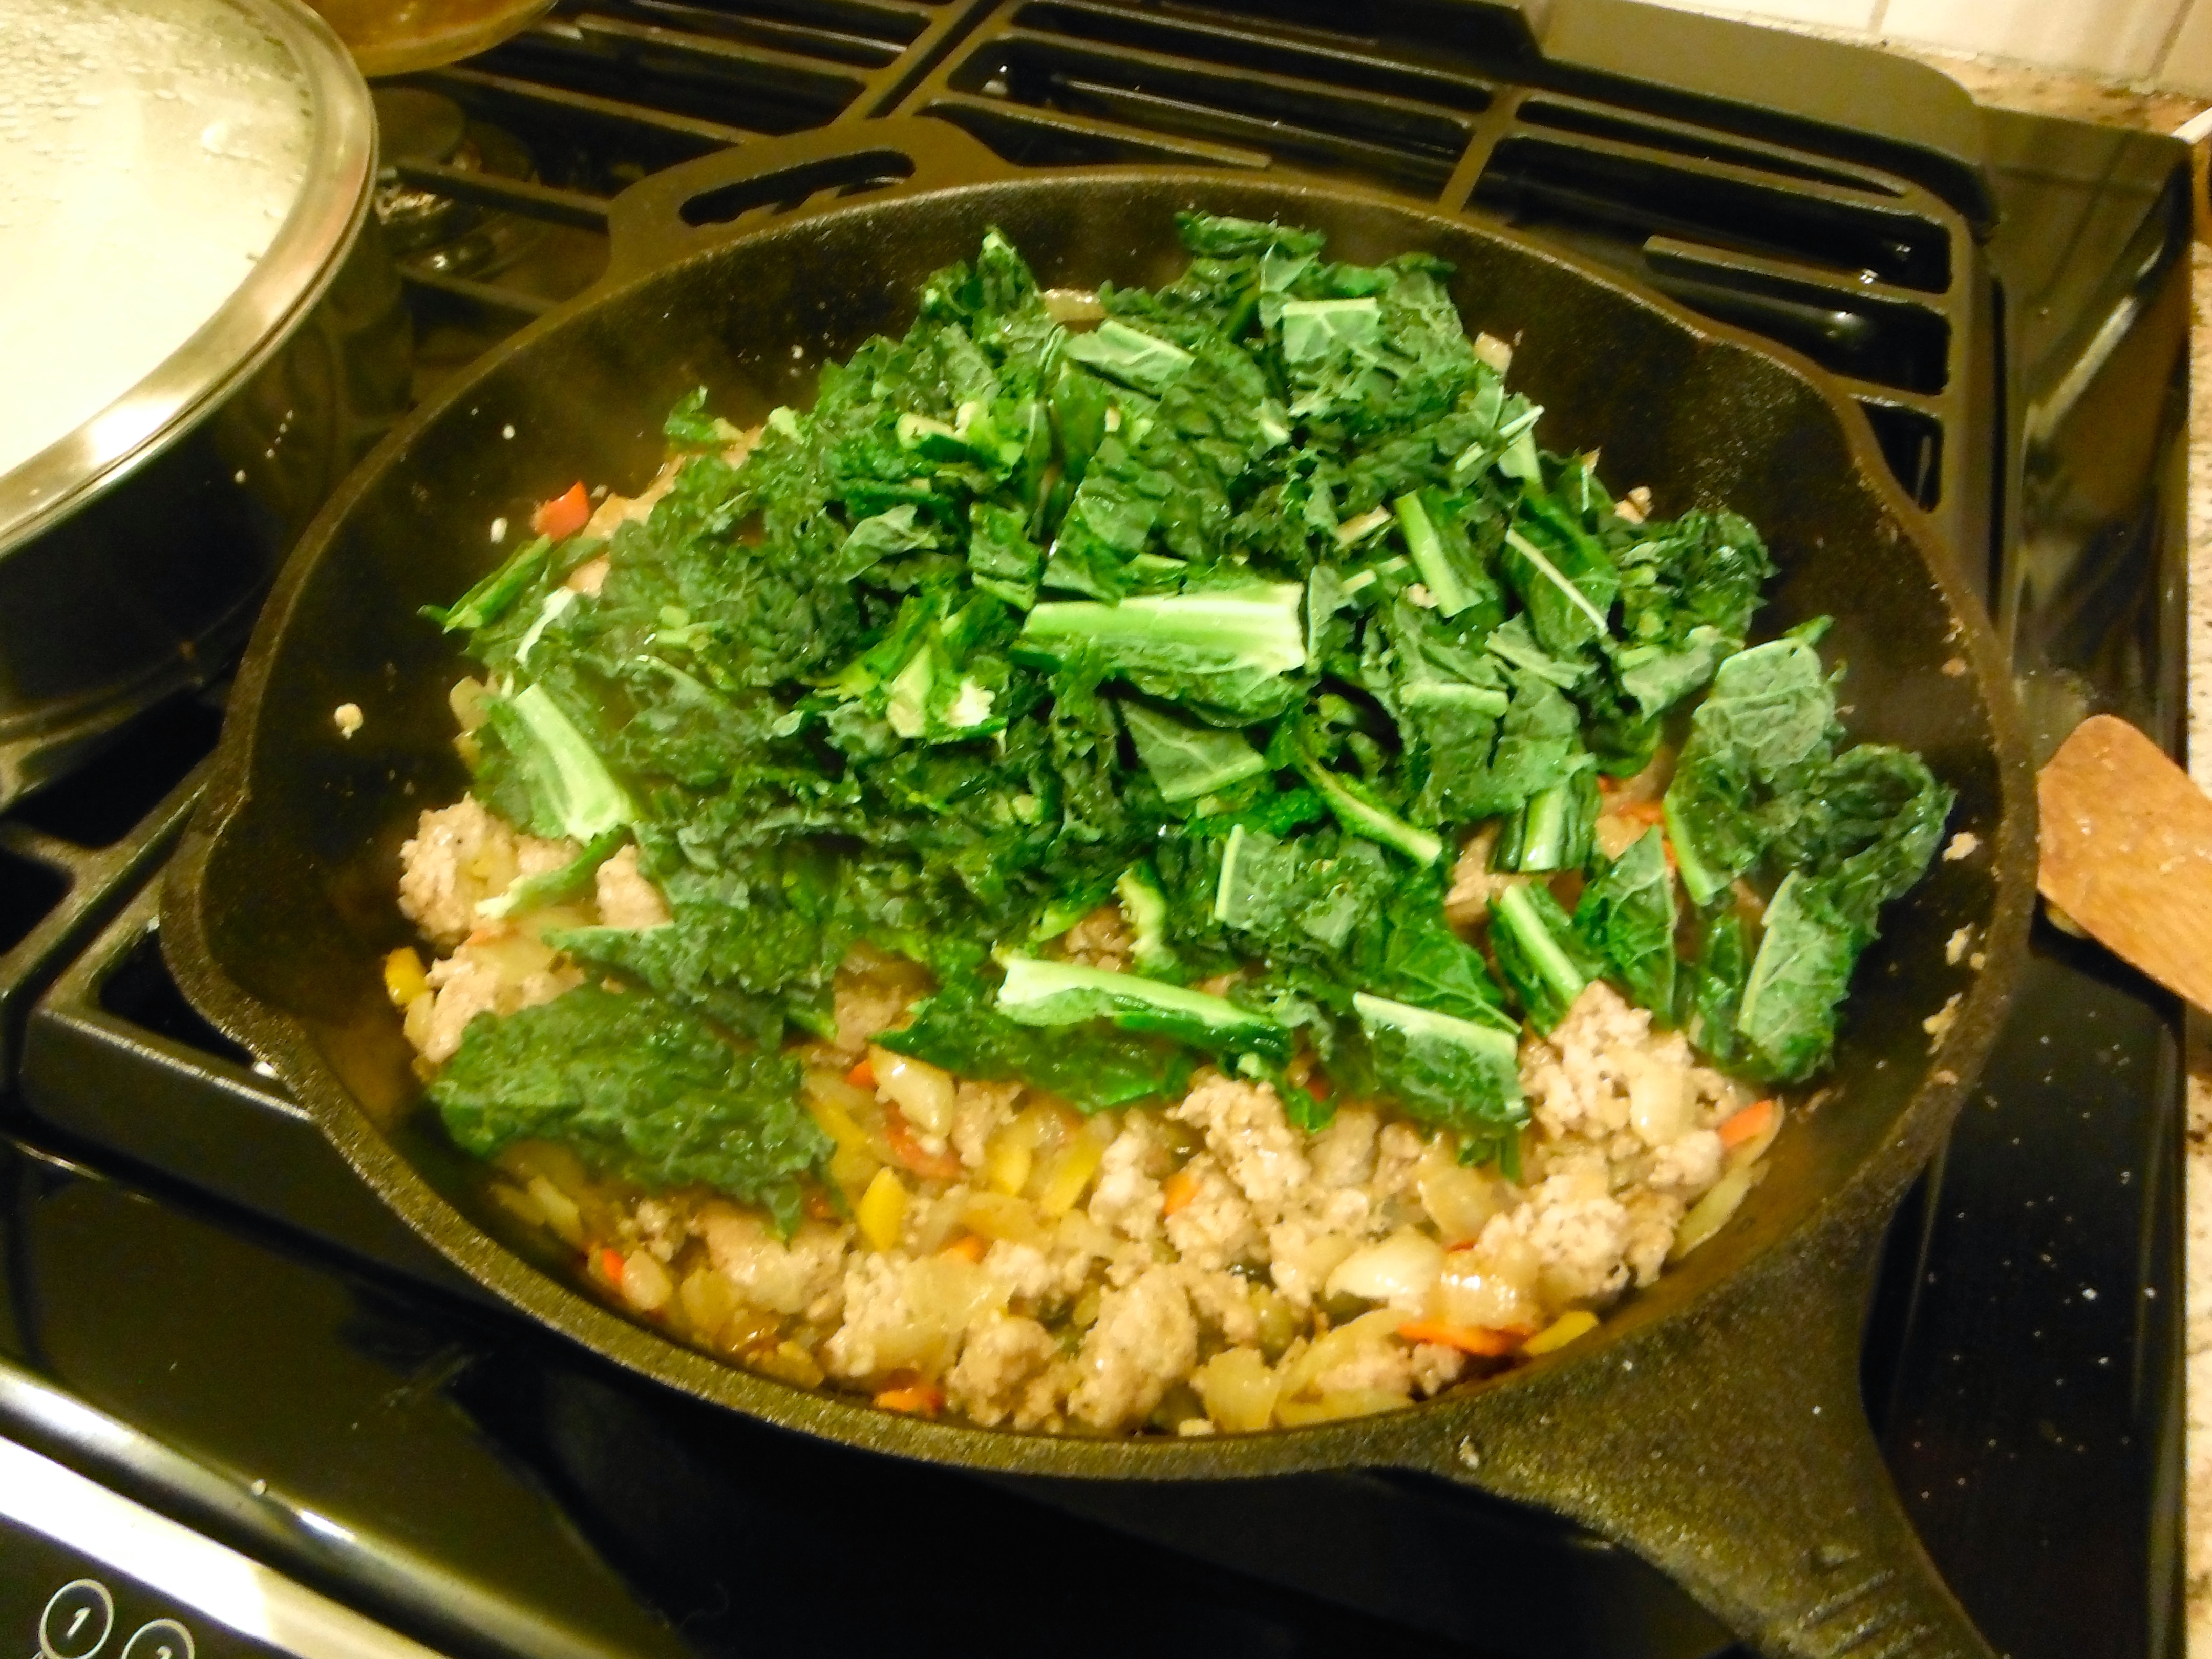
  5. When sausage has cooked through, add kale. Stir to combine and cook for another 5 minutes.
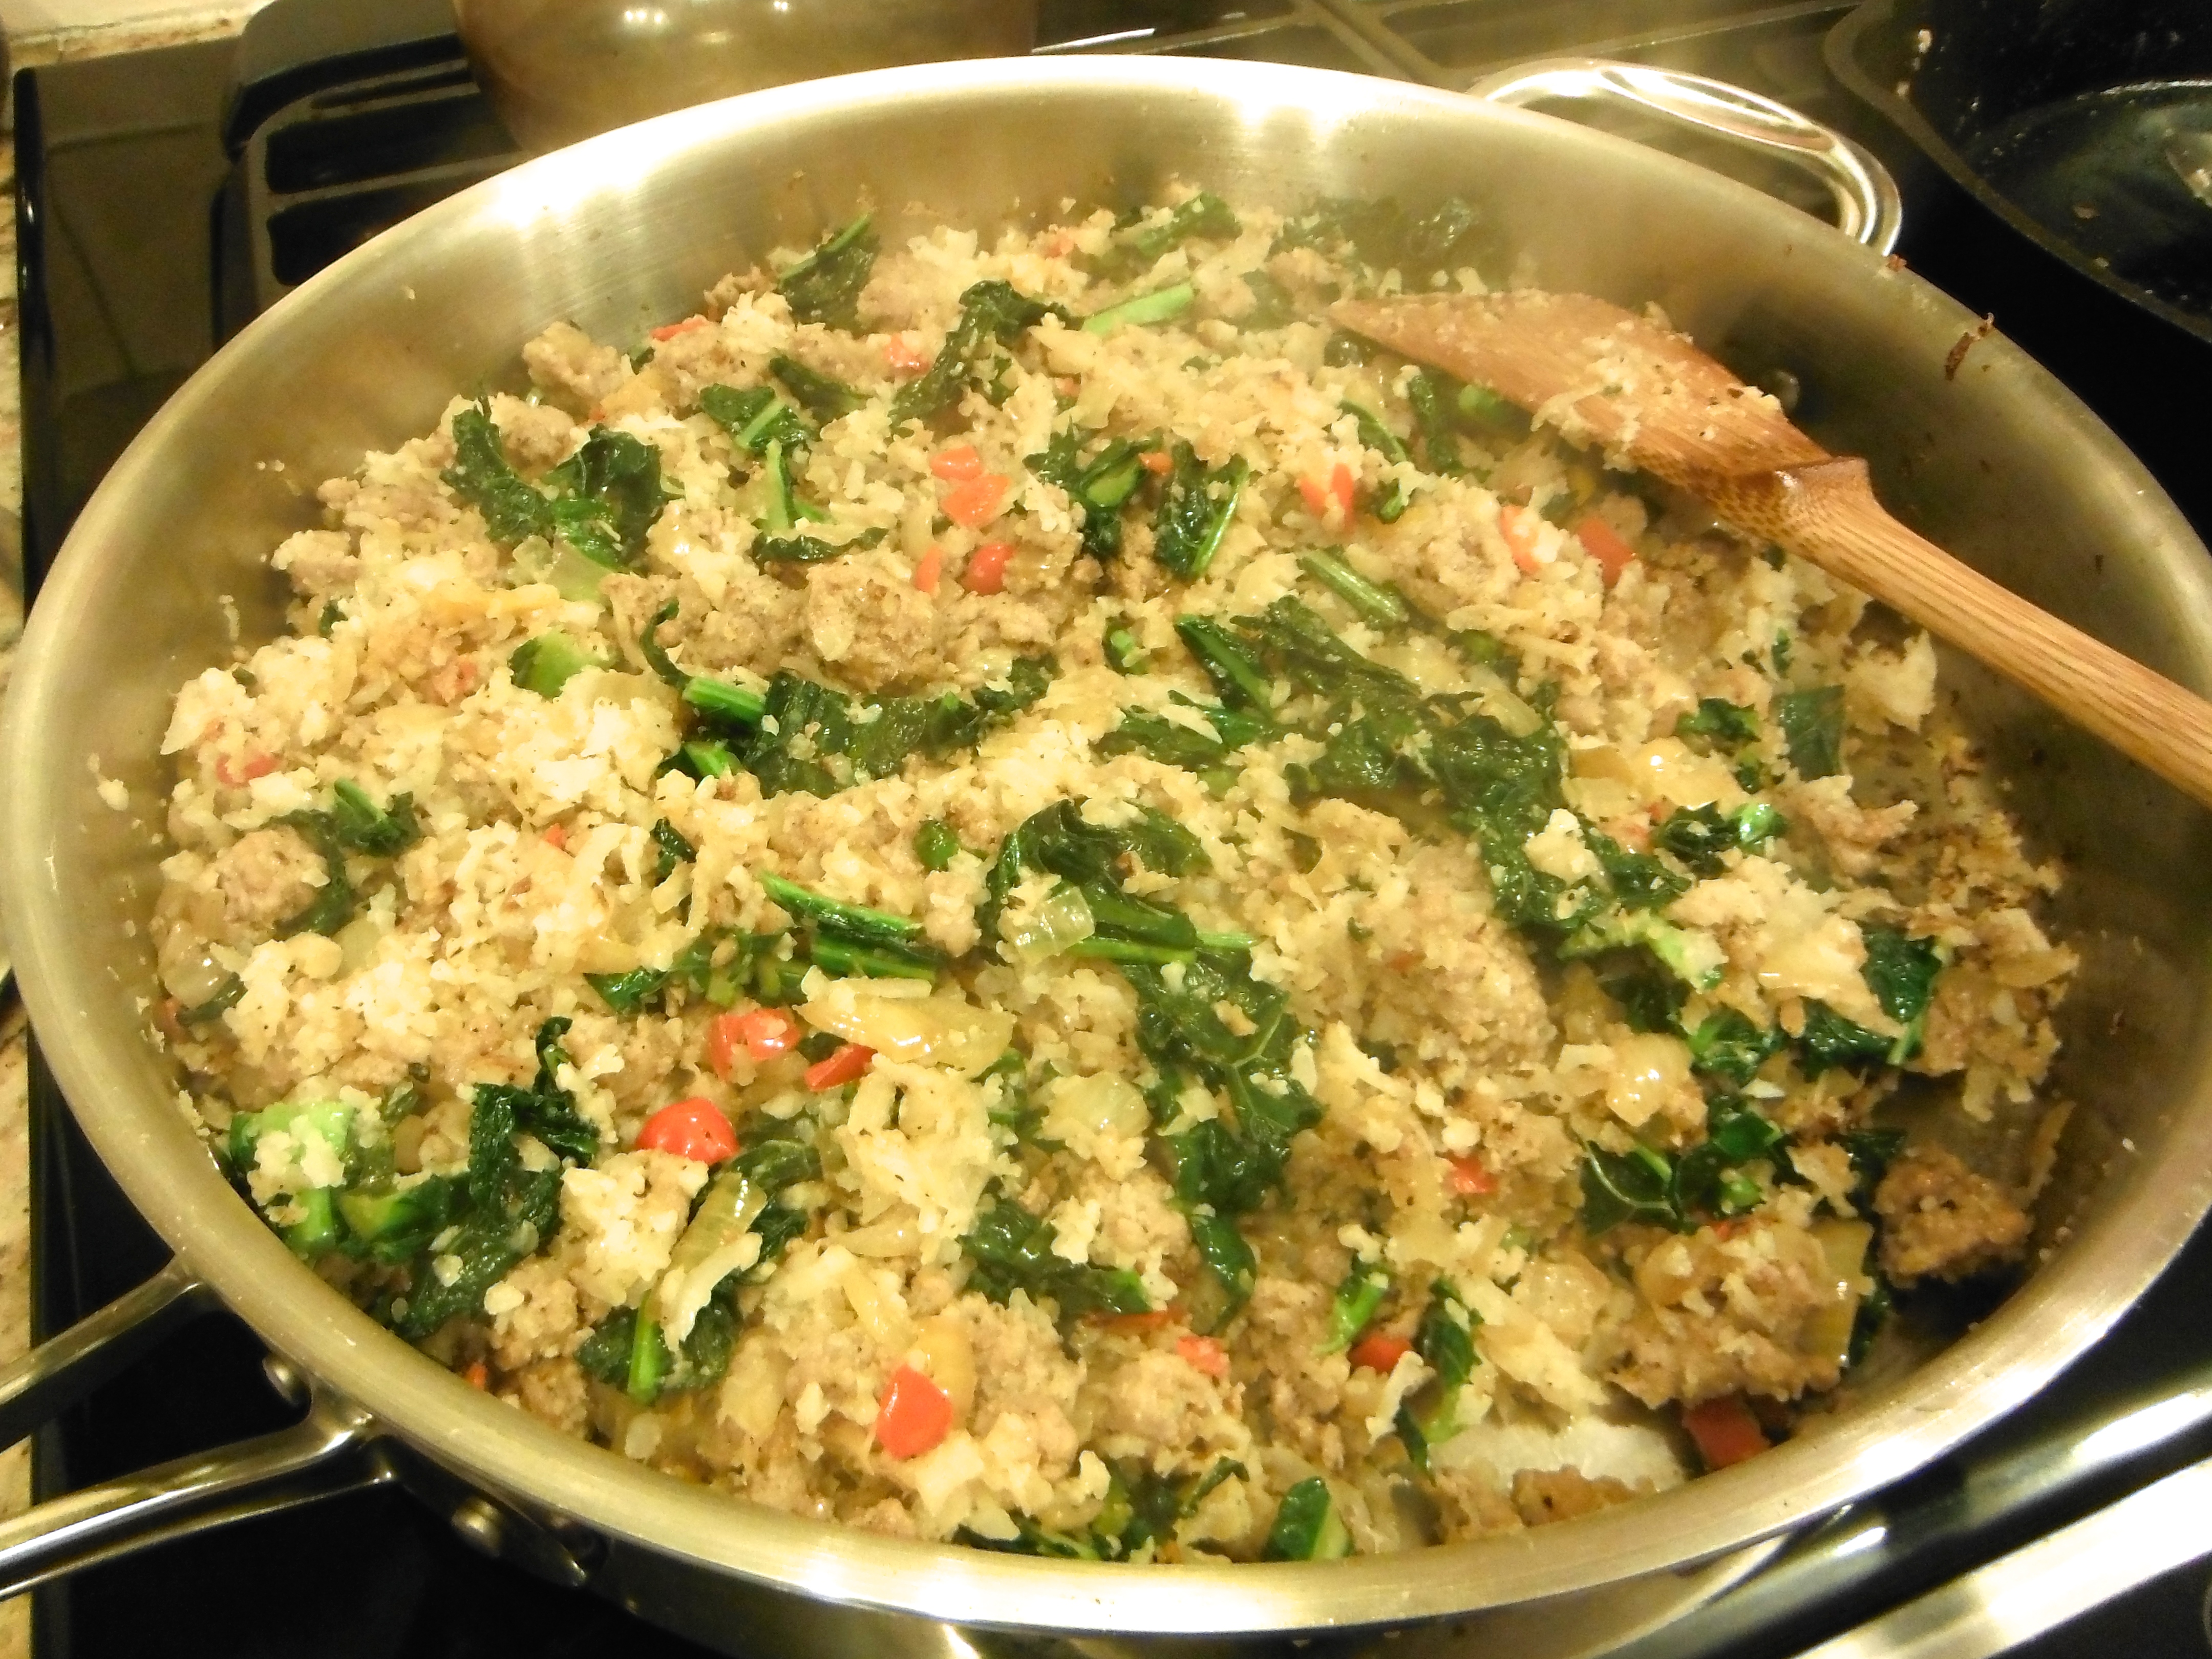
  6. Add to cooked Cauli-Rice (see below) and stir to combine.
Cauli-Rice
  1. When sausage is cooking. Wash a head of cauliflower and chop into pieces.
  2. Using the shredder attachment on a food processor, shred cauliflower into rice-sized pieces.
  3. Heat 2 tbsp fat of choice in a large pan, over medium heat.
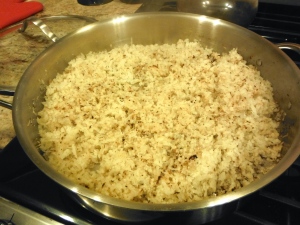
  4. Add shredded cauliflower and season very liberally with sea salt and pepper.
  5. Stir to combine, cover with a lid and let cook for at least 10 minutes. Stir occasionally.
Final Product
  1. Turn the oven to broil.
  2. Flip the squash so it is skin side down.
  3. Fill the squash with the sausage and cauli-rice mixture, really packing it down. Top with more mixture.
  4. Sprinkle some nutritional yeast on top and broil for 3-5 minutes, being careful not to burn!
  5. Serve immediately.
Notes
  1. Most of this recipe can be made up to 24 hours in advance. Roast the squash and store in a sealed container in the fridge. Prepare the filling and store in a sealed container in the fridge. Assemble when you are ready to eat. Instead of broiling, heat the oven to 400F and cook for 15 minutes until heated through.
This recipe is very flexible
  1. - add or remove any vegetables you have on hand (eg. omit bell pepper if following a therapeutic diet)
  2. - substitute other ground meat or shredded chicken
  3. - substitute acorn, butternut or kabocha squash or even small or mini pumpkins
Amanda Naturally http://www.amandanaturally.com/

Preheat oven to 400F. Gather ingredients. Wash squash and throw in the oven as it’s preheating. Prep veggies. Gather spices. Take the sausage out of the casings.

Sausage Stuffed Delicata Squash - Amanda Naturally  Sausage Stuffed Delicata Squash - Amanda Naturally Sausage Stuffed Delicata Squash - Amanda Naturally


Sautee onions and peppers until translucent. Add garlic, cook for a few minutes. Add sausage. Cook through. When the meat is cooked, stir in the chopped kale and cook for another 5 minutes. 

Sausage Stuffed Delicata Squash - Amanda Naturally  Sausage Stuffed Delicata Squash - Amanda Naturally

Meanwhile, shred cauliflower and sautee in a covered pan with lots of salt and pepper. Cook for a minimum of 10 minutes, stirring occasionally.

Sausage Stuffed Delicata Squash - Amanda Naturally  Sausage Stuffed Delicata Squash - Amanda Naturally Sausage Stuffed Delicata Squash - Amanda Naturally  Sausage Stuffed Delicata Squash - Amanda Naturally

Once the squash has been in the oven for 20-25 minutes or so, take it out, cut in half lengthwise and scoop out the seeds. Place on a tray, cut side down and roast for another 20 minutes.

Sausage Stuffed Delicata Squash - Amanda Naturally

When both the sausage mixture and the cauli-rice are done, add together in the larger pan. In my case it was the cauli-rice pan. Stir to combine. It can sit at this stage until you are ready to assemble.

Sausage Stuffed Delicata Squash - Amanda Naturally

Pull the squash out of the oven and flip onto the round side. Turn the oven to broil. Stuff with cauli-rice/sausage mixture, packing down and adding more on top. Sprinkle with nutritional yeast and broil for 3-5 minutes, being careful not to burn. Enjoy every mouth-watering bite!!

Sausage Stuffed Delicata Squash - Amanda Naturally  Sausage Stuffed Delicata Squash - Amanda Naturally

So tell me, what’s your favourite fall vegetable??

Lettuce Wrap Tacos

Hands down my favourite days to cook are Sundays. I am often at home for a good chunk of the afternoon, so I have the ability to get fancy and creative in the kitchen! I’m talking slow-roasted ribs, braised chops, roast duck (new accomplishment as of yesterday)…oh how I wish every day was like Sunday!  


http://instagram.com/p/tgnok4C9id/?modal=true


But alas that’s not how life works. And to be honest, I love work, and Sundays are the only day I don’t work, so if every day was Sunday, I wouldn’t be able to do what I love.

So what do our week day meals look like?

Often it’s pork chops, burgers or sausages. But there are days that we get home from the office at 8pm and you can bet that we are STARVING at that time! Those nights we try to get dinner together as quickly as possible! What can I throw together in 10 minutes or less???

Lettuce Wrap Tacos!

The best part? You can get as fancy as you want, or keep it simple and straight forward. It can also be modified to any diet – autoimmune protocol, low-carb, dysbiosis protocol, SCD, GAPS. Odds are you have most of these ingredients in your kitchen right now!

Lettuce Wrap Tacos - Amanda Naturally

Optional prep step: Sautee onions and garlic in some fat (coconut oil, organic lard / tallow, bacon grease) for a few minutes.

Step 1: sautee 1 lb ground meat (pork, beef, chicken, turkey). We buy our meat from Brooker’s.

Step 2: season liberally with sea salt and pepper

Optional seasonings: cumin, chili powder, chill flakes, oregano, hot sauce, paprika

Lettuce Wrap Tacos - Amanda Naturally

Step 3: while the meat is cooking (keep an eye on it, stir regularly) prep the wraps. Choose a leafy green that is large enough to make into a wrap – butter lettuce and romaine work, but my favourite is the Collard Green. It is so sturdy it never breaks! They can be hard to find organic, so we rely on Mama Earth CSA for ours!

Step 4: prep toppings. This is where things get fancy or stay simple! Choose any or all of the following toppings:

salsa
sauerkraut
mayo
fermented carrots
diced tomato
sliced avocado
guacamole
diced onions
cilantro
sauteed onions
sauteed peppers

Step 5: Turn off the heat once the meat has cooked through and start building your wraps. We put together our tacos right in the kitchen to save time transferring it to pretty serving dishes! Dish up the meat right from the pan, leave the toppings on the cutting board, and let the lettuce wraps dry in the drying rack.

Lettuce Wrap Tacos - Amanda Naturally

So there you have it – easy peasy lettuce wrap tacos that turn into great taco salads for lunch the next day! If you don’t scarf it all down at dinner that is…

Lettuce Wrap Tacos
Serves 4
A quick and healthy mid-week meal that will satisfy all members of the family! Easy to modify based on the contents of your fridge.
Write a review
Print
Prep Time
5 min
Cook Time
5 min
Total Time
10 min
Prep Time
5 min
Cook Time
5 min
Total Time
10 min
Ingredients
  1. 1 small onion, diced
  2. 2 cloves garlic, diced
  3. 1 tbsp fat of choice (bacon grease, lard, coconut oil)
  4. 1 lb ground meat (pork, beef, chicken, turkey)
  5. sea salt
  6. pepper
  7. 1 tsp cumin
  8. 1 tsp oregano
  9. ½ - 1 tsp chili flakes
  10. 8 collard greens (sub butter lettuce or romaine)
  11. 2 small avocados
  12. ¼ cup diced red onion
  13. ¼ cup cilantro, roughly chopped
Instructions
  1. Heat pan over medium.
  2. Add fat, sauté onions and garlic for 3 minutes.
  3. Add ground meat, season liberally with sea salt and pepper.
  4. Add cumin, oregano and chill flakes. Stir well.
  5. While the meat is cooking (keep an eye on it, stir regularly) prep the collard greens by washing and breaking off the stems.
  6. Slice avocados, dice a red onion, wash and chop some cilantro. Leave on cutting board.
  7. When meat is finished, assemble tacos directly from the dishes they were cooked in.
  8. Divide ¼ of the meat mixture between 2 collard leaves.
  9. Top with prepared avocados, onion, cilantro.
  10. Add salsa, sauerkraut and any other sauces you have around the house!
Notes
  1. Additional spices: paprika, hot sauce, coriander
  2. Additional toppings: diced tomatoes, homemade mayo, fermented carrots, guacamole, sautéed onions, sautéed peppers
Amanda Naturally http://www.amandanaturally.com/
 Lettuce Wrap Tacos - Amanda Naturally

So tell me, where do you use leafy greens instead of bread? If you haven’t tried it yet, give it a shot and let me know how it goes!

Sauerkraut

Recently I have had a lot of questions on my Instagram account about sauerkraut. What it is, how I use it, where I find it and why I’m so obsessed with it. So let’s chat about it!

Sauerkraut is fermented cabbage. I know, that doesn’t sound so awesome, but trust me, it’s delicious! To be honest, when I first started eating sauerkraut, I didn’t like it. But I wanted to like it, so I made a conscious decision to work at it. I started with 1 tsp, mixed in with sautéed onions, potatoes and sausage. It was faint, but the flavour was there. Over a few weeks/months I started increasing the amount I was eating. And then one day, I realized I loved the stuff!! I started putting it on everything – hamburgers, tacos, sausages (of course). What’s my favourite food to eat it with? Eggs. How bizarre is that?! Bizarrely delicious, that’s how! If you like it, try it – I promise it’s amazing!

eggs & kraut | AmandaNaturally.com


Why have I made such a concerted effort to develop a liking for sauerkraut?

As I said before, sauerkraut is fermented cabbage. Fermented foods are an incredible addition to your diet. For the longest time I was always focused on what to avoid in my diet – no more dairy, then gluten, then garbage-y gluten-free products, then legumes. That was an important part of my healing process, but it was only when I started actively adding in super foods that I really started seeing some amazing changes.

The weakest part of my body is my digestive tract. I feel like it’s always a work in progress. It still flares up from time to time, which is frustrating considering I’m supposed to be coaching others on how to heal themselves, and I’m still working on myself! Whenever I start down that thought path, I try to take a few steps back and imagine where I would be if I hadn’t made the interventions I had when I did. Probably on some serious IBS drugs and en route to a full blown autoimmune condition like arthritis.

Lately, I’ve been having digestive attacks less and less, and I swear it coincides with aggressively including fermented foods in my diet on a regular basis. I try not to go more than a day without a fermented food, and it seems to have done wonders for my belly!

So what’s the deal with fermented foods??

First and foremost, they are an absolutely incredible source of probiotics. Sauerkraut is made by allowing non-oxygen dependent microorganisms to grow on the cabbage. These microorganisms are powerful probiotics – way more potent and diverse than anything you can get at a health food store! Constantly consuming probiotics (in food form) will slowly start to change the landscape of your colon – in a good way! If pathogenic gut bacteria are starting to grow over (a.k.a. dysbiosis), regularly reintroducing healthy bacteria can keep them in check! Having a healthy gut microbiome is the foundation of a healthy body. Fermented foods are an easy and inexpensive way to keep your gut healthy!

Second – fermentation increases the bioavailability of certain vitamins and enzymes. The cabbage is pre-digested by the microorganisms, which makes it easier for us to digest and absorb the nutrients.

Third – it’s an easy and delicious way to get some extra veggies in! If we’ve been out of town and come home to an empty fridge, I know I can grill up some meat from my freezer and add some cabbage for a complete meal!

Lastly – it’s empowering. Eating a delicious food (well first learning to find it delicious) on a regular basis, and knowing that it is actively working to heal my digestive tract and support my overall gut health is super amazing. It’s the simplest thing that keeps my digestion healthy, my immune system rockin’ and my nutrition status through the roof! All from eating a little kraut! Super cool.

Where to buy the good stuff?

First of all, it is absolutely imperative that you eat raw sauerkraut. The standard stuff found at most grocery stores isn’t actually fermented – it’s pickled. Not the same thing! Pickled kraut is found on the shelf. Fermented kraut is always in the fridge.

I used to buy my sauerkraut at the farmer’s market, because it was to die for! They added fun herbs such as nettle and dulse, which helped mellow out the sour flavour. Unfortunately as I started to eat more and more of it, $10/jar started to add up quickly. There are some great products at local health food stores that are slightly more reasonable. My 2 favourite brands are Bubbies and Eden Organics


http://instagram.com/p/W69BSgi9qL/?modal=true


One day I decided to learn how to make it myself. It couldn’t be that hard since practically every culture in human history has some kind of fermented food in their diet. And at $3 for a head of cabbage – I couldn’t beat the price! 

Homemade Sauerkraut 101

My first 4 batches of sauerkraut had a 50% success rate. The first batch I followed directions I had found online somewhere. It didn’t recommend keeping an eye on it, so I put it in the back of a closet and left it for 3 weeks. When I went to grab it at the end of its fermentation time, it was a mouldy mess! I hit the internet and realized what had happened. The good bacterial growth needs an anaerobic environment. This means it needs no exposure to oxygen. So it has to stay submerged under water at all times!

So, round #2. Total and complete success! I diligently checked the sauerkraut every day and topped up the jars with a salt water solution regularly. I was thrilled! Also, I used purple cabbage, so it was beautiful!


http://instagram.com/p/mLffMqi9gp/?modal=true


Round #3. I got cocky. I had nailed the last batch so I thought it would be a breeze this time round. I even poured the leftover sauerkraut juice on my new batch of kraut to speed the fermentation process. I didn’t check it nearly as often, so what happened? Mouldy mess.

Round #4. I perfected my technique. A perfect balance of keeping an eye on it, without being obsessive! This is how I make my sauerkraut.

Homemade Sauerkraut

1. Add your shredder attachment to your food processor. If you don’t have a food processor, you can shred your cabbage using a Spiralizer or a good knife!

Make Your Own Sauerkraut - Amanda Naturally

2. Peel the outer few layers off your cabbage.

 Make Your Own Sauerkraut - Amanda Naturally

3. Chop the end off your cabbage. You can cut out the core as well, but it’s not necessary!

Make Your Own Sauerkraut - Amanda Naturally

4. Cut cabbage into slices that will fit into your food processor spout.

Make Your Own Sauerkraut - Amanda Naturally

5. Shred the cabbage!

Make Your Own Sauerkraut - Amanda Naturally

6. Dump shredded cabbage into a large bowl. Sprinkle liberally with sea salt. I used about 1 tbsp sea salt per head of cabbage and I usually do 2-3 heads of cabbage at a time.

Make Your Own Sauerkraut - Amanda Naturally

7. Smash your cabbage with a meat mallet or your hands for a few minutes, until the cabbage starts to soften and releases some of its liquids.

Make Your Own Sauerkraut - Amanda Naturally

8. Pack the cabbage as tightly as possible into jars.

Make Your Own Sauerkraut - Amanda Naturally

9. Sprinkle the top with some additional sea salt (I used a few twists of my salt grinder) and add enough filtered water to make sure the cabbage is all below the surface. A few pieces will float on top, that’s okay!Make Your Own Sauerkraut - Amanda Naturally 

10. At this point, my kitchen is usually a total disaster and cabbage is everywhere. I fasten the lid to the jars, so I can rinse the cabbage off in the sink. (NOTE: make sure to remove the lid after you rinse off the jars!)

11. Place your jars in an area of your home where they can sit undisturbed for 3-4 weeks. It needs to be relatively dark (no sun exposure) and a fairly consistent temperature. You also need to be able to access it easily! I keep mine on a shelf in my living room!

Make Your Own Sauerkraut - Amanda Naturally

12. Cover with a tea towel to prevent dust and bugs from getting in. You might want to place it on a plate, tray or another towel, because sometimes liquid can bubble up and over in the first few days. It can be a little stinky the first few days too – this goes away!

Make Your Own Sauerkraut - Amanda Naturally

13. Every 2-3 days, check on your sauerkraut. If you notice that the water has dropped below the cabbage, simply add a few more grinds of sea salt and some filtered water. 

14. In 3-4 weeks, with the help of some amazing beneficial bacteria, your cabbage will have turned into sauerkraut! At this point you can add the lid and place in the refrigerator for regular use. Enjoy!


UPDATES:

1. Please do NOT rinse your sauerkraut after fermenting it! I have had many people say they were worried about the salt content, so they rinsed it off. You will be rinsing away the good bacteria at the same time! Sea salt is not bad for you, in fact it is a fabulous source of minerals. If you are eating real, whole food you actually need to make sure you get enough salt in your diet. 

2. Do NOT heat your sauerkraut. It will kill the bacteria.

3. My kraut-making technique has evolved over the last year or so. I now use a fermenting crock because I make extra large batches. You can also use these nifty jar top fermenters. Both are great because they force the cabbage to stay submerged, decreasing risk of mould. 


So tell me, have you ever fermented any foods? Do you have any recommendations for other fermentation projects I should try?


Copyright 2014 Amanda Naturally | Design by The Nectar Collective