Brussels Sprouts. The poor vegetable that has been demonized by our society! I hadn’t even tried Brussels sprouts, but I knew I didn’t like them because….wait, I didn’t actually know why.
So when a few years ago I received them in my vegetable CSA I was actually pretty stoked to give them a try. There were so many foods that I either used to not like, or had simply pre-judged, that I now love, that I was pretty sure I was in for a treat.
And boy was I right!
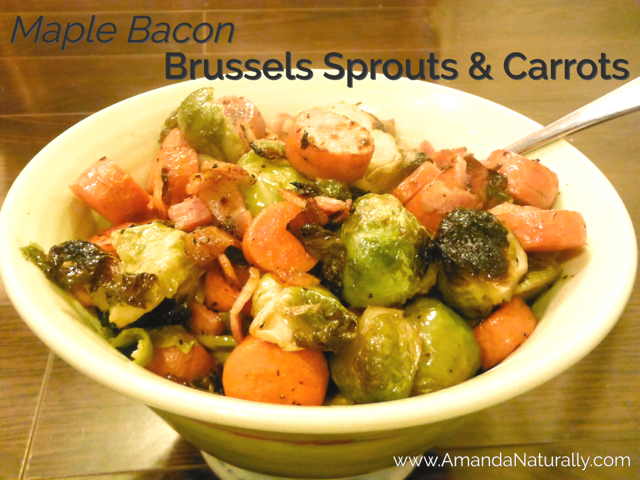
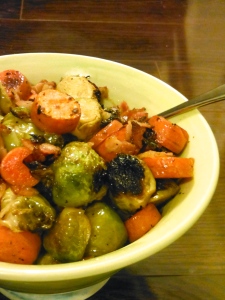
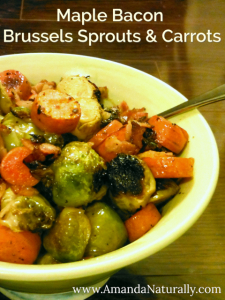
Roasted brussels sprouts are so delicious! They caramelize against the pan, which leads to an incredible smokey flavour, with a hint of sweetness. In this recipe, I’ve taken both of those flavours up a notch. I used maple syrup and roasted carrots to compliment the sweet side, and smokey bacon as a delicious contrast!
Bonus: Brussels sprouts are part of the brassica family. These vegetables – which include broccoli, kale, cauliflower, collards, cabbage, arugula, mustard greens and bok choy – are anti-carcinogenic by way of a powerful little molecule known as indole-3-carbinol (I3C). I3C modulates estrogen uptake by cancerous cells that rely on estrogen for growth and proliferation – namely breast, endometrial and cervical cancers. They also contain very high levels of sulfur (which is why if you overcook them, they get stinky!) which is a crucial building block of glutathione – one of our critical detoxification molecules.
Note on Brassica Veggies & the Thyroid
Many people with low thyroid function, hypothyroidism or Hashimoto’s thyroiditis have been warned against eating brassica vegetables. While it is important to remember that I’m not a doctor, it is equally as important to understand that the research simply isn’t there to support this. Moderate consumption of brassica veggies, even with subpar thyroid function, especially if they have been cooked, are not only safe, but may be beneficial to thyroid health. Now, if you’re downing a green juice made of raw kale, on a daily basis, you could potentially get yourself into trouble – especially if you have a selenium deficiency. As with any and all foods, overdoing it on one, will inevitably cause problems. Everything in moderation my friends!
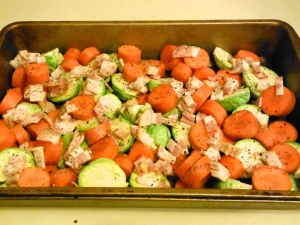
Enough science, back to the yummy stuff. Today’s recipe, which is perfect for a regular fall/winter dinner, and is especially timely for our neighbours to the south since Thanksgiving is next week, is Maple Bacon Brussels Sprouts and Carrots. First time cooking brussels sprouts? Rest assured this is easy! Simply combine all ingredients together in a roasting pan, on a cookie sheet or even in a cake pan and bake until crispy. Drizzle the maple syrup for the final 10 minutes. Enjoy!
Maple Bacon Brussels Sprouts & Carrots
2014-11-20 14:51:37
A delicious side dish for a fall meal, including Thanksgiving! Gluten-free, dairy-free and paleo. Full of flavour!
Prepare Brussels sprouts by slicing ¼ inch off the bottom and peeling off the outer few layers. The leaves should be bright green and tightly packed. Slice in half from top to bottom. Place in pan.
Wash carrots and chop into pieces about the size of the brussels sprouts. Add to pan.
Drizzle with 2 tbsp cooking fat and season liberally with salt and pepper. Toss to combine.
Chop bacon into small pieces and spread on top of the brussels sprouts and carrots.
Bake for 35 minutes. Stirring 2 or 3 times.
Drizzle with maple syrup and bake for 10 more minutes.
When I first started cooking, I would follow a recipe exactly as it was written. As I got more comfortable in the kitchen, I started loosening up a bit. One tablespoon of oil? Approximately a quick circle around the pan. One tsp of cumin? I’d eyeball it in the palm of my hand. The more I practised, the better I got. I started to inherently know when an additional spice should be added, or what ingredients were okay to omit if I didn’t have them. Before I knew it, I stopped following recipes altogether! I learned some basic flavour combinations such as chill powder, cumin and oregano; lemon, garlic and rosemary; dijon and thyme – and started applying them to various cuts of meat and veggie dishes. Now I rarely follow a recipe, which can actually make it challenging when I’m trying to post my recipes for you guys!
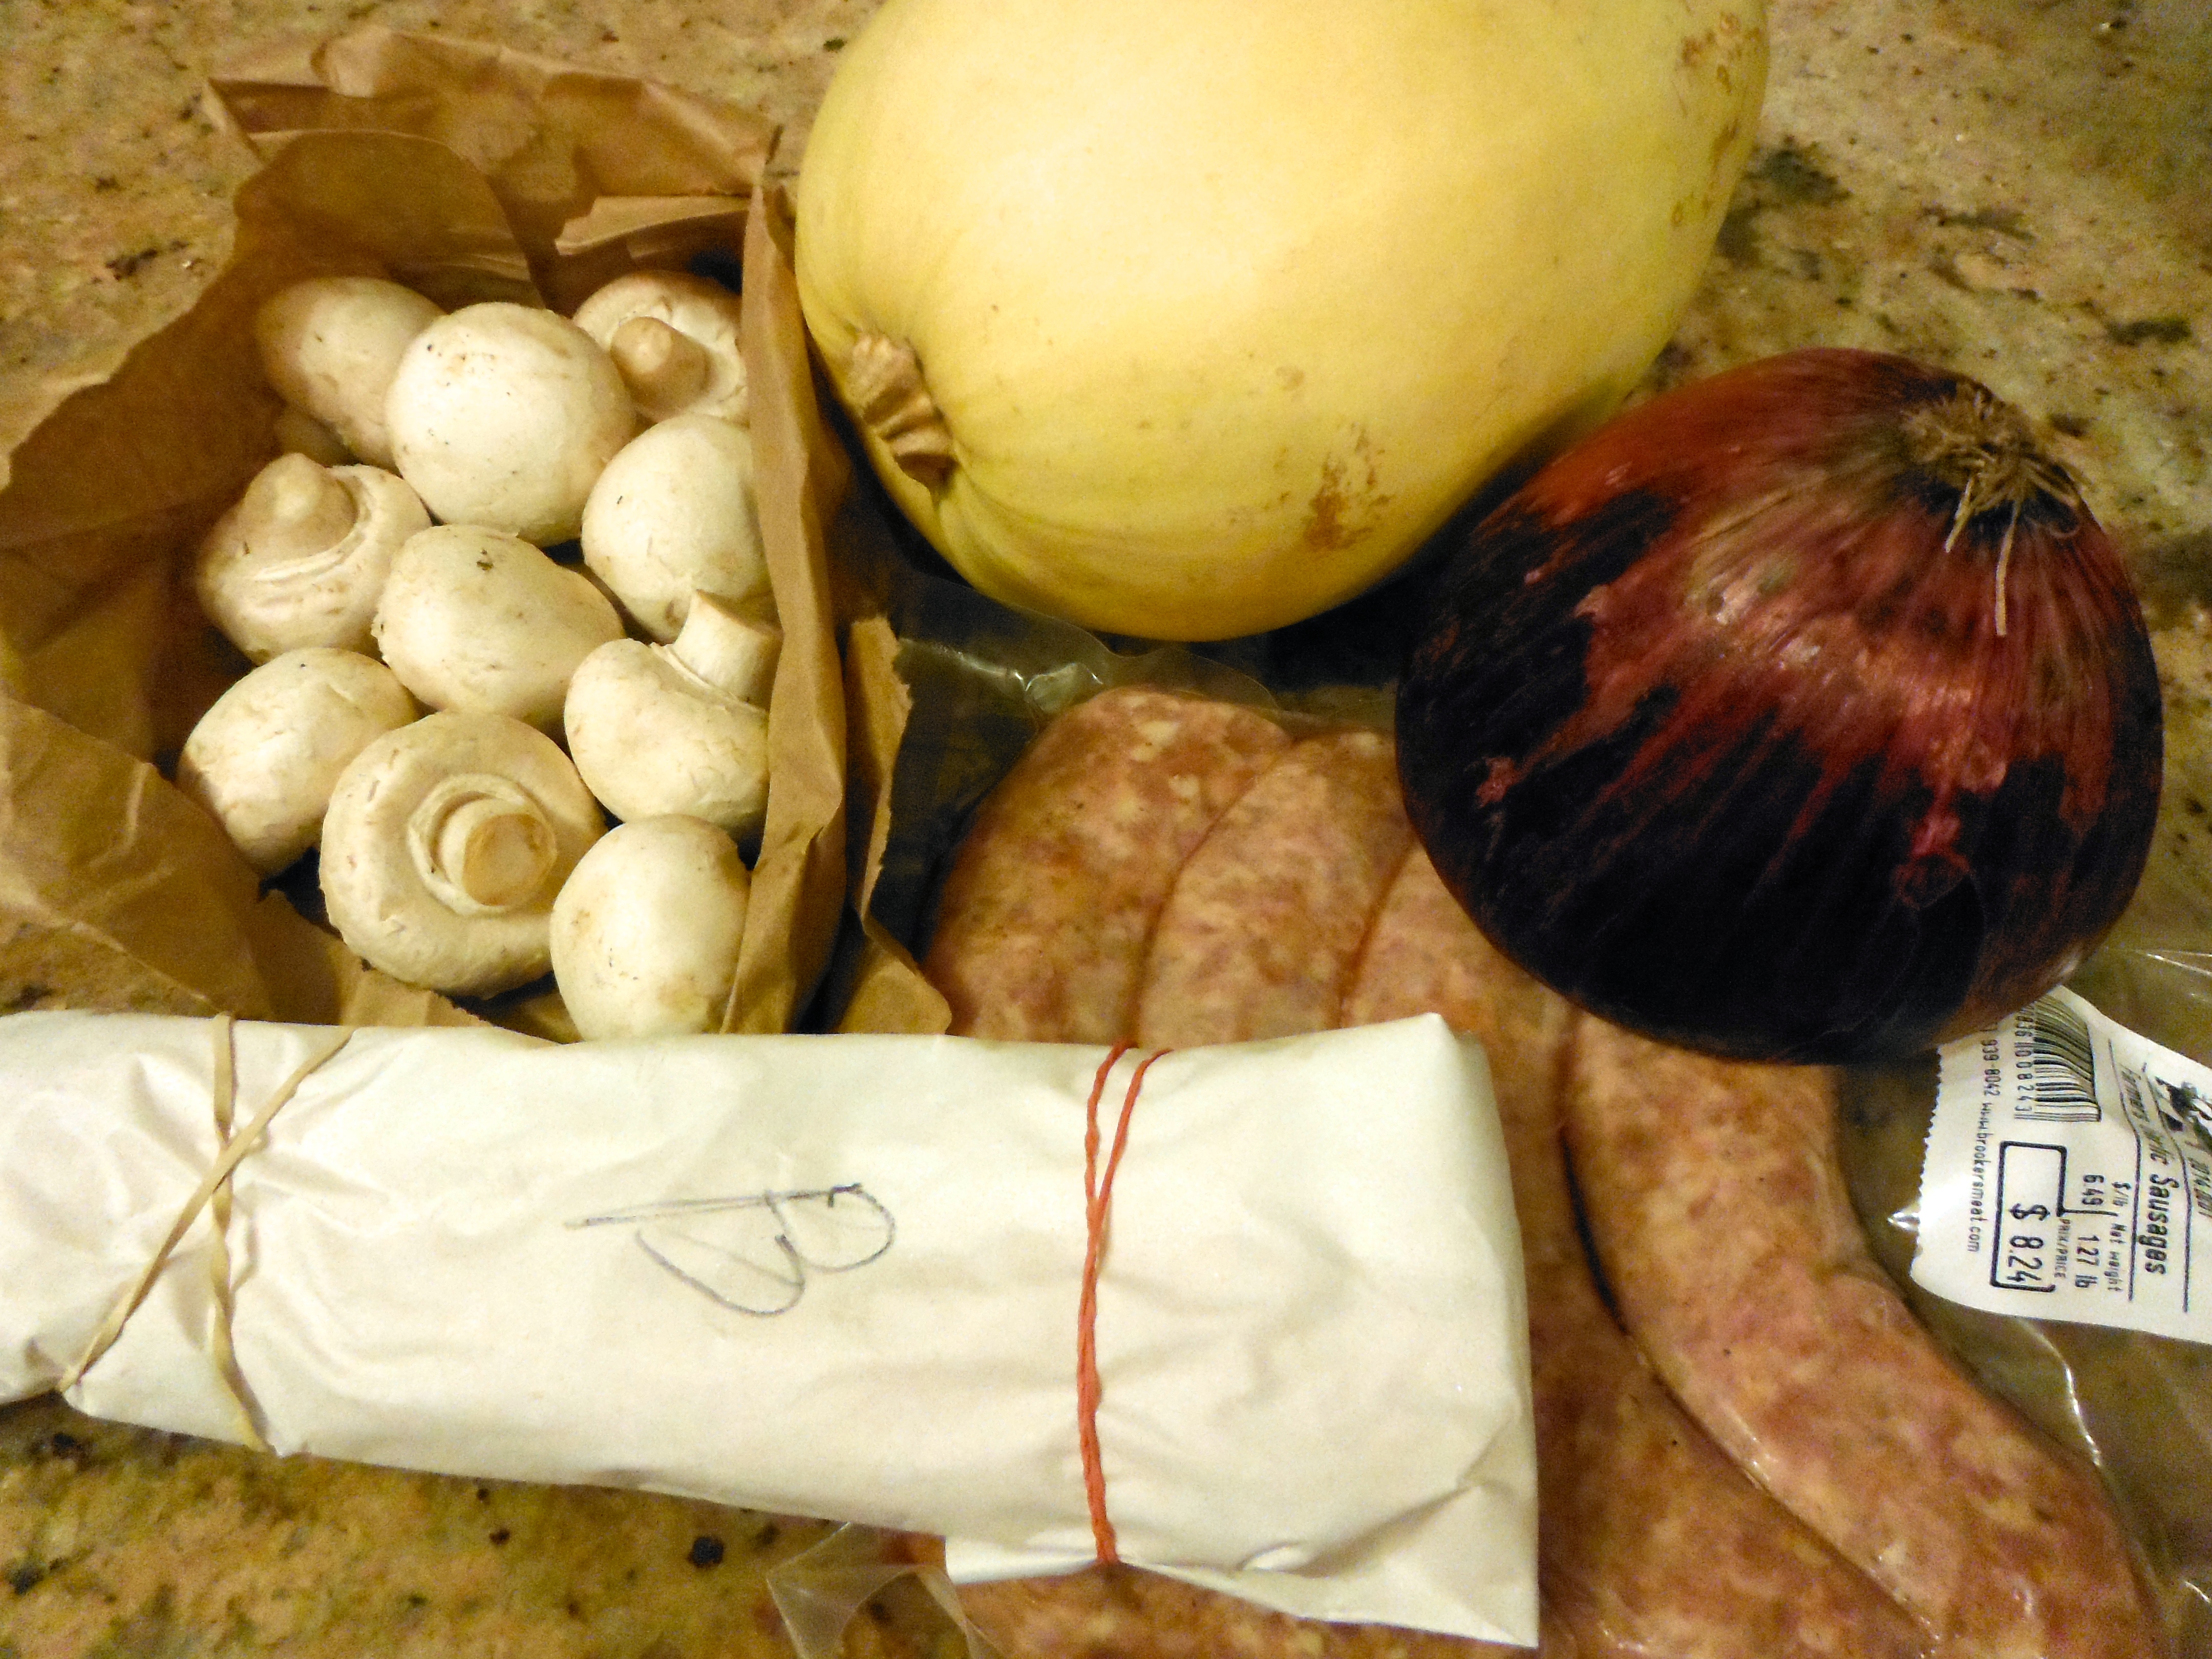
This recipe is a perfect example of that. I had a few ingredients in my kitchen, but no plan. I started with sausage and wanted to do something different with it. I mean, I love grilled sausages topped with sautéed onions and mounds of sauerkraut, but a girl’s gotta have some variety! I was trying to think about other ways that sausage is used and I instantly flashed back to the Sausage and Pepper Penne we served at the East Side Mario’s I worked at back in school. I decided on a pasta!
As I do with all my squash, I turned the oven on to 400F and threw the squash in whole as it was preheating, for 25 minutes. It has never exploded on me and it makes cutting it open WAY easier! After 25 minutes, cut in half width wise, scoop out the seeds and place cut side down in a pan. Roast for another 15-25 minutes until the skin gives slightly under pressure. Scrape noodles out with a fork!
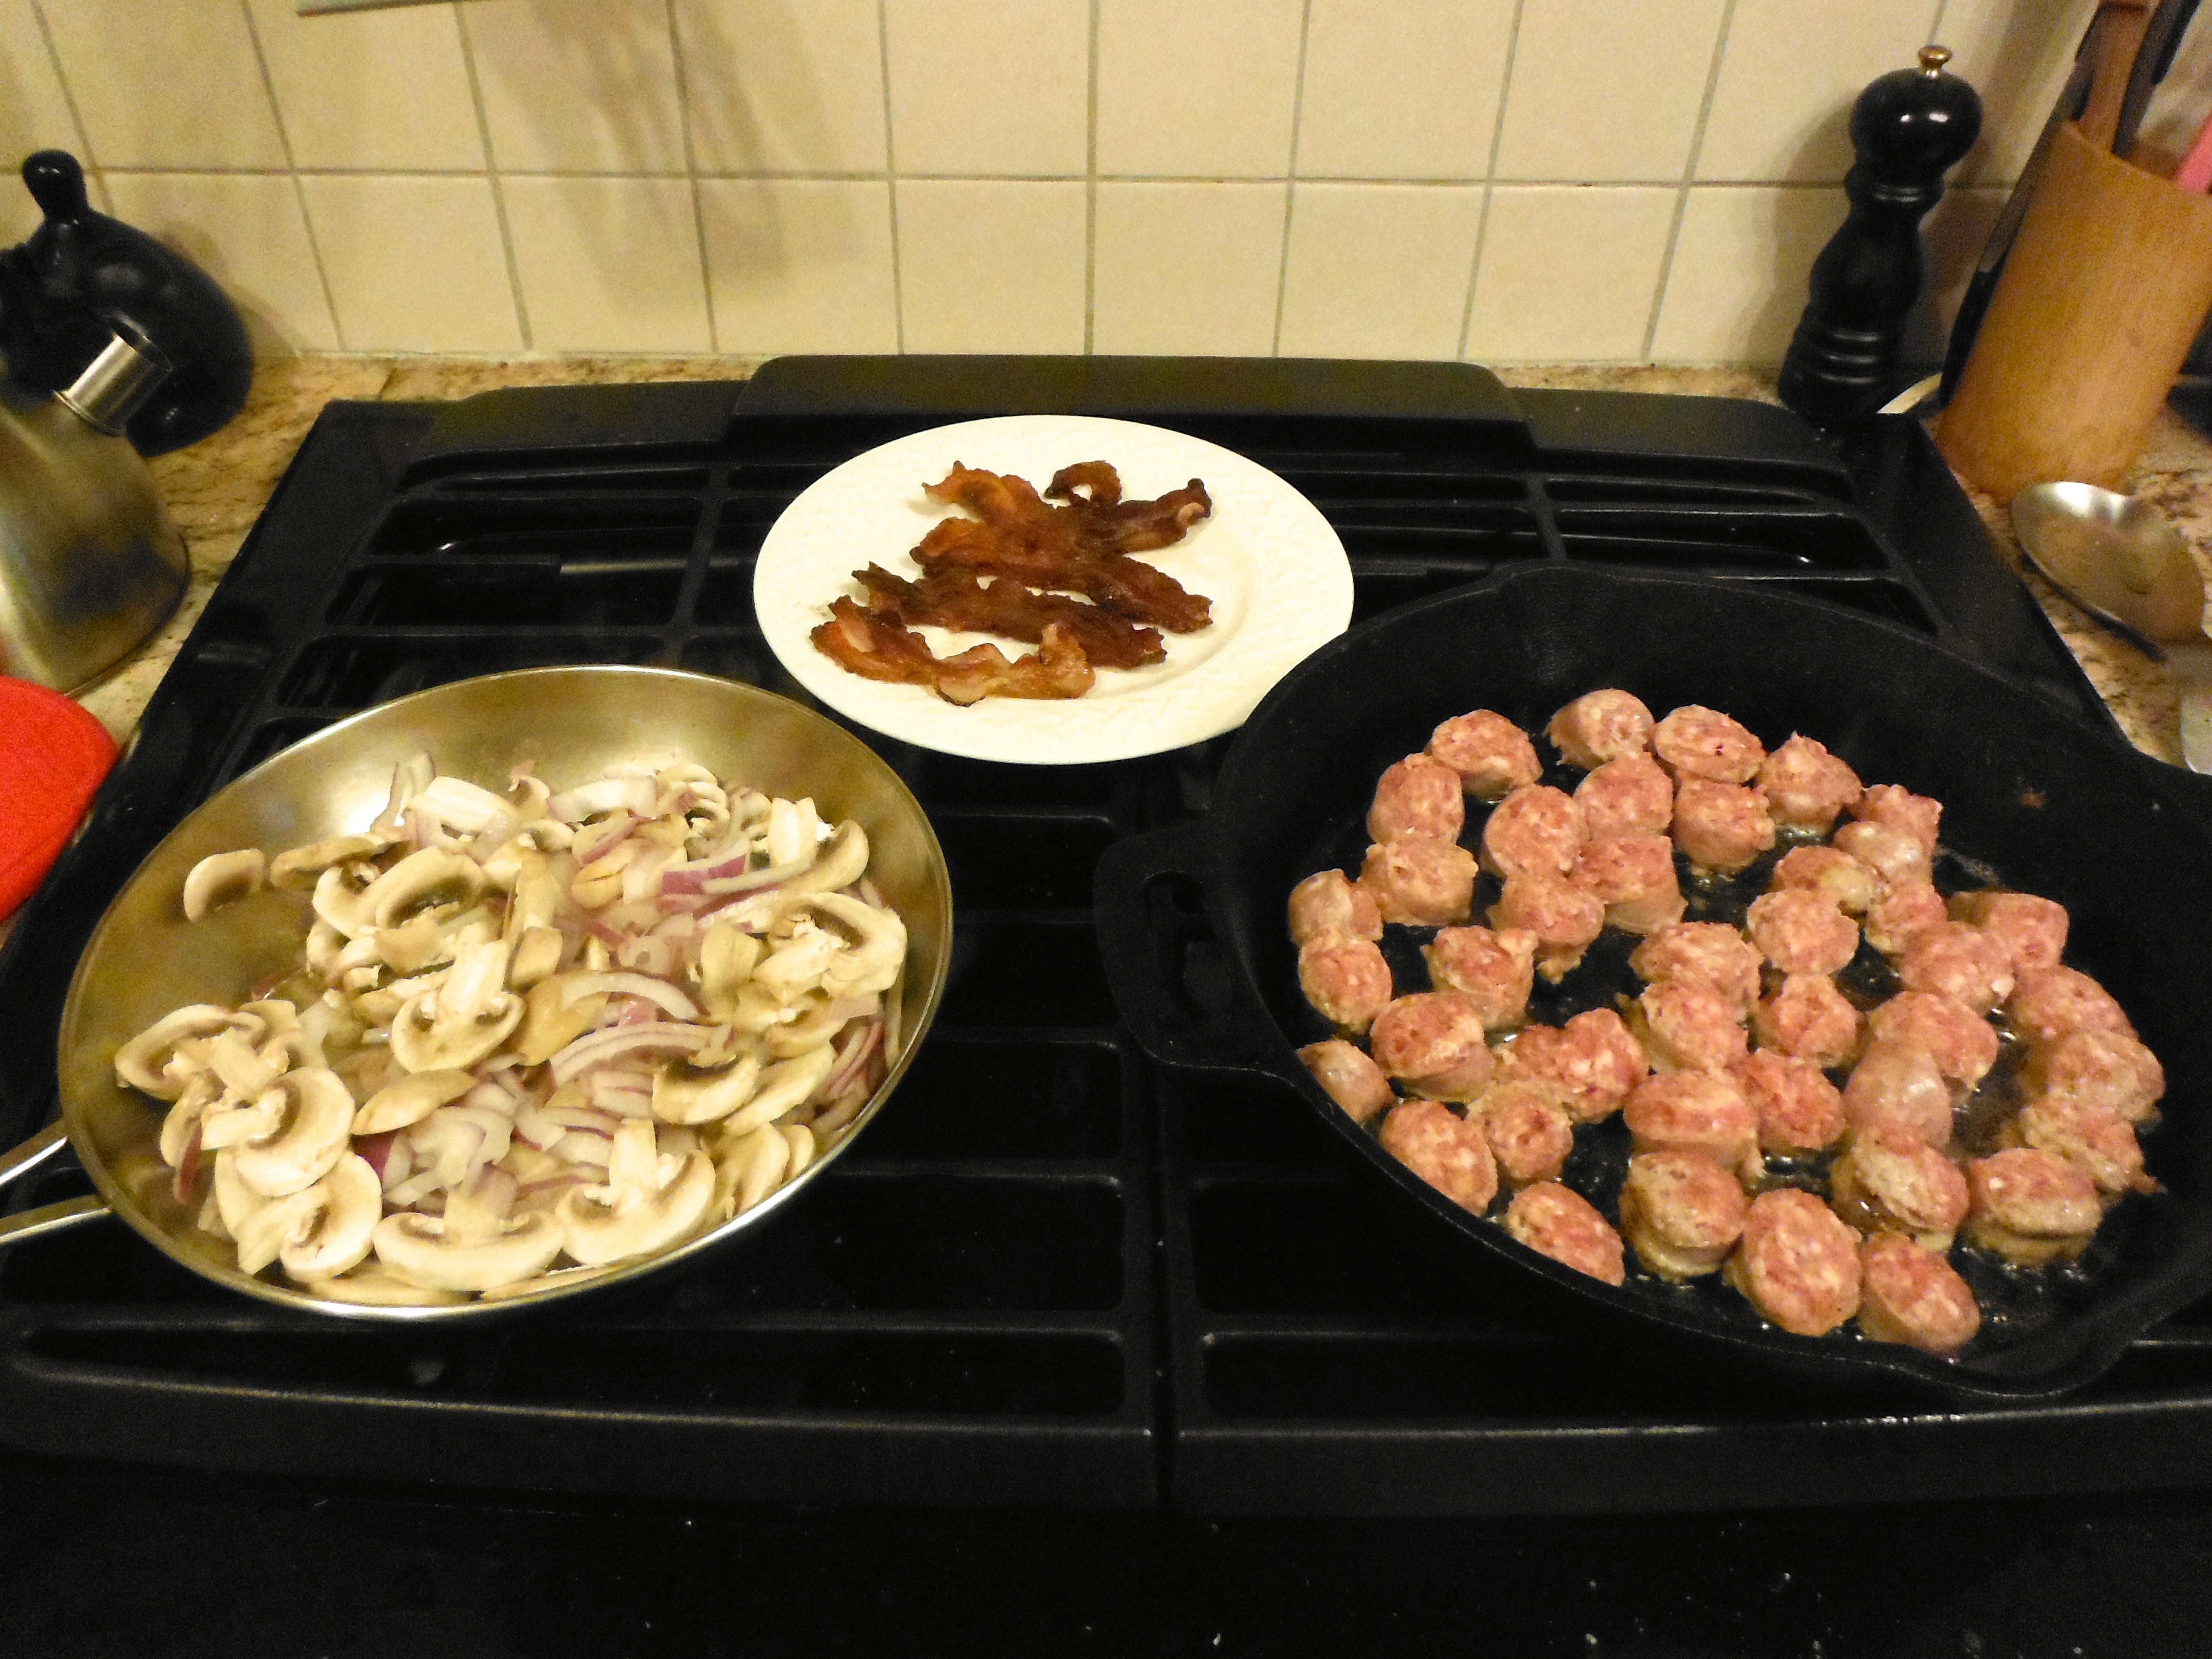
Cook the bacon, set it aside and sautée the veggies and sausage in the bacon grease.
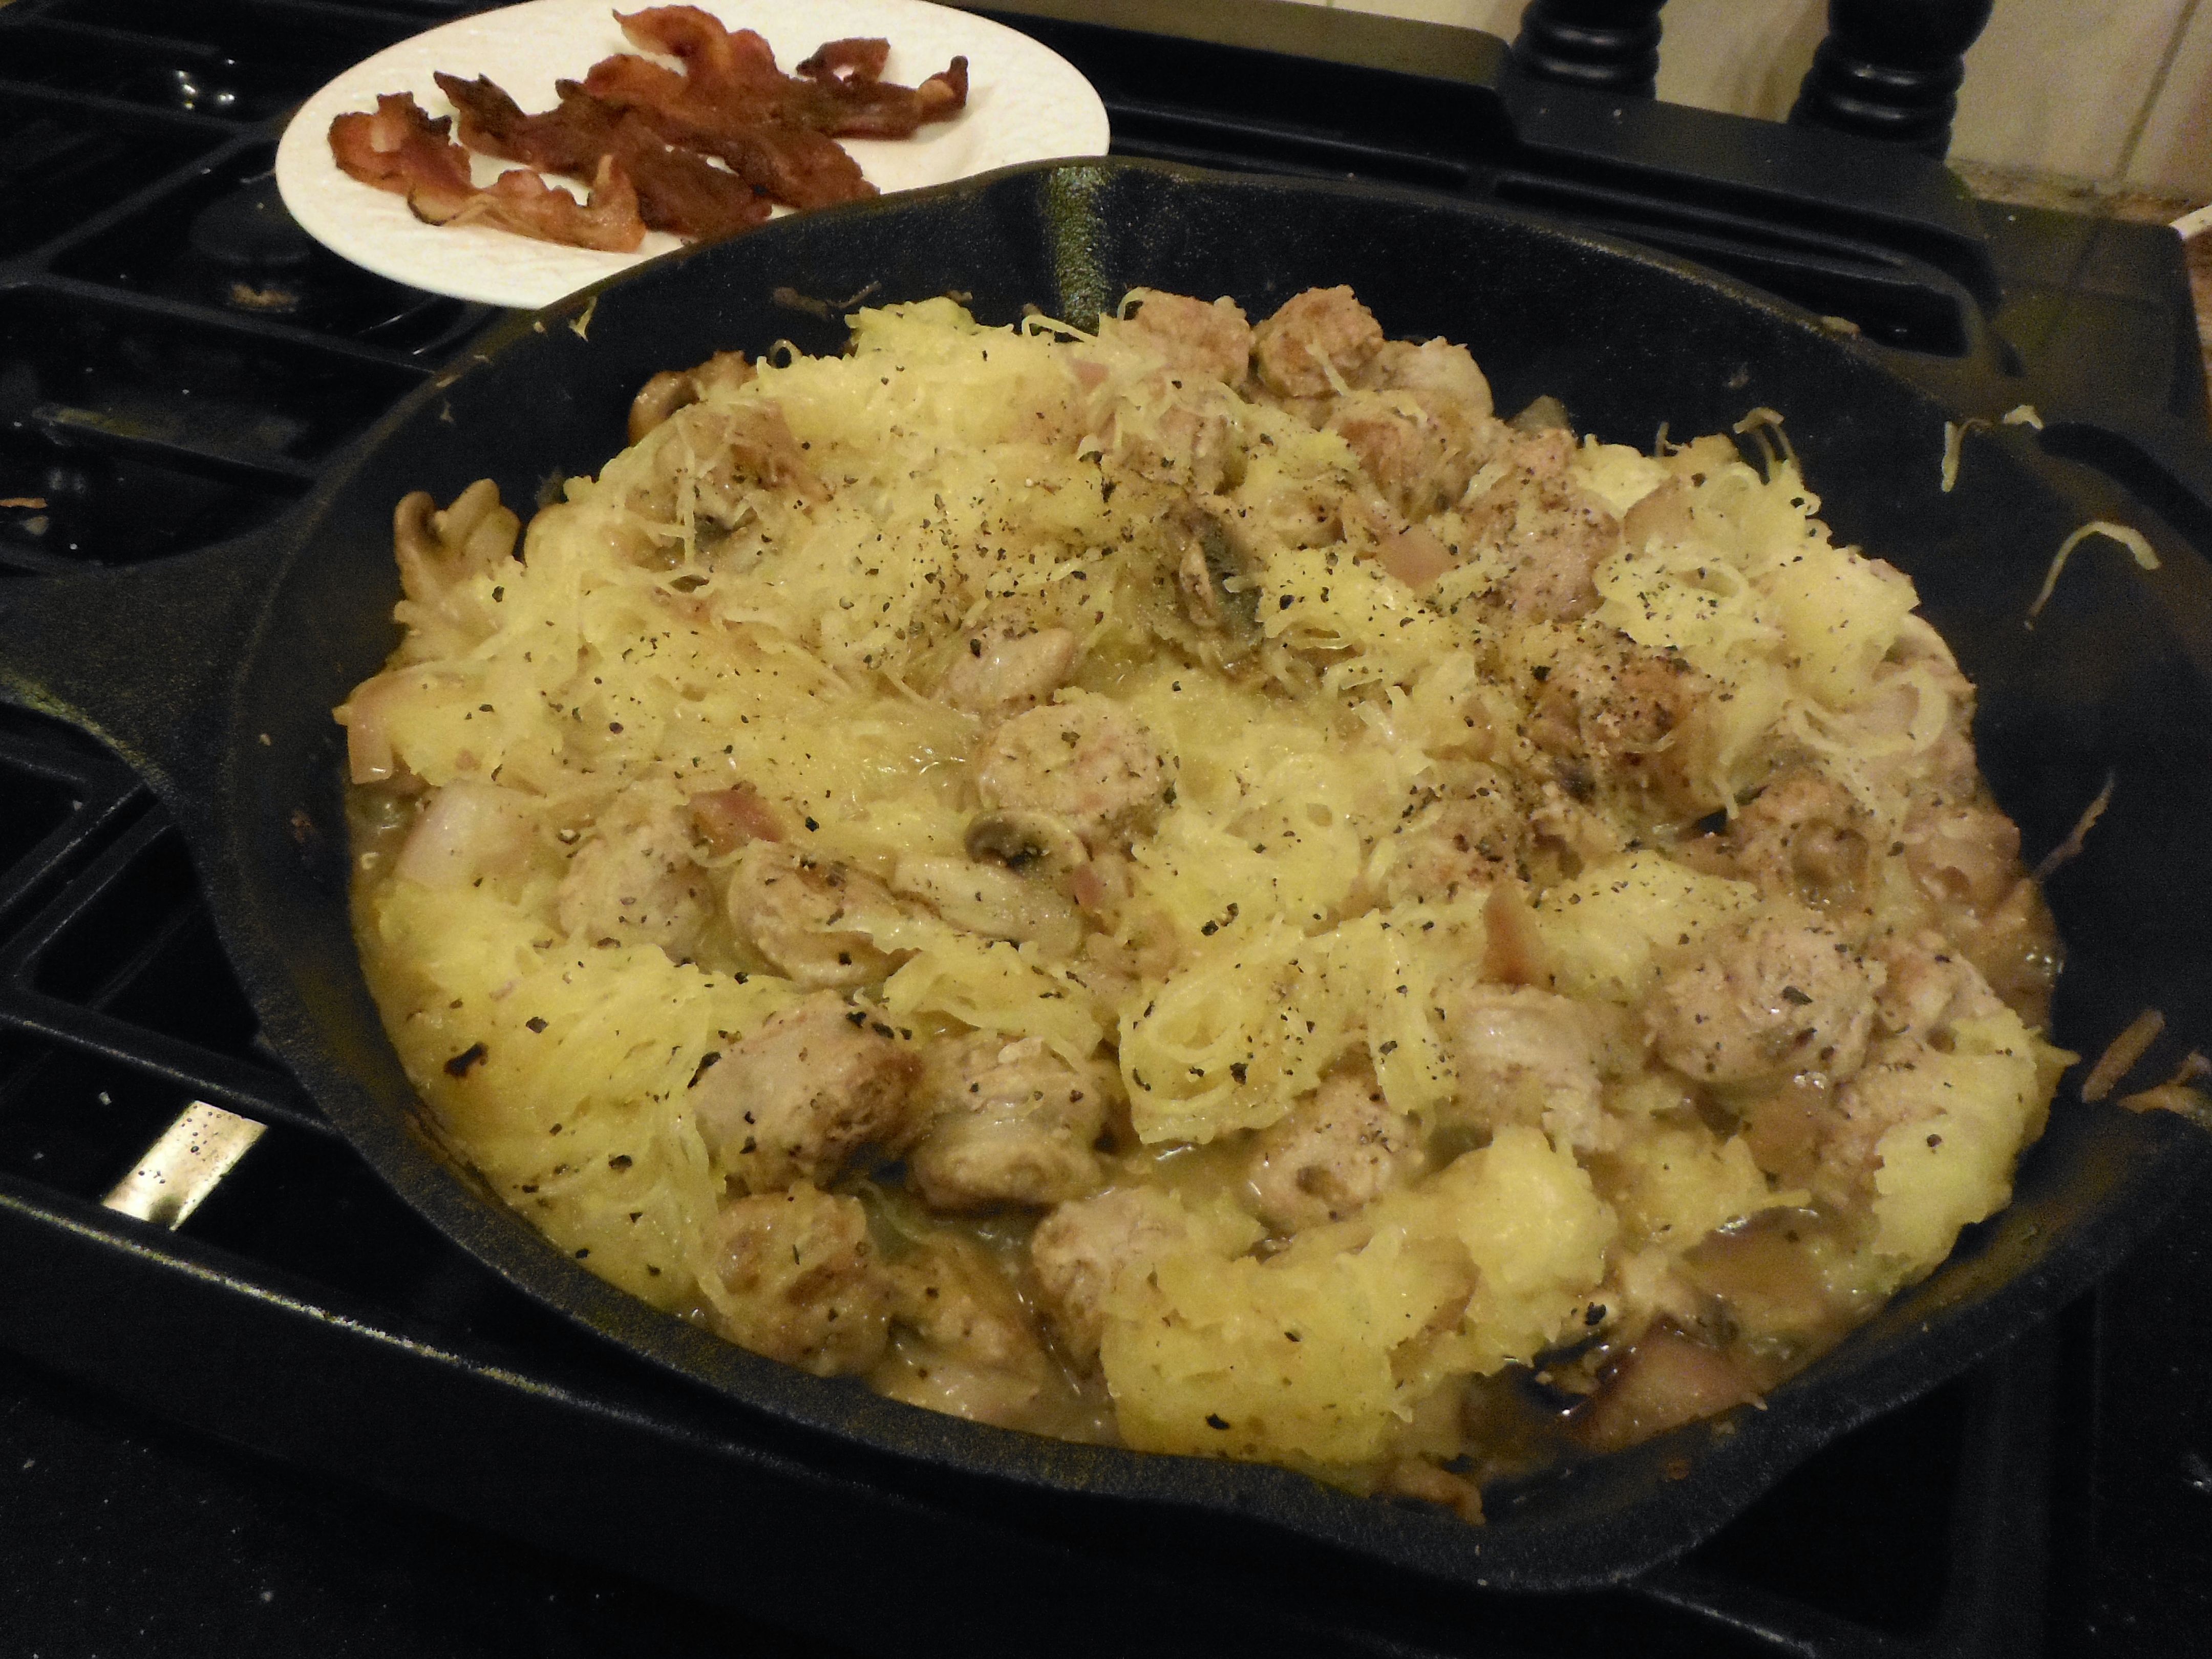
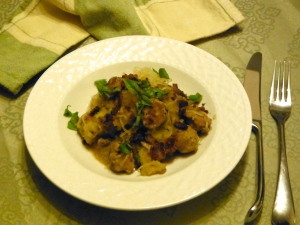
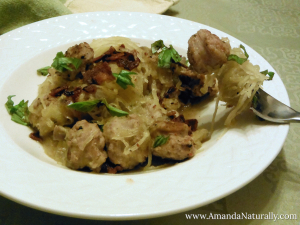
Toss sautéed veggies and sausage with spaghetti squash. Top with the bacon and fresh basil. Voila – Sausage & Mushroom Spaghetti (Squash)!
Sausage & Mushroom Spaghetti (Squash)
2014-10-30 15:48:45
Serves 6
Sausage & Mushroom Spaghetti (Squash) - an easy, low-carb pasta, jam-packed with healthy fats, protein and flavour!
Cook spaghetti squash - set the oven to 400F and throw the squash in whole. After 25 minutes pull the squash, slice it across the circumference, width wise and scoop out the seeds. Place the squash cut side down on a baking sheet and bake for another 15-25 minutes, until soft to the touch. Set aside until you're ready to assemble the pasta.
Cook the bacon until crispy. Chop into small pieces and set aside.
Pour half of the bacon grease into another pan. Add onion and mushrooms. Season with sea salt and pepper. Sautee.
Meanwhile, in the original pan, brown the sausage slices. Approximately 3-4 minutes per side.
When the sausages are done, add the onion and mushrooms to the sausage pan. Using a fork, scrape the spaghetti squash into noodles into the pan. Season liberally with sea salt and pepper. Toss everything to combine well and distribute the yummy bacon grease.
Serve in pasta bowls topped with bacon and fresh basil.
Anyone who makes an effort to eat whole, real foods most (if not all) of the time, can totally sympathize with me when it comes to finding quick grab-and-go snacks. Sometimes I wish I was still in the dark about nutrition so I could grab a protein bar to throw in my purse for those just-in-case moments. Unfortunately, I still have not found a bar that I consider real food, so homemade snacks are my only option. The one exception are Larabars, which I do enjoy, but I find they’re very sweet and mostly dried fruit. Since they range from 3-5g of protein per bar, I don’t really classify them as high protein snacks. When you start to get into the actual high-protein snacks 3 things happen:
They start using whey (dairy) which I am allergic to.
They start adding all sorts of other garbage to make it taste remotely ok.
If they are striving for a “clean” bar, they use stevia (which messes up my stomach) and all sorts of grains, which can be problematic for some.
Nuts and seeds don’t cut it either. While they have some protein in them, they are mostly fat. Which is a good thing! But can be easily overdone and a lot of people don’t find them that satisfying. I know I don’t. I can bang back handfuls of nuts in a short period of time – which usually makes me feel pretty darn sick. But if I limit myself to a small portion, it really does not seem to do the trick.
So what options are there? I can’t do dairy so yogurt and cottage cheese are out. Beans are a no go for me – but they’re not really a nutrient dense protein source anyway. Protein powders – well there’s a time and a place for them, they’re heavily processed, very few have clean ingredients and those that are often have stevia (darn stomach). For the longest time, the only protein-dominant snack I could think of was eggs. Hard boiled eggs are still one of my go-to’s for a quick protein source that requires minimal refrigeration. But honestly, how many eggs can a girl eat? Most days I have 2-3 eggs for breakfast, and I don’t know what it is, but that usually seems to be my limit.
When I really started getting into the real, whole foods scene, I began seeing some incredible store-bought snacks that bloggers and instagrammers were raving about. Epic Bars, Exo Bars, Steves Paleo Goods, Sophia’s Survival Food – all of these would actually work within my food options! I was stoked, but soon learned that these products are only available in the US. You can have them shipped to Canada, but for a hefty fee, so I decided to do what I always do…make my own!!
Homemade beef jerky is actually an incredibly easy process – it just takes a bit of time! My first inspiration was this great tutorial for homemade jerky over on The Paleo Mom. I made my first 2 batches of jerky following this method and was hooked.
http://instagram.com/p/qHdbEWC9gL/?modal=true
I loved having jerky in the cupboard for so many reasons! It was perfect for long days at the office, days where I don’t have any leftovers for lunch, road trips, vacations, on airplanes, days when you are out and about all day long and even times when you might be eating with other people and there are not many options for you due to food sensitivities, or what have you. I could just throw it in my purse and not worry about it!
The only problem was it took so darn long in the oven. There were very few days that I could actually dedicate to the 7+ hours required to be at home. So I made a purchase that I swore I would never need – a dehydrator! I bought it used so it was a reasonable investment that has paid for itself over and over again! Now I make jerky every time I get a meat delivery, and while we try to save it for times of need, it rarely lasts us a week because it’s so freakin delicious!
Homemade Beef Jerky
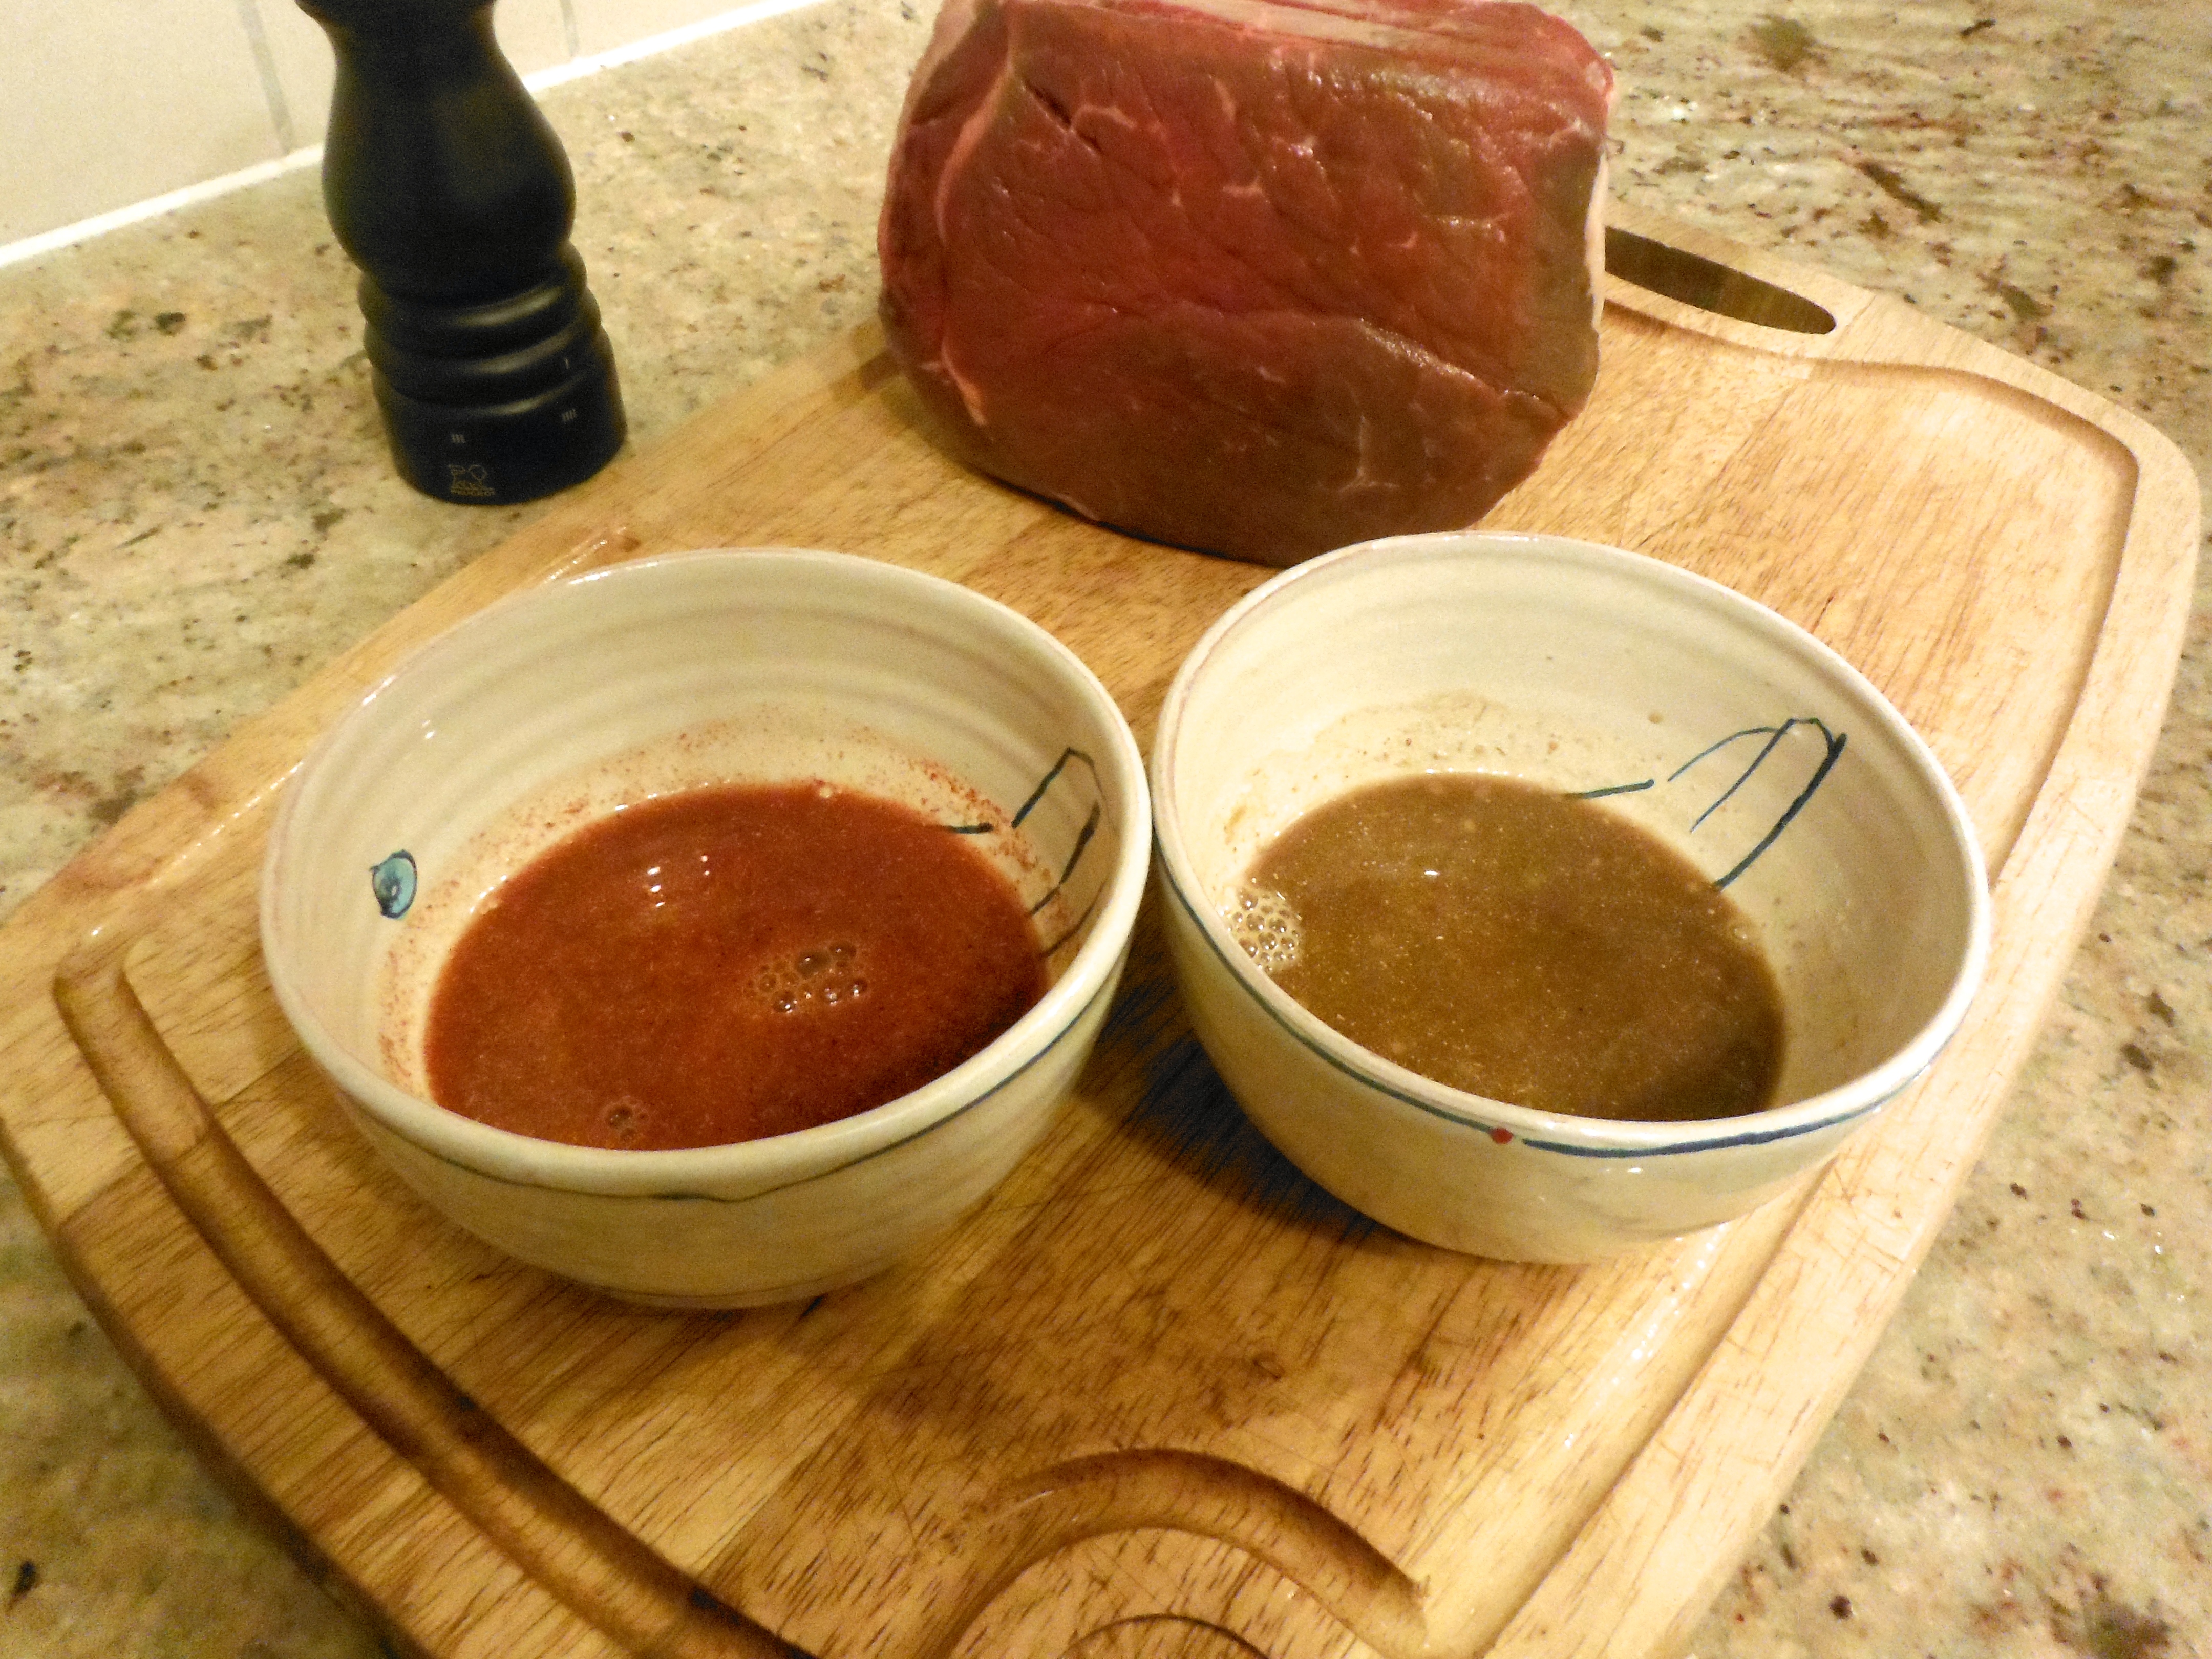
The cut of beef is the most important part. You want a large piece of meat that has very little fat on it. Or if there is fat, that it is on the outside and easy to remove. Fat goes rancid pretty easily, so if there is fat on your jerky, it decreases the shelf life. This is the only time I recommend avoiding the marbled meat options! I did lots of research, but really struggled to know what to purchase because the names and cuts of the animal seem to vary dramatically between countries! I started experimenting and have now tried a few different cuts. Flank steak had a bit too much marbling. Brisket was good, but I was pretty devastated getting rid of the huge layer of fat that ran through the middle of the meat. The third time was the charm. I tried a blade roast from our favourite grass-fed meat delivery team – Brooker’s Meat – and it’s now my jerky cut of choice! I usually make 2 different flavours, to keep it interesting.
Ingredients
1 grass-fed Blade Roast (mine was 3.72 lbs and cost $27.86)
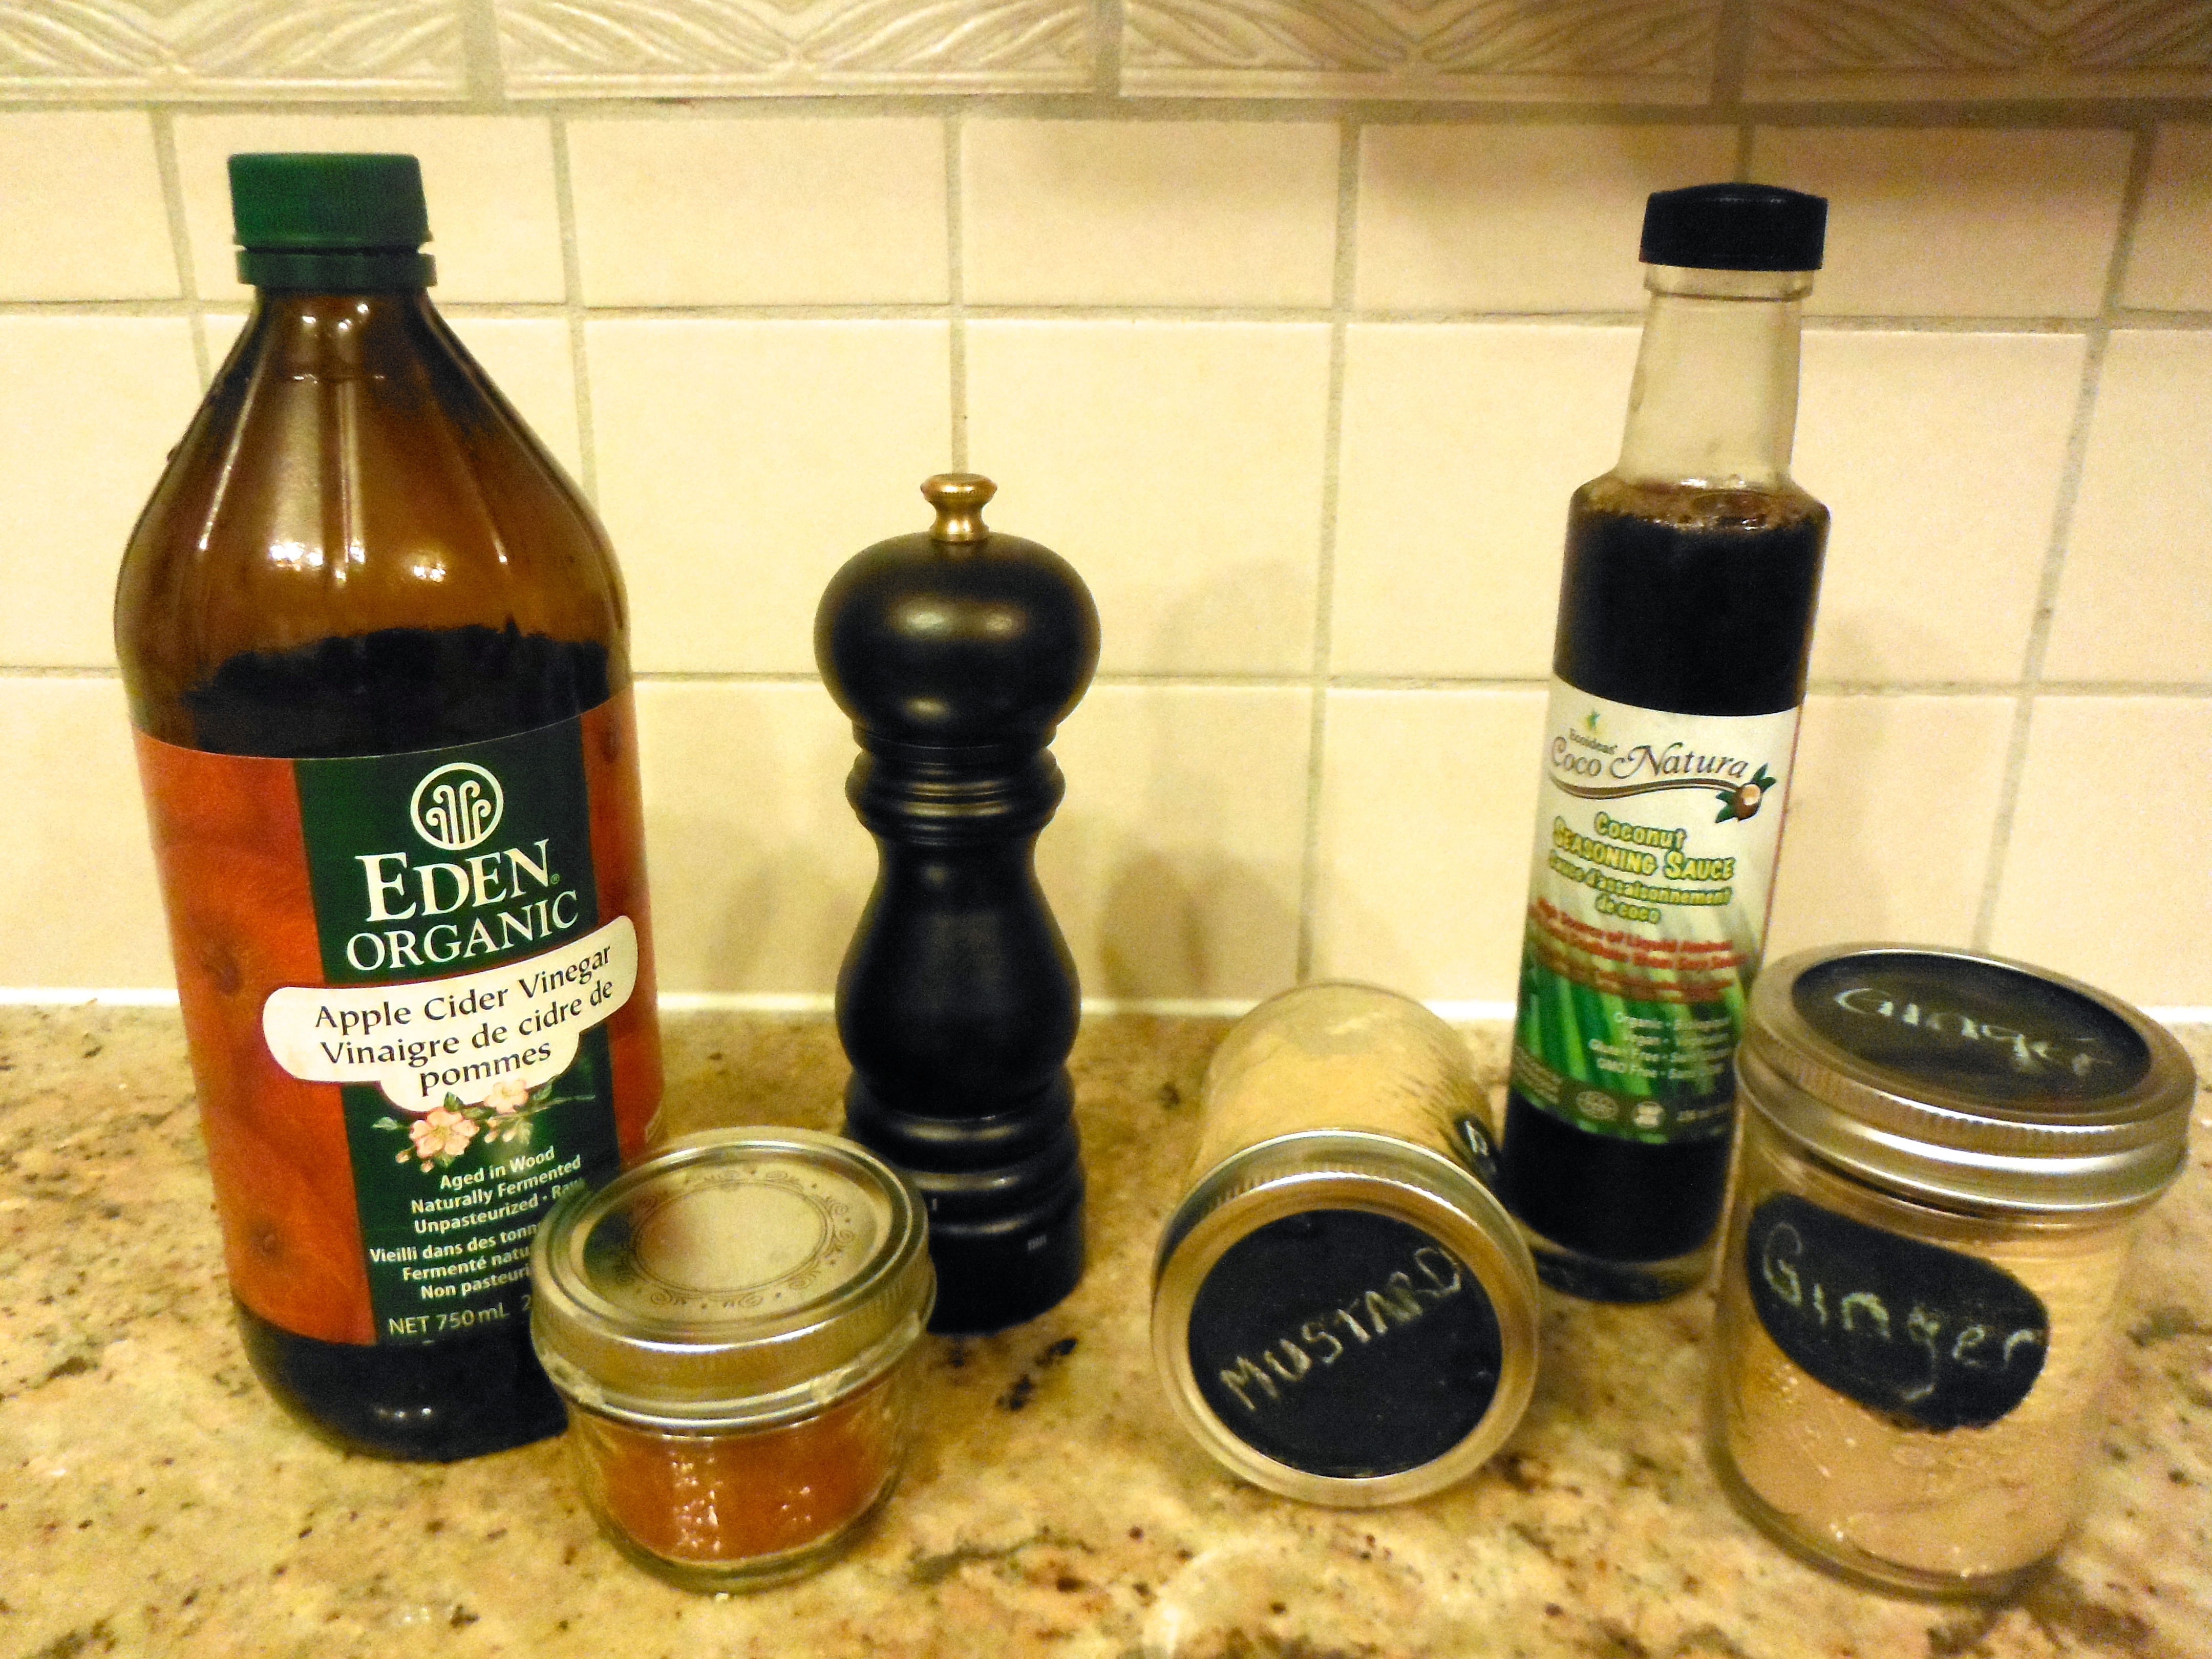
¼ cup coconut seasoning sauce(called coconut aminos in the USA. Alternatively, use gluten-free tamari or soy sauce) ½ tsp mustard powder 1½ tsp ginger powder
Sea salt, liberal amounts.
NOTE: Paprika is a nightshade, so may need to be avoided by some people. The coconut seasoning, mustard and ginger batch is nightshade free. If following the autoiommune protocol strictly, eliminate the mustard powder because it is made from a seed.
Directions
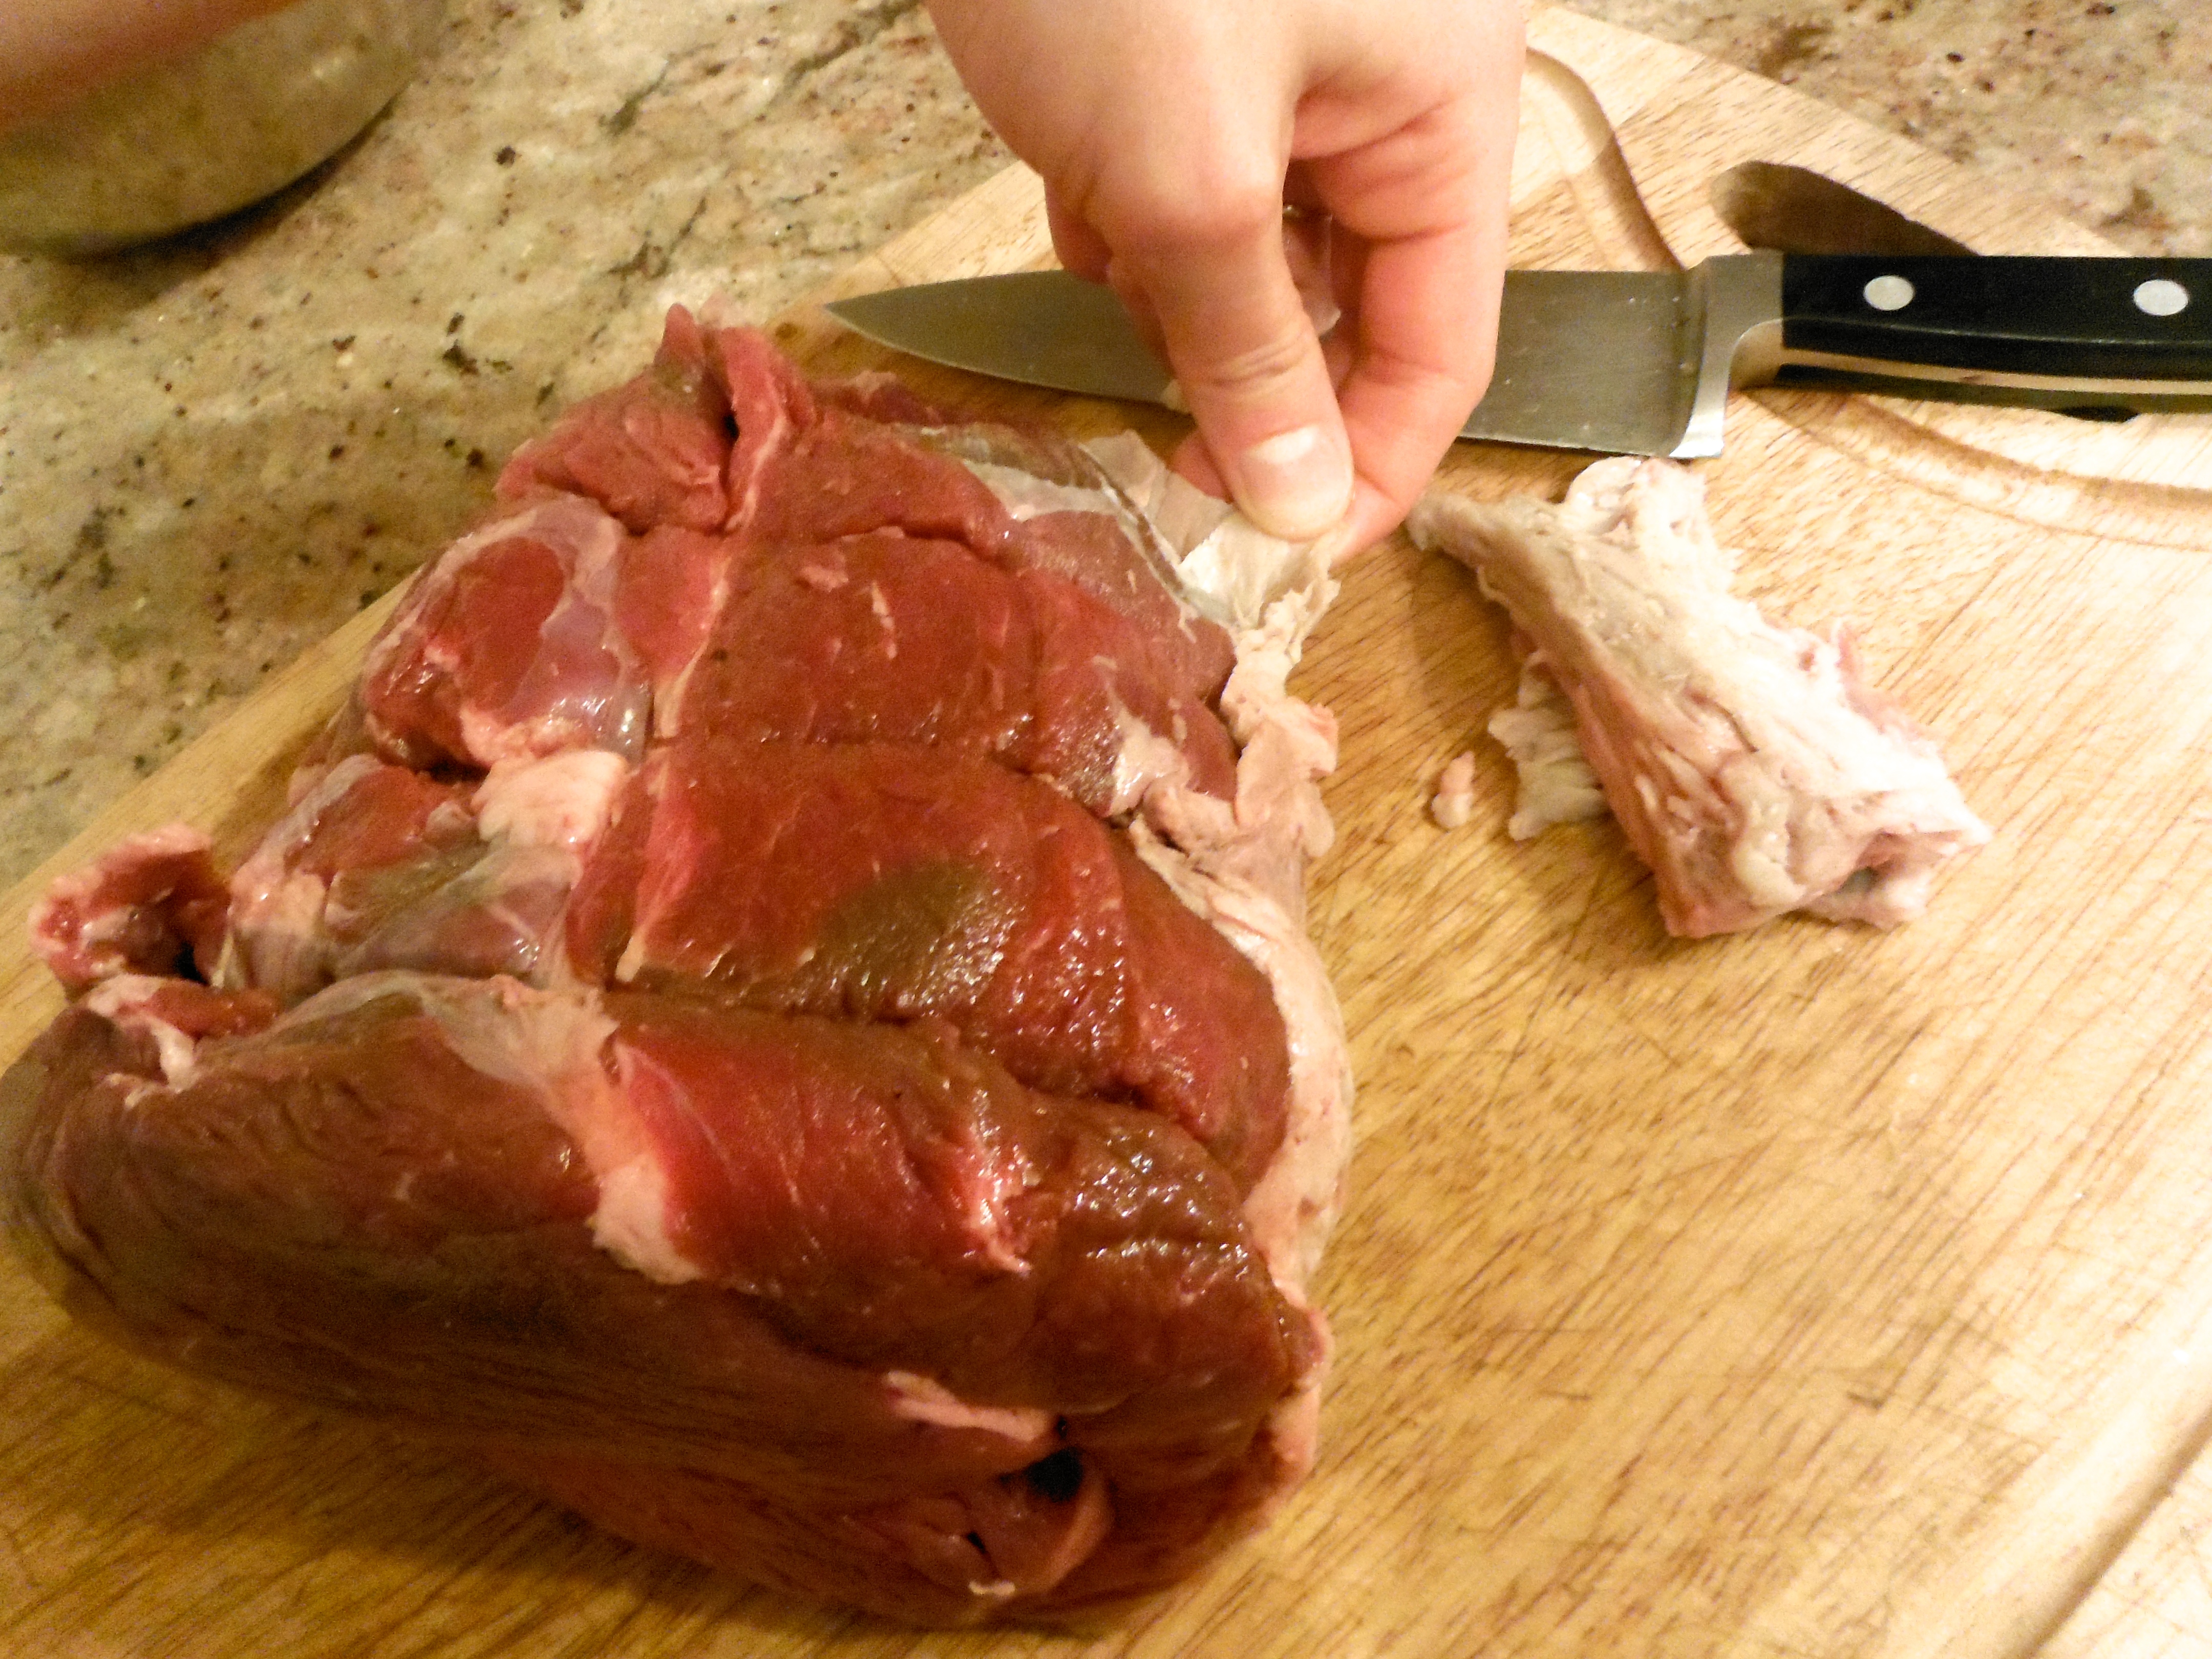
Meat is easier to cut when it’s on it’s way to frozen. So if previously frozen, let thaw in the fridge and slice when it’s still slightly firm. Alternatively, freeze for 30-60 minutes before starting to make cutting easier.
Combine the apple cider vinegar and hot paprika in one small bowl. Mix thoroughly. Combine the coconut seasoning (or tamari), mustard and ginger in another small bowl. Mix throughly.
Prepare your cut of beef. Remove as much of the fat as possible.
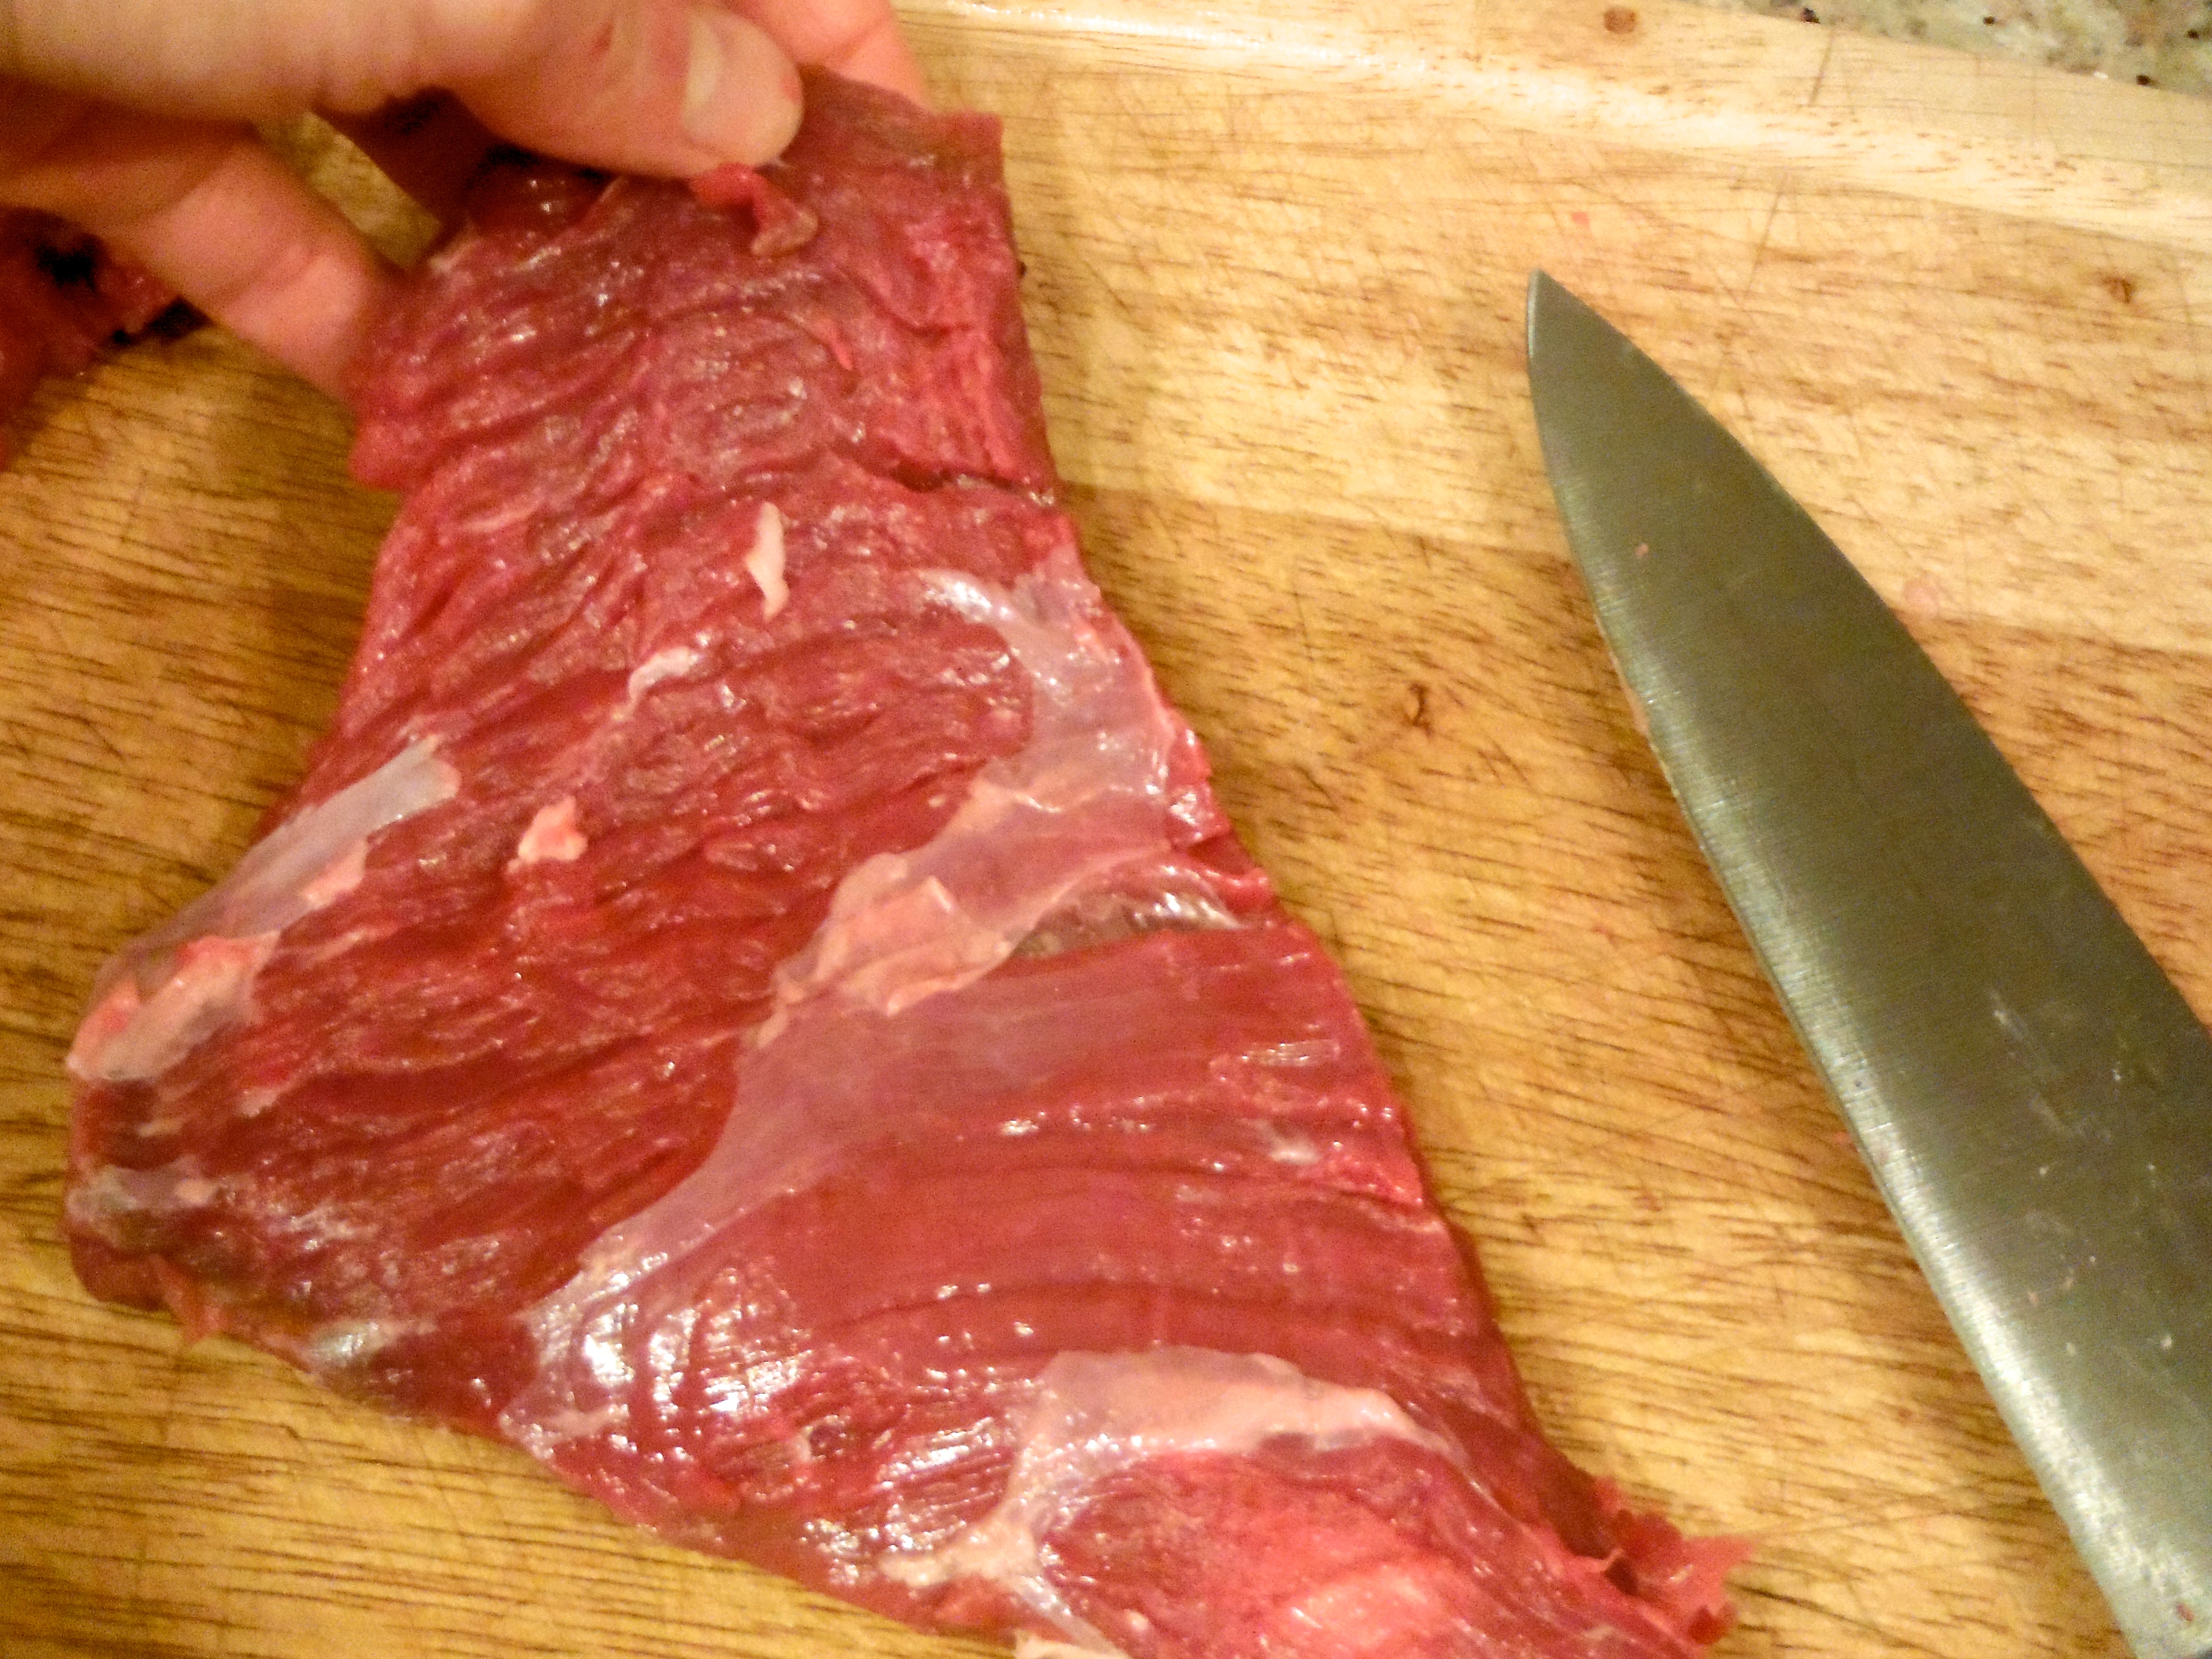
Then, cutting against the grain, slice the piece of meat into jerky sized pieces. Mine are about ¼ inch thick or less.
The grain is running side to side in this photo, so I am cutting “against” it, or perpendicular to it.
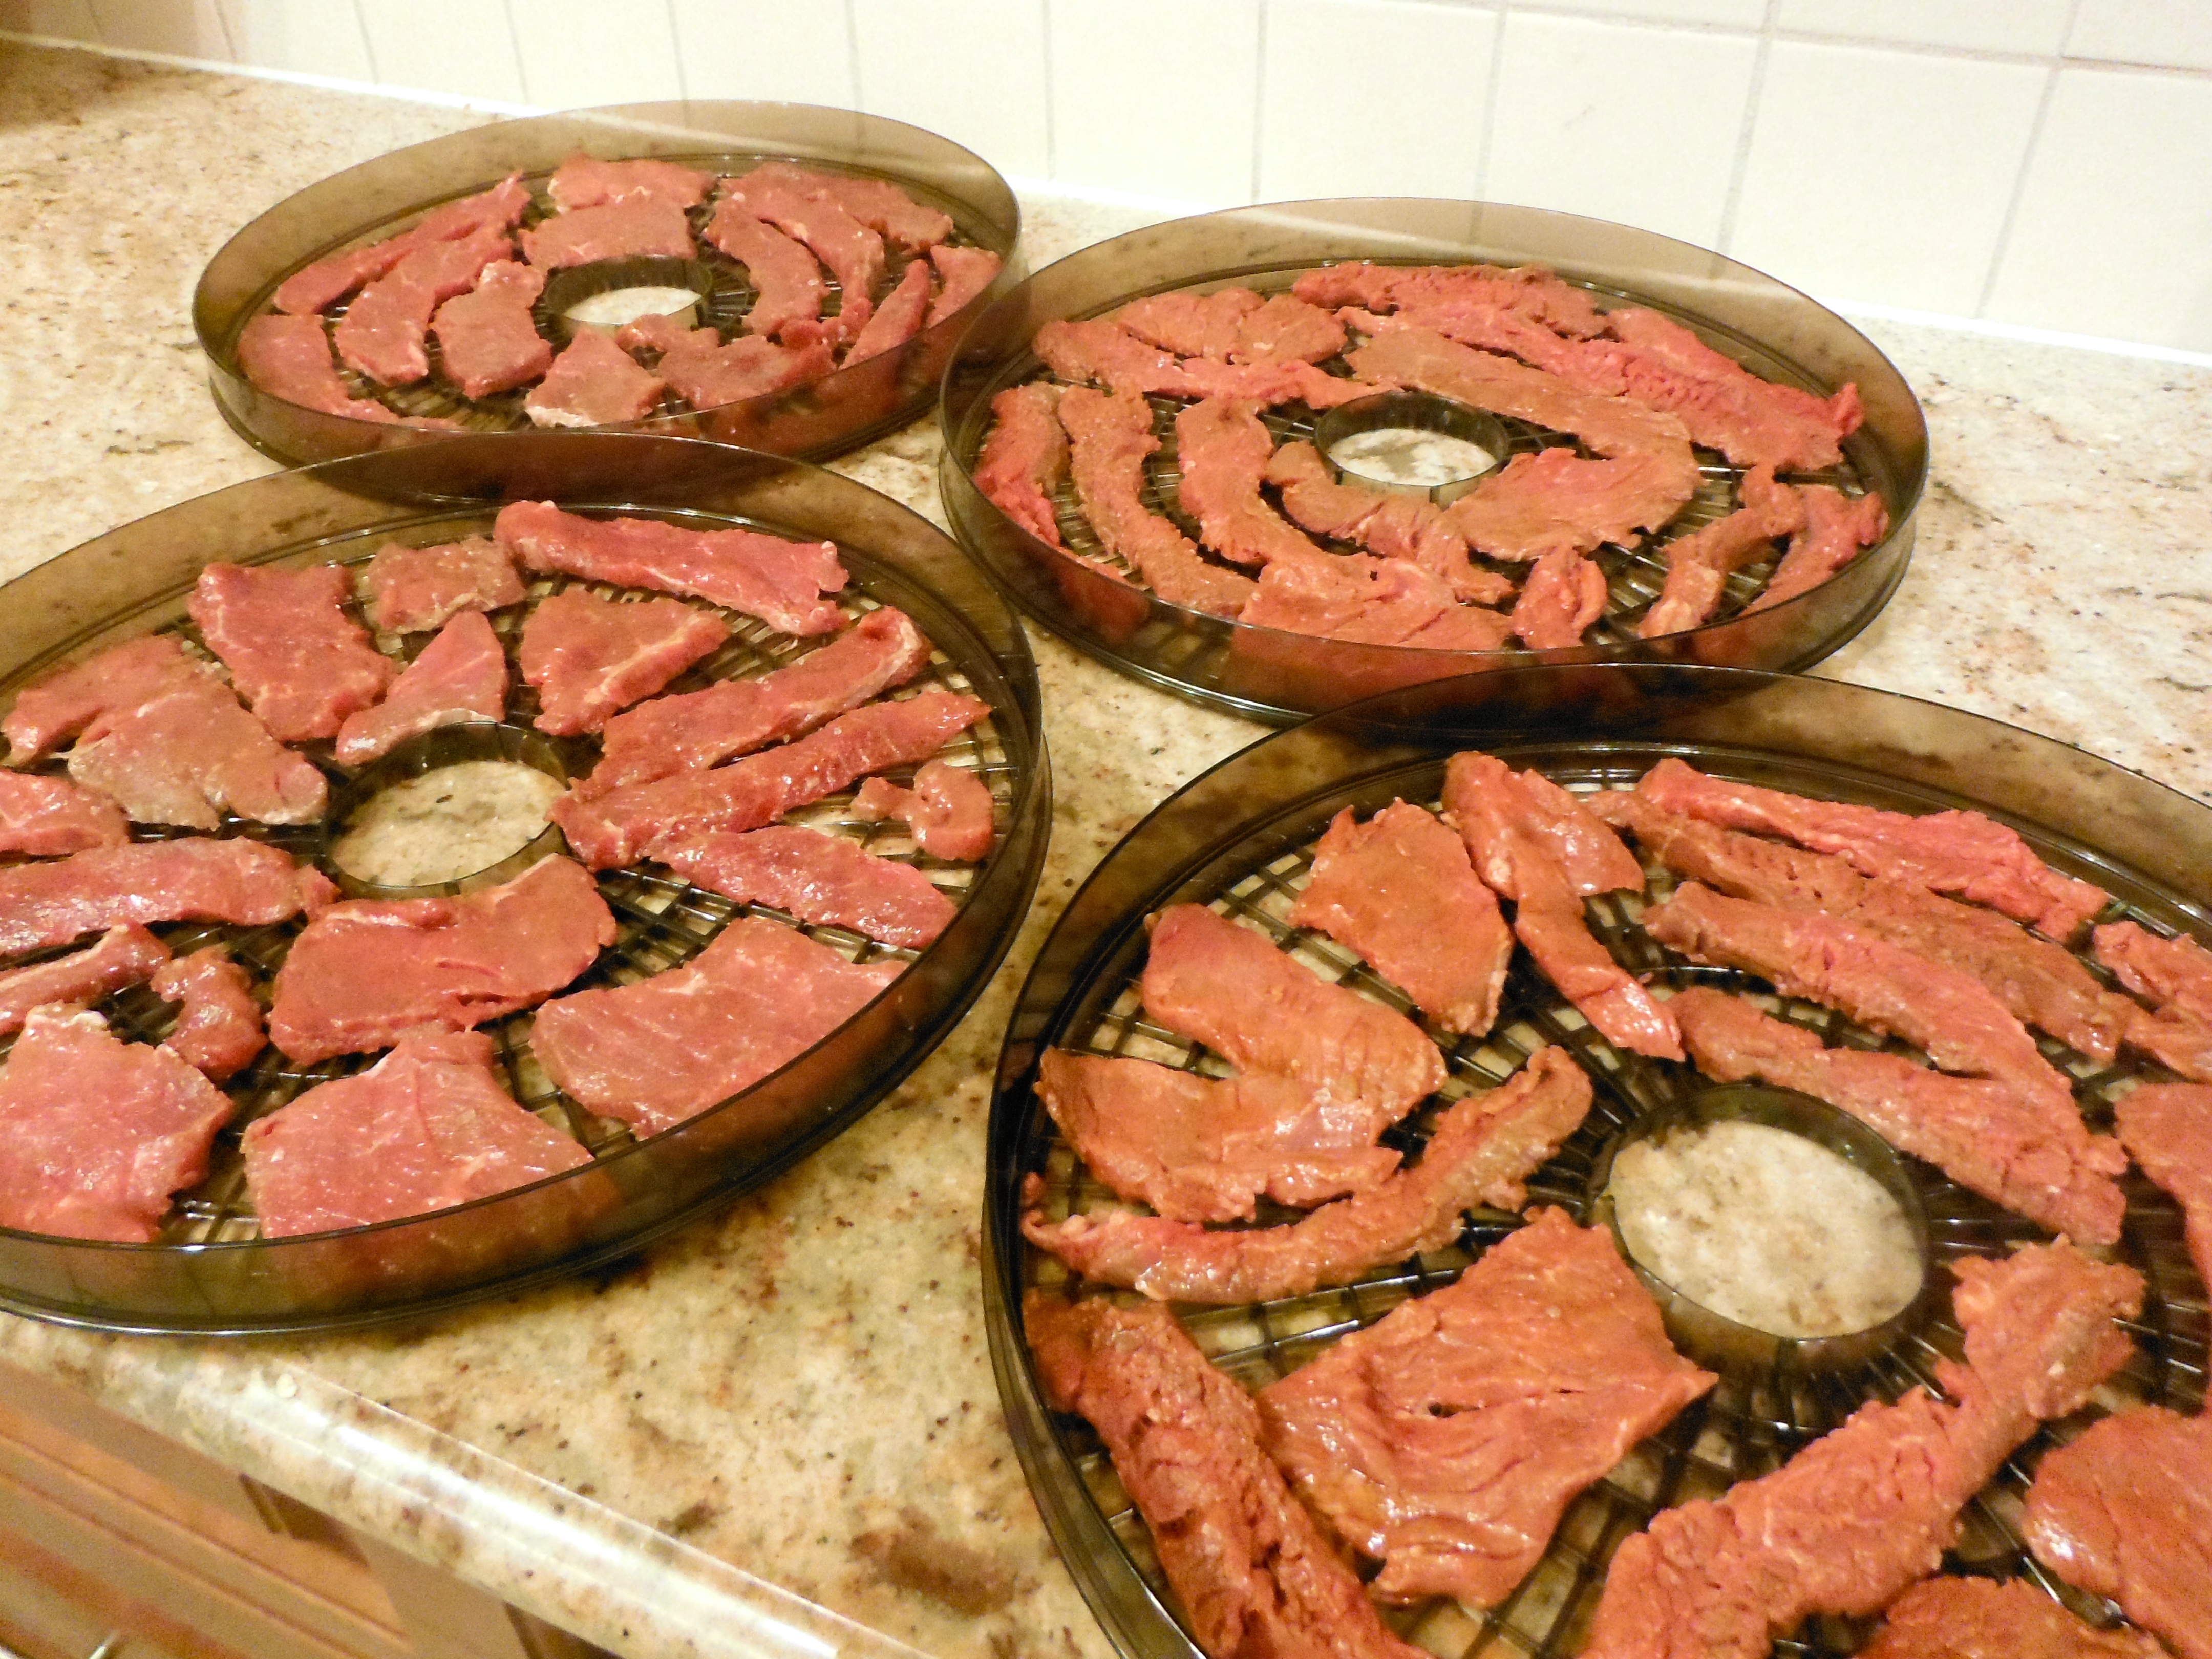
Divide the sliced meat into 2 bowls and pour the 2 seasoning mixes over them. Season liberally with sea salt, mix well and let marinate on the counter for 30 minutes.
Lay your jerky pieces on to your dehydrator trays making sure they don’t touch. Season again with sea salt.
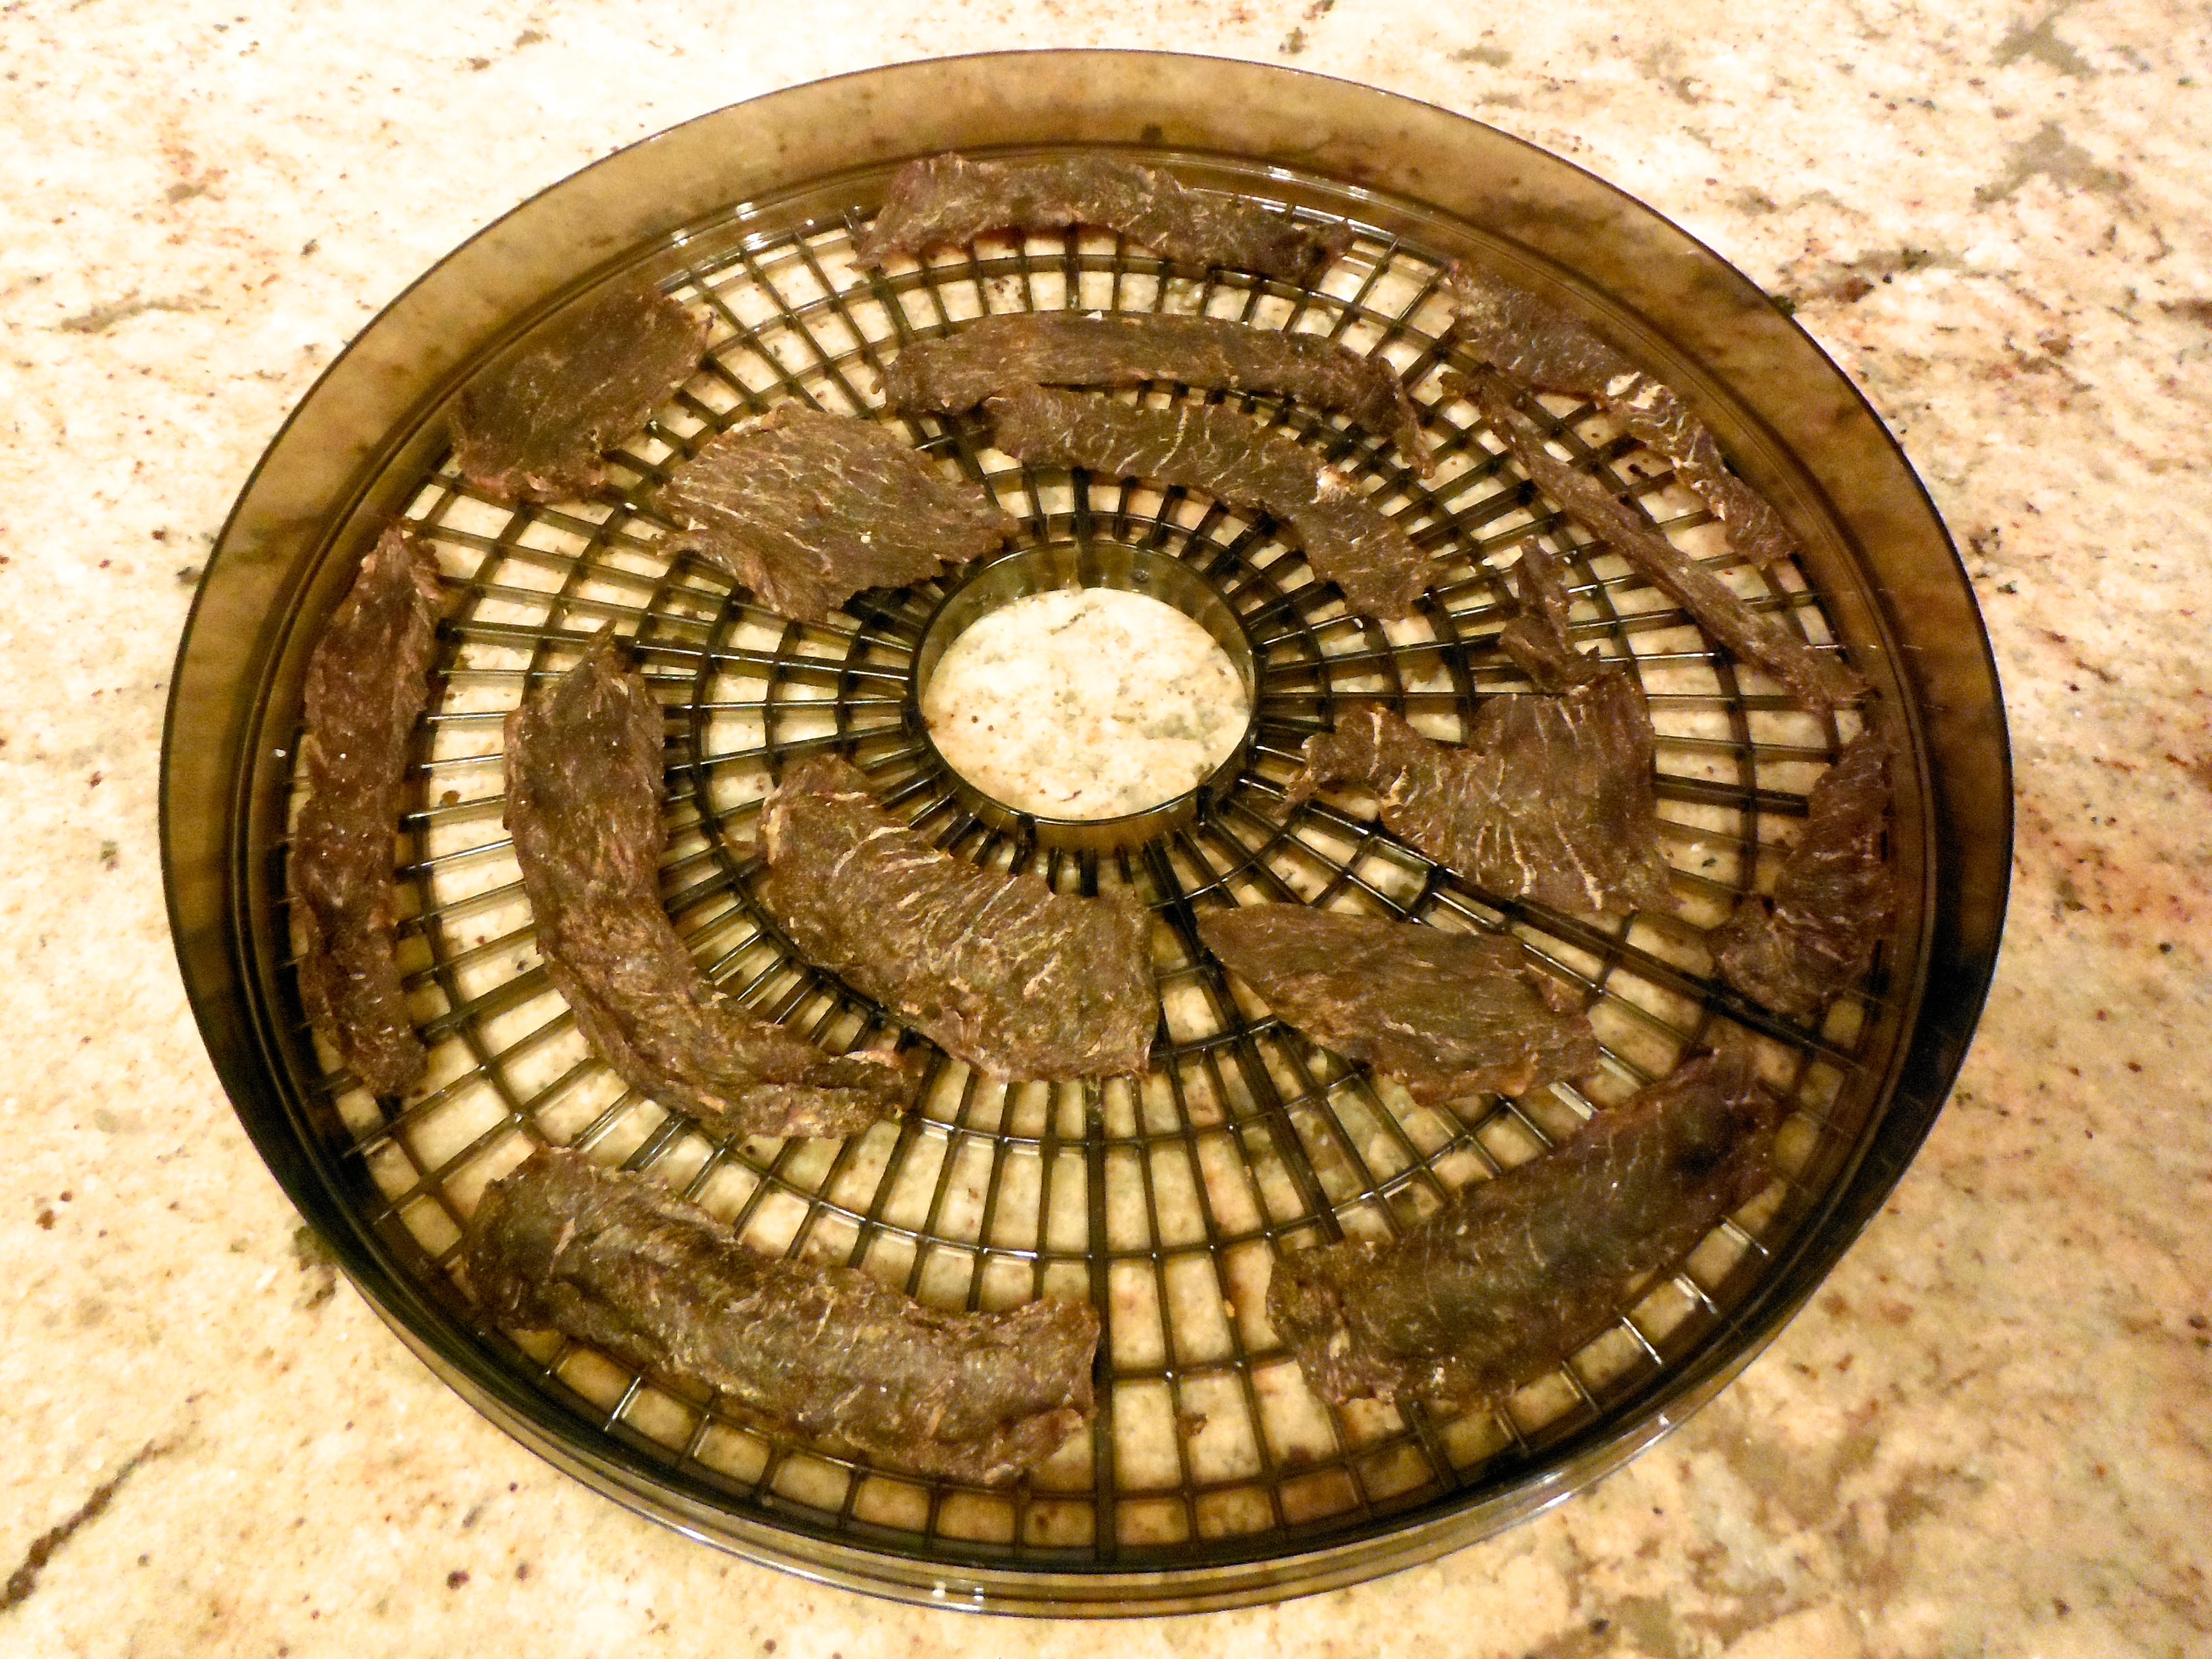
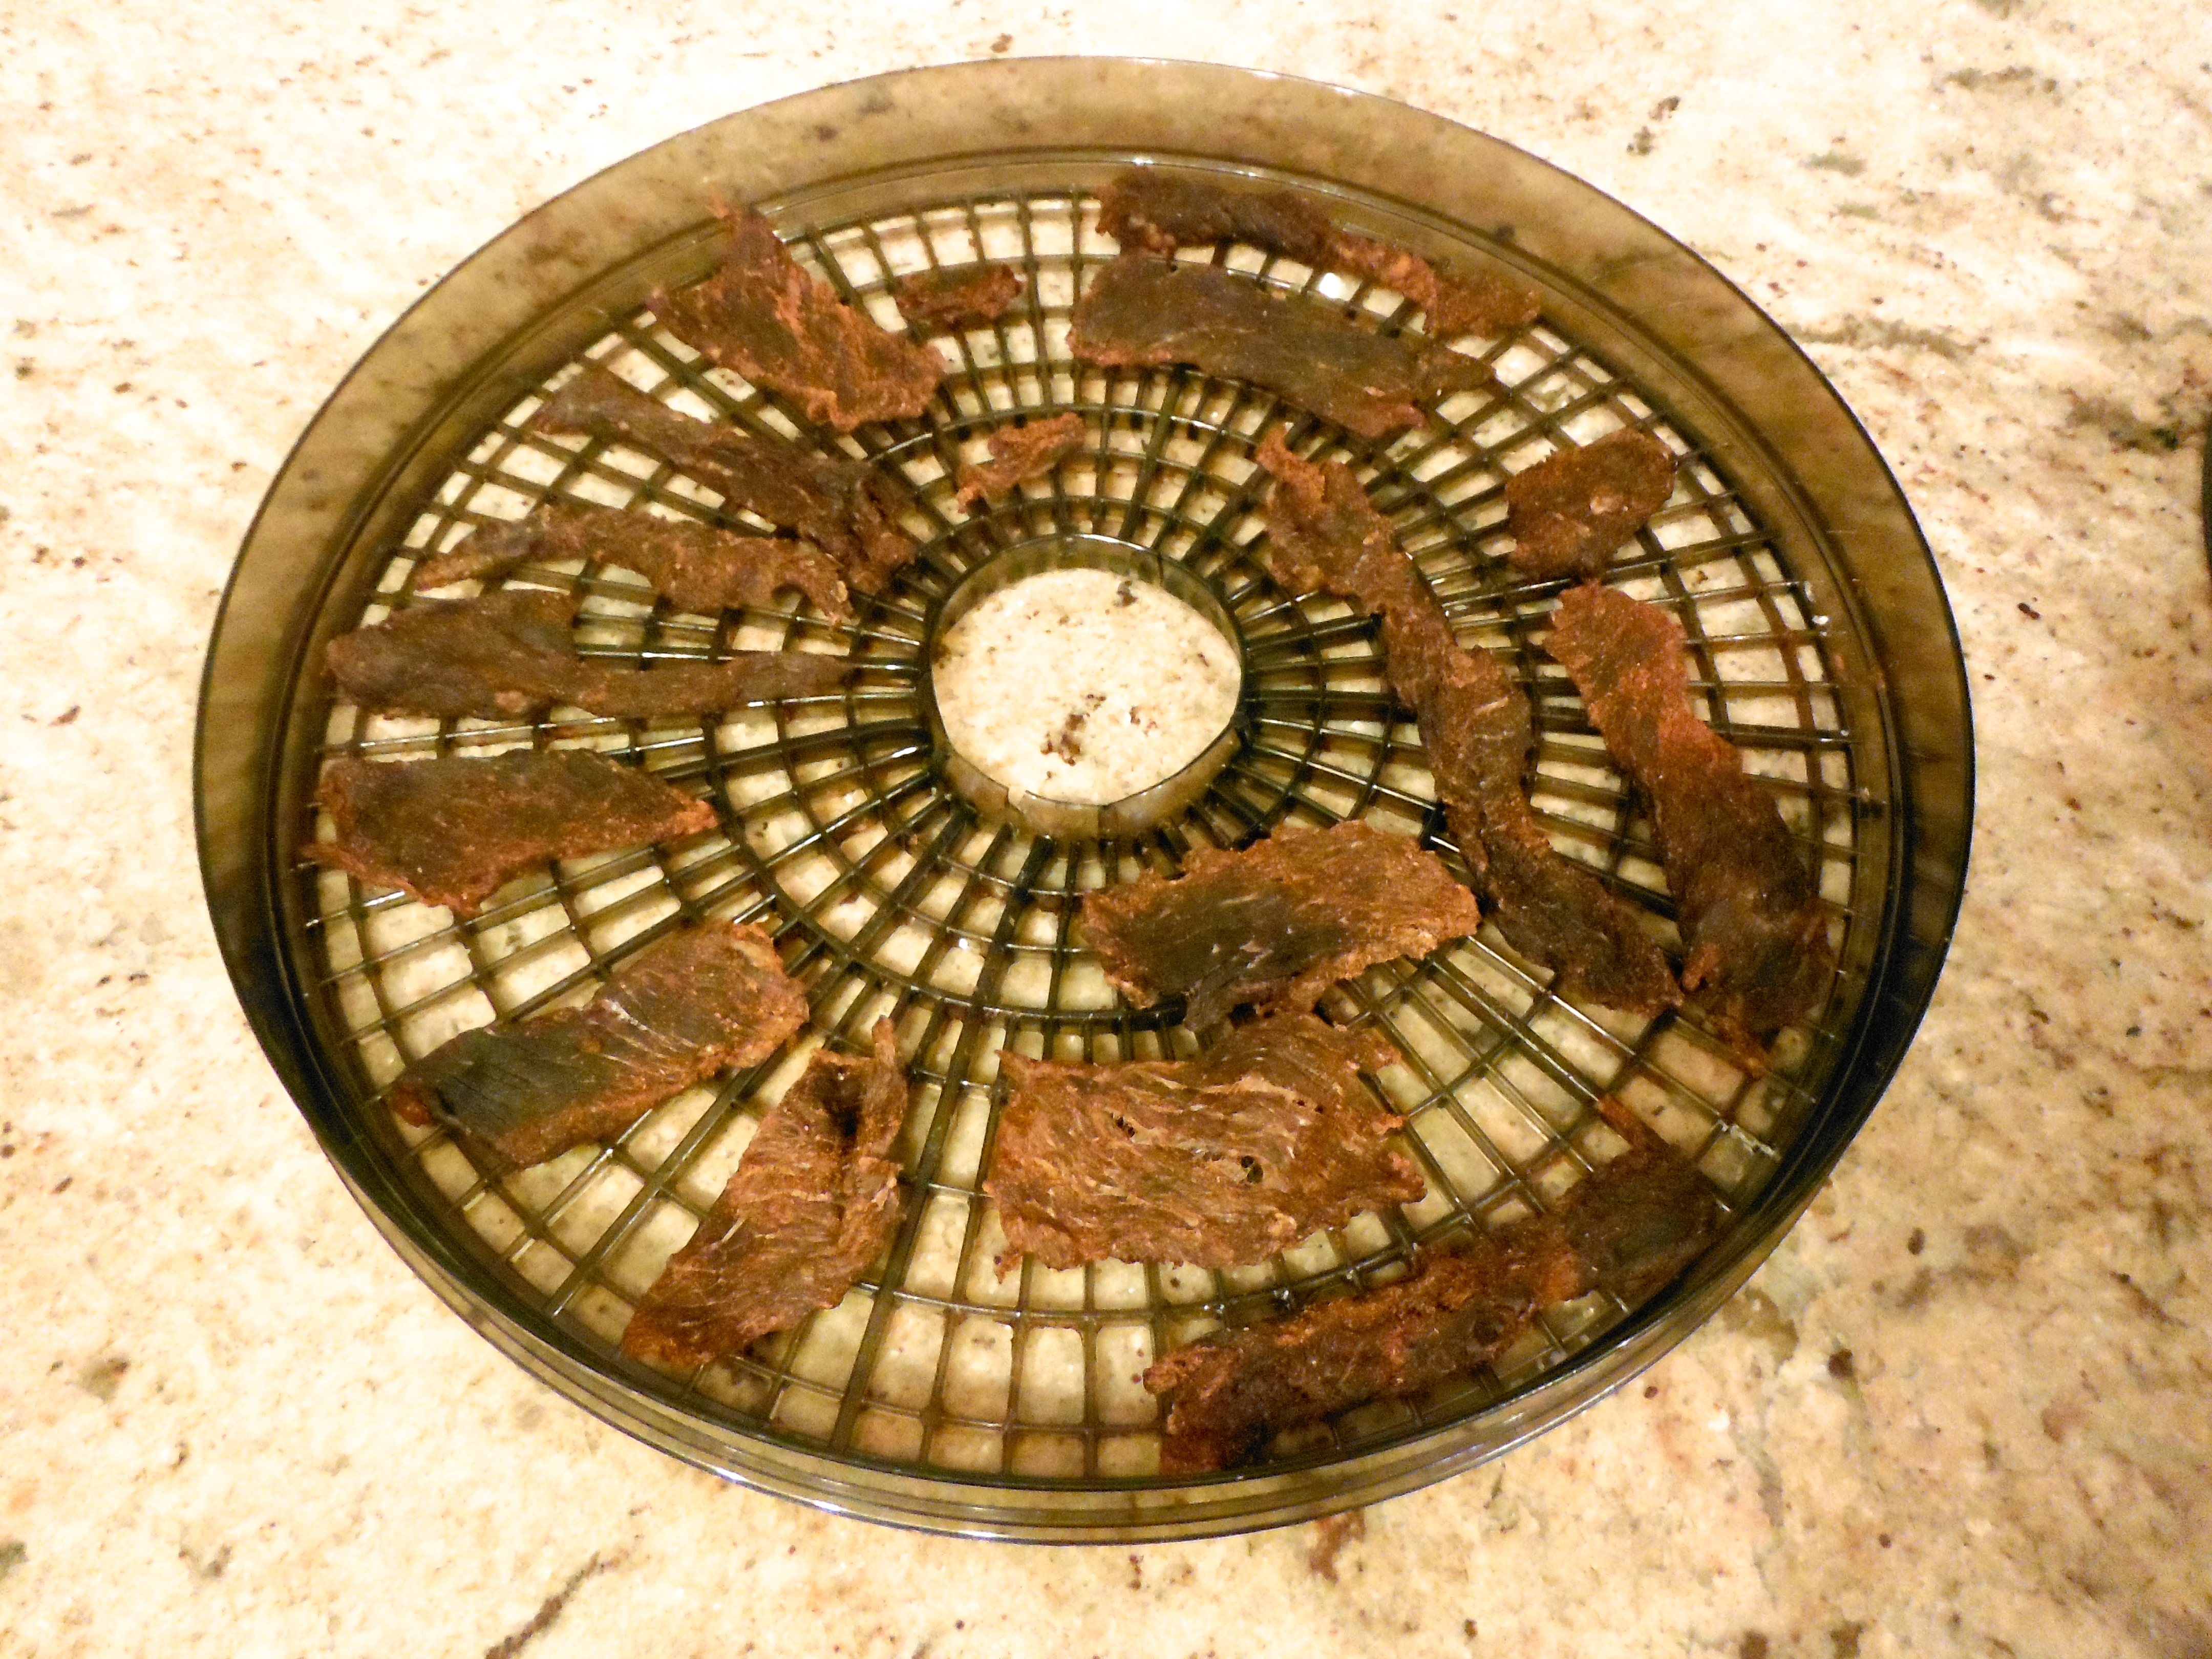
Dehydrate for 24 hours, or until ready. Most of mine were ready in about 24 hours, but I threw a few thick, weirdly shaped pieces back on for another 6 hours. (Note: if you do not have a dehydrator, you can follow the initial directions I followed, or simply bake in the oven at 200F on drying racks/baking sheets for a few hours.) The photos below is what it looks like when it’s done. The ginger mustard batch is on the left, and the spicy batch is on the right.
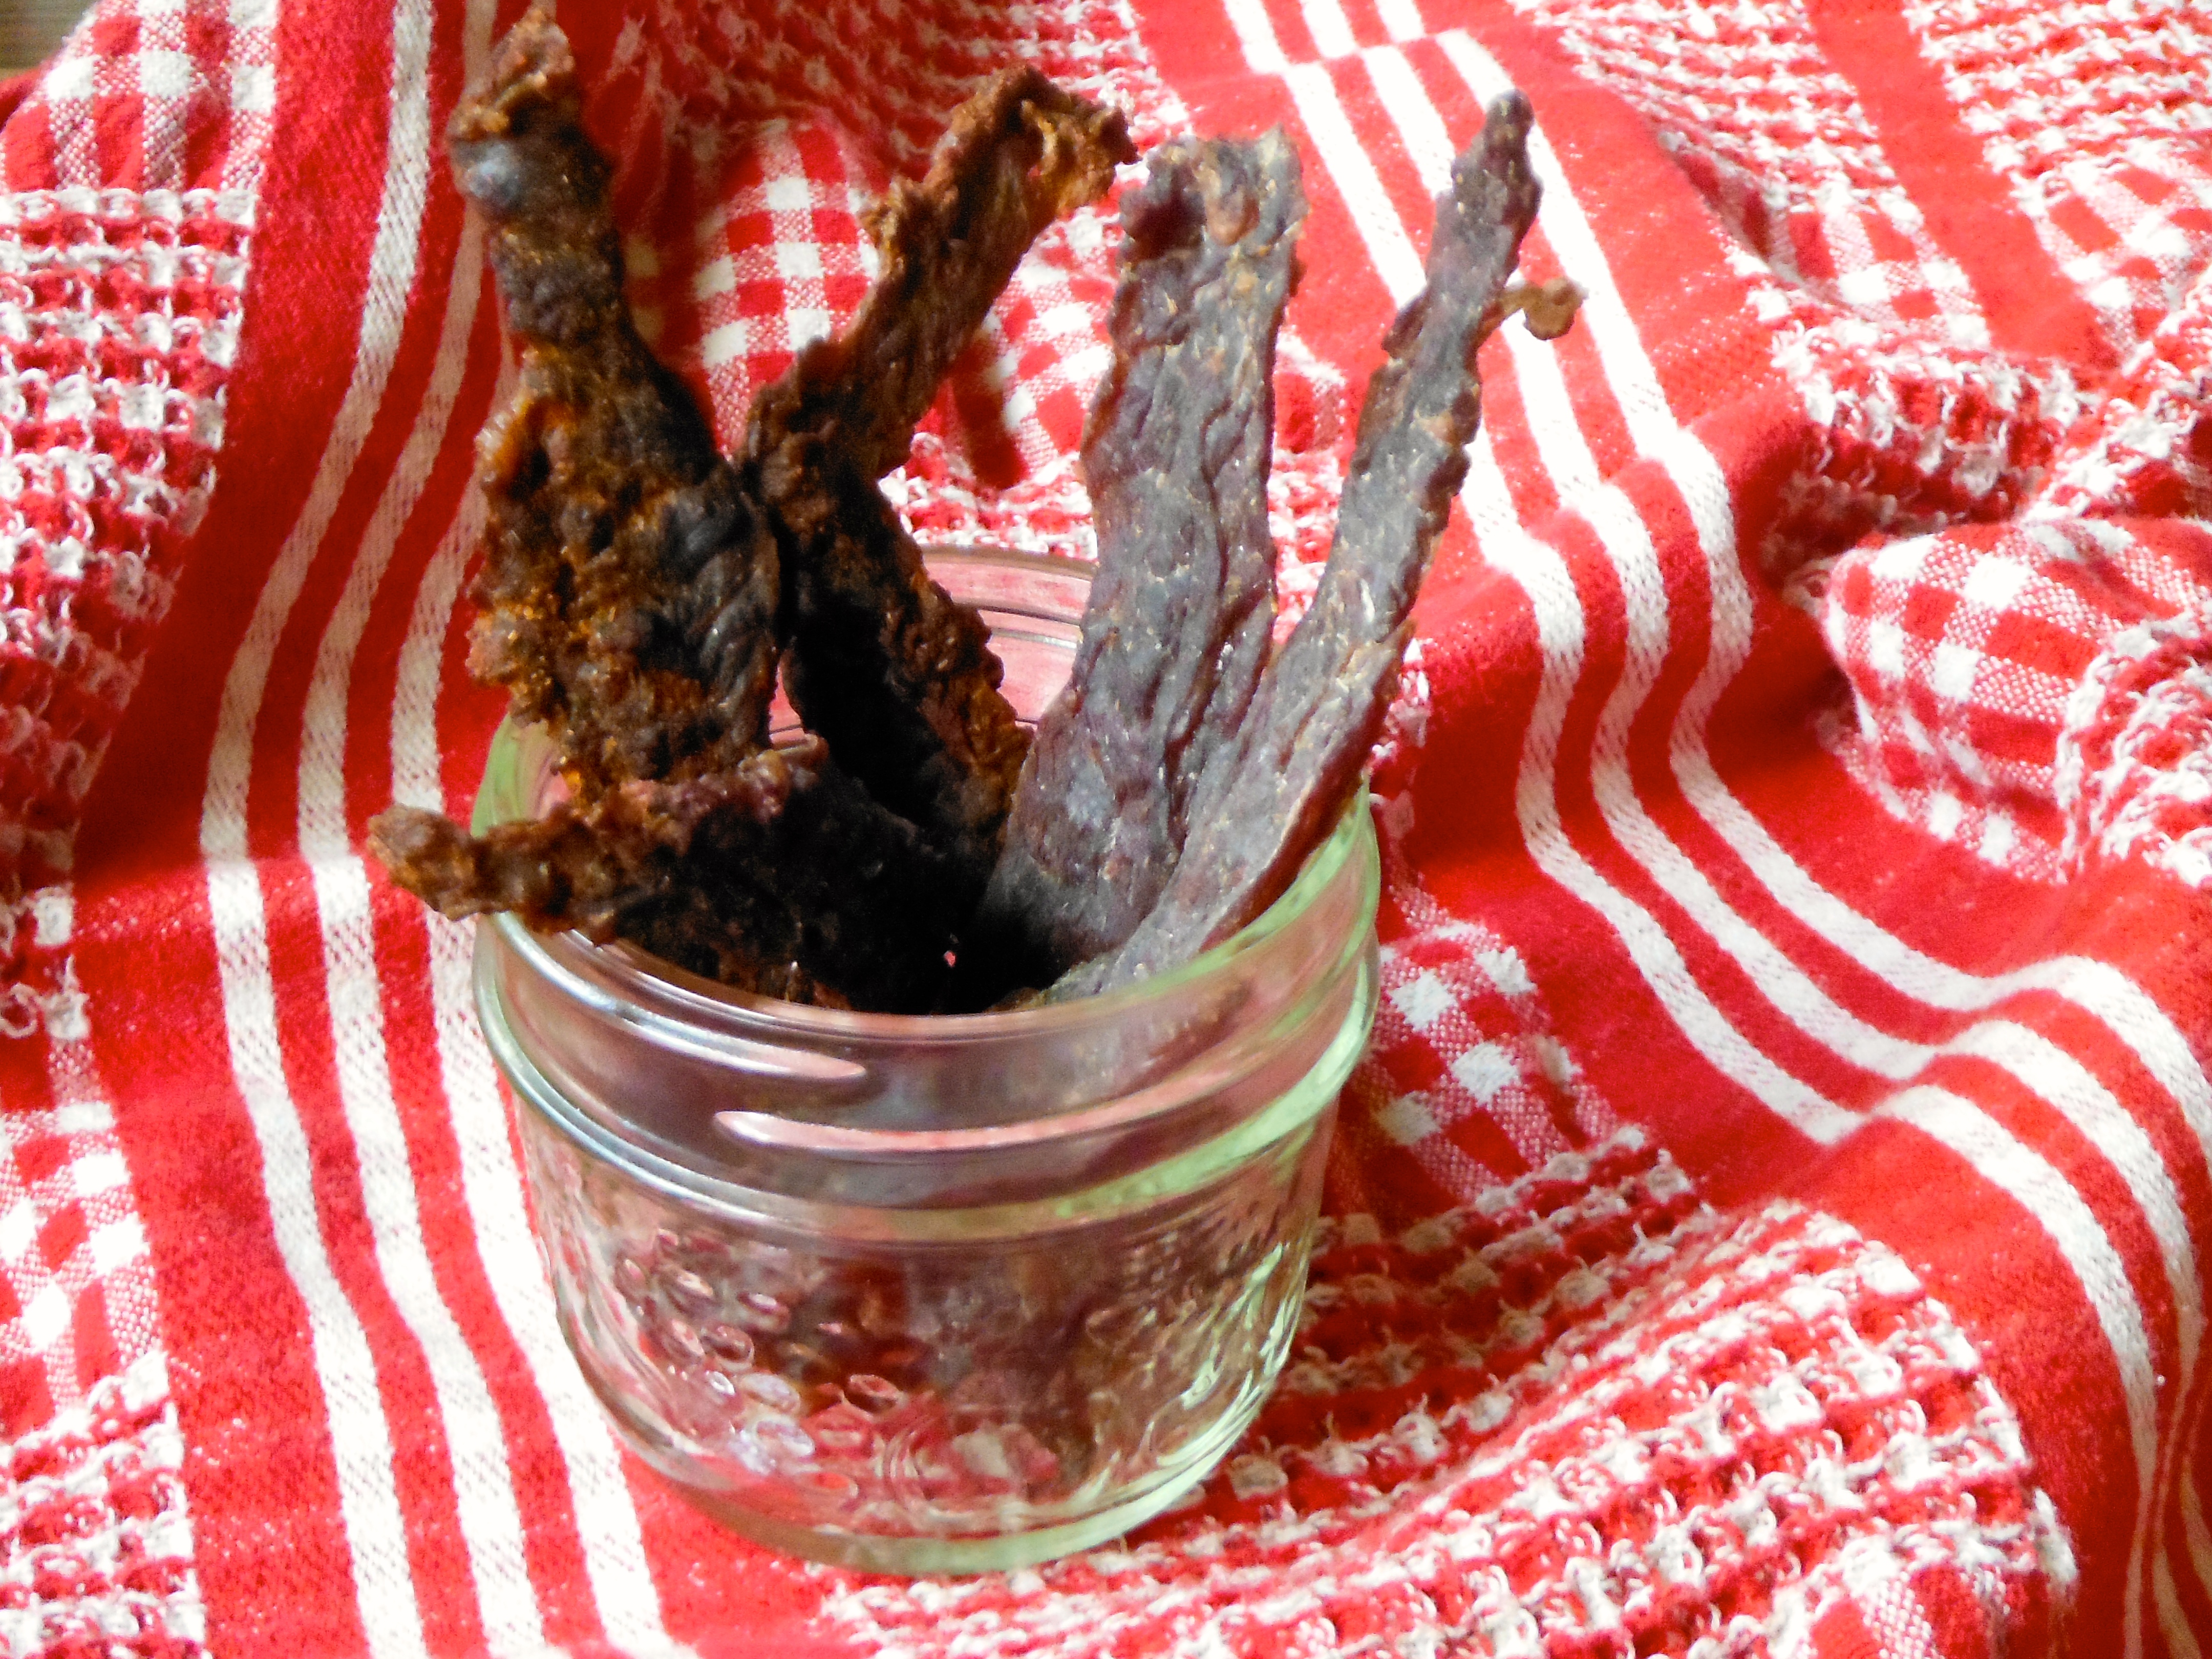
Store in a sealed container in the cupboard. Word on the street is this stuff lasts a while, like 6+ months. Mine has never lasted more than a few weeks!

 Brussels Sprouts. The poor vegetable that has been demonized by our society! I hadn’t even tried Brussels sprouts, but I knew I didn’t like them because….wait, I didn’t actually know why.